Enable 2-Step Verification for your workforce account
This page is meant to work like a simple document. Scroll through the sections below and follow the screenshots in order. You do not need to click through a guided flow. Hover over any screenshot for a closer view.
Section 1
Sign in and set your new password
Use the temporary credentials first, then move through the first-time account prompts until you are ready to enroll in 2-step verification.
Step 1
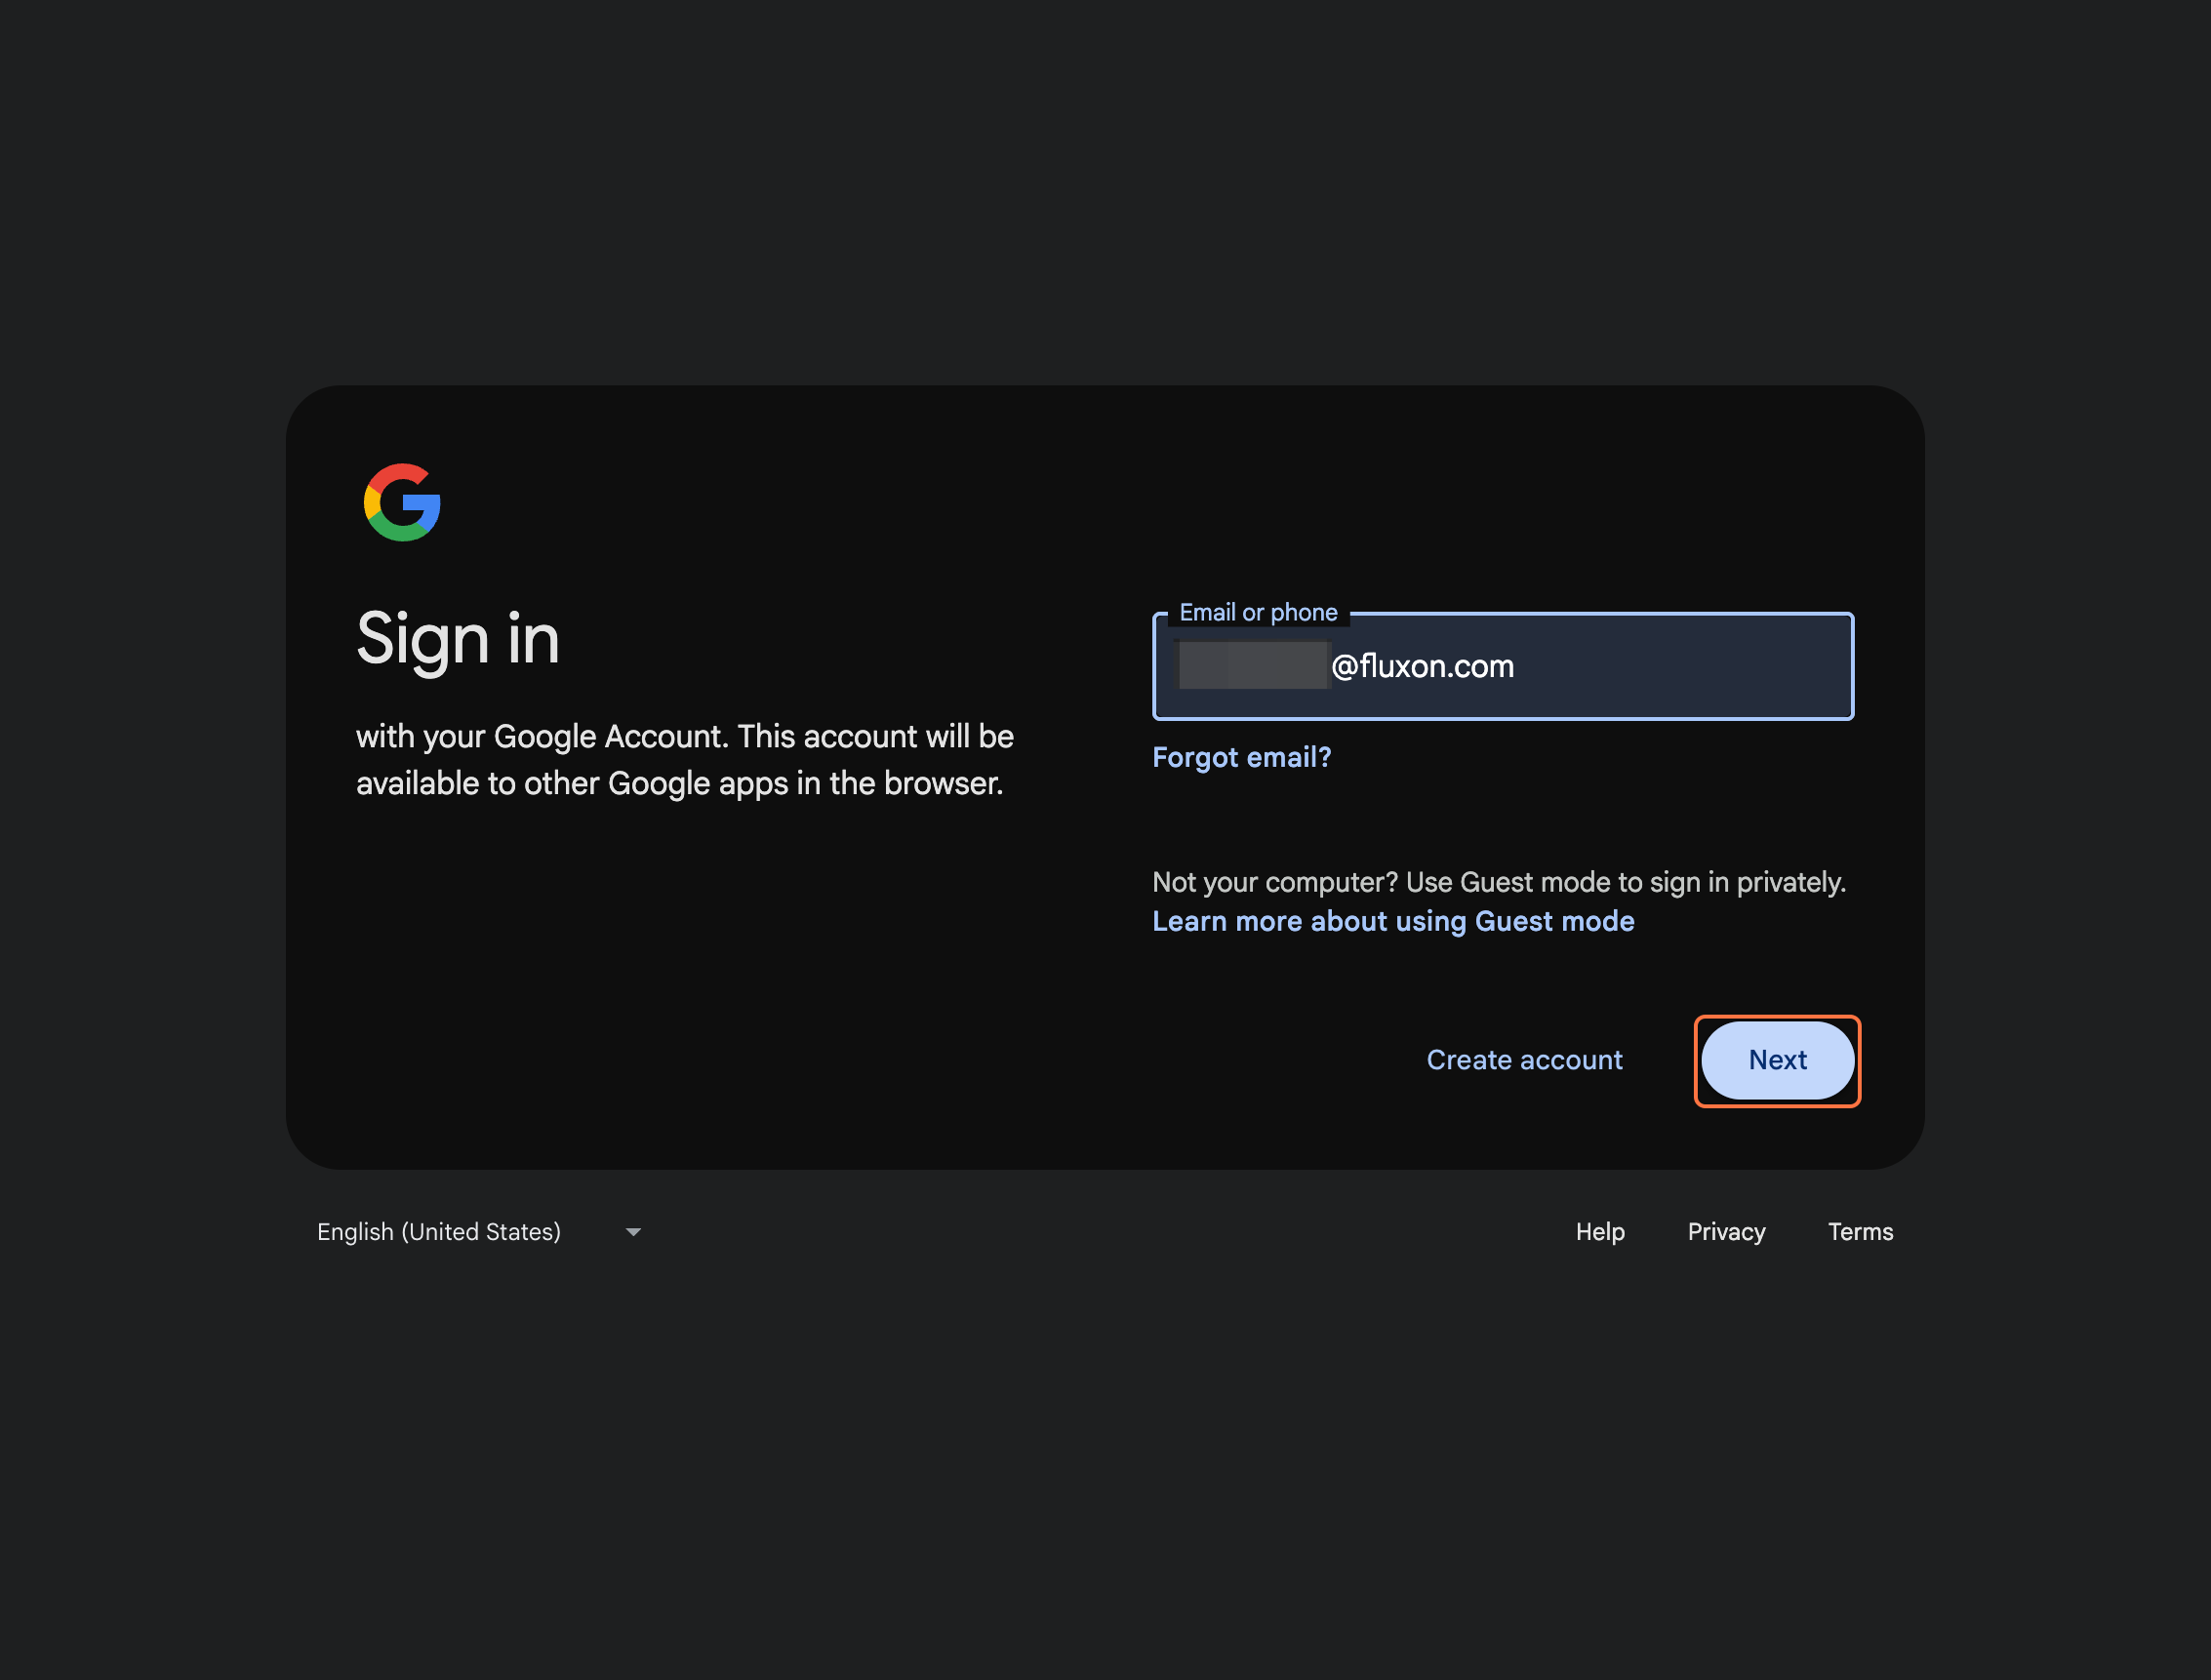
Enter your work email address and click Next.
Use your assigned workforce email to begin sign-in.
Step 2
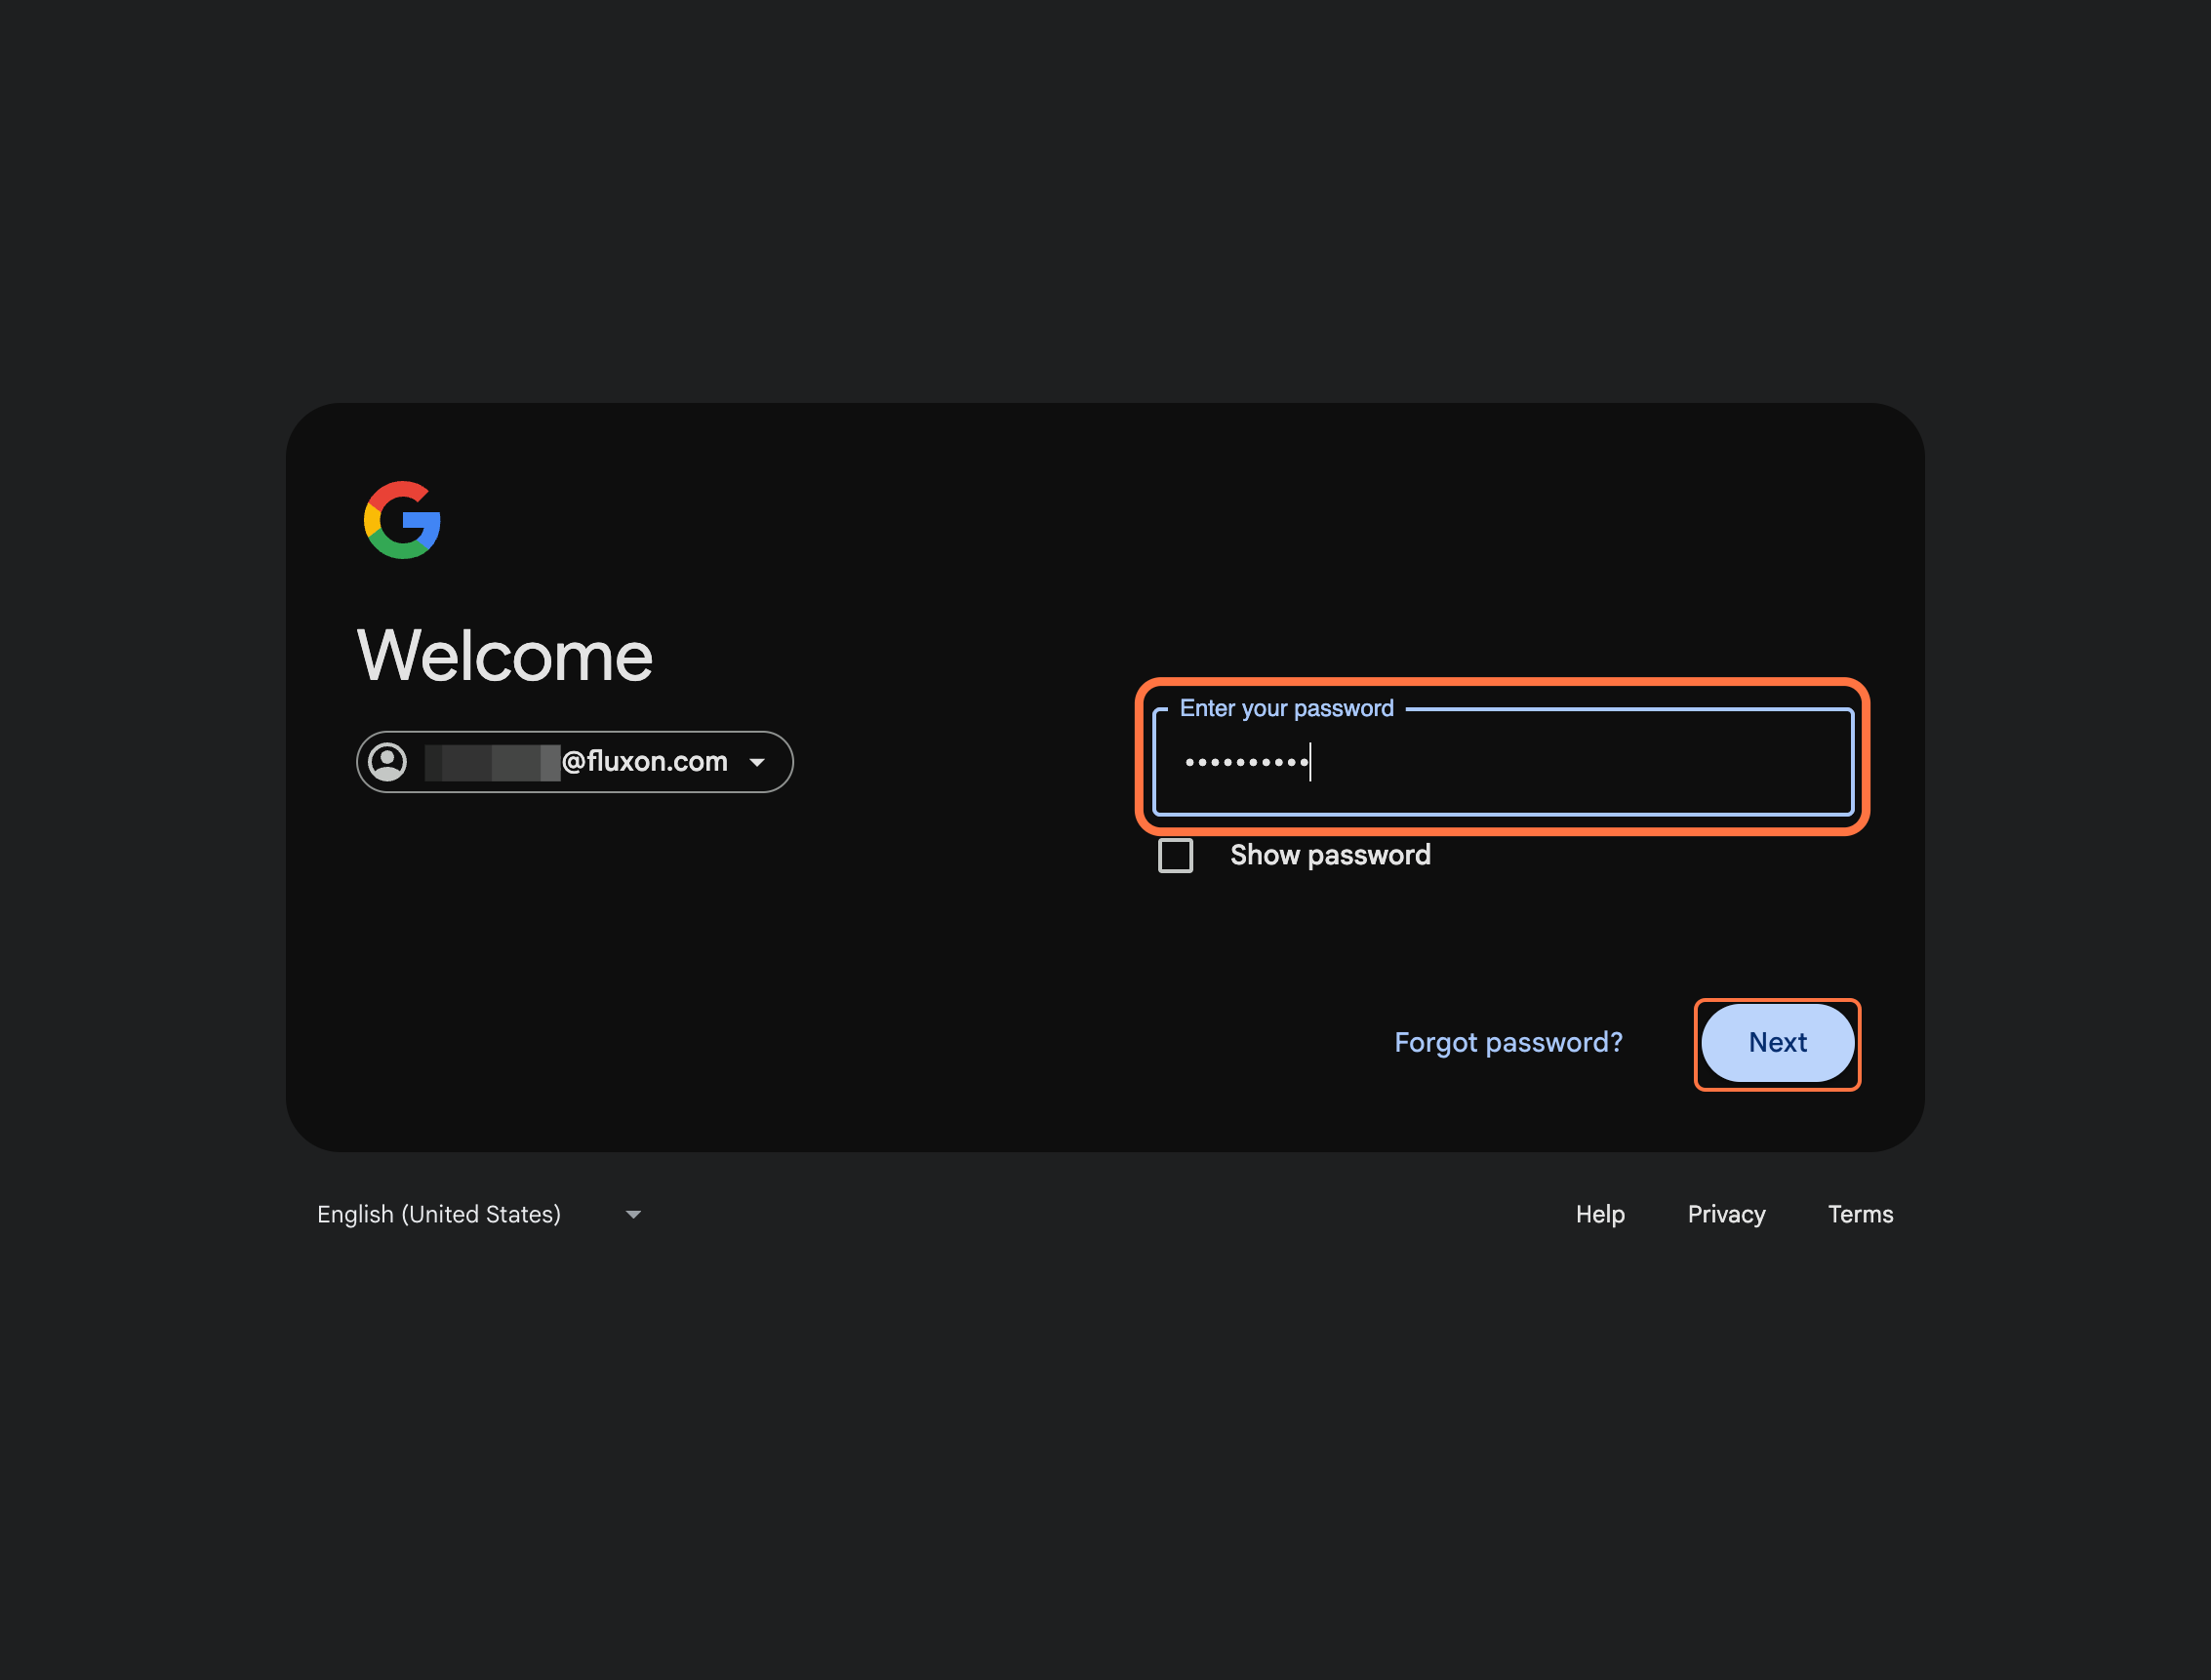
Enter the current password and continue.
Use the password shared during onboarding.
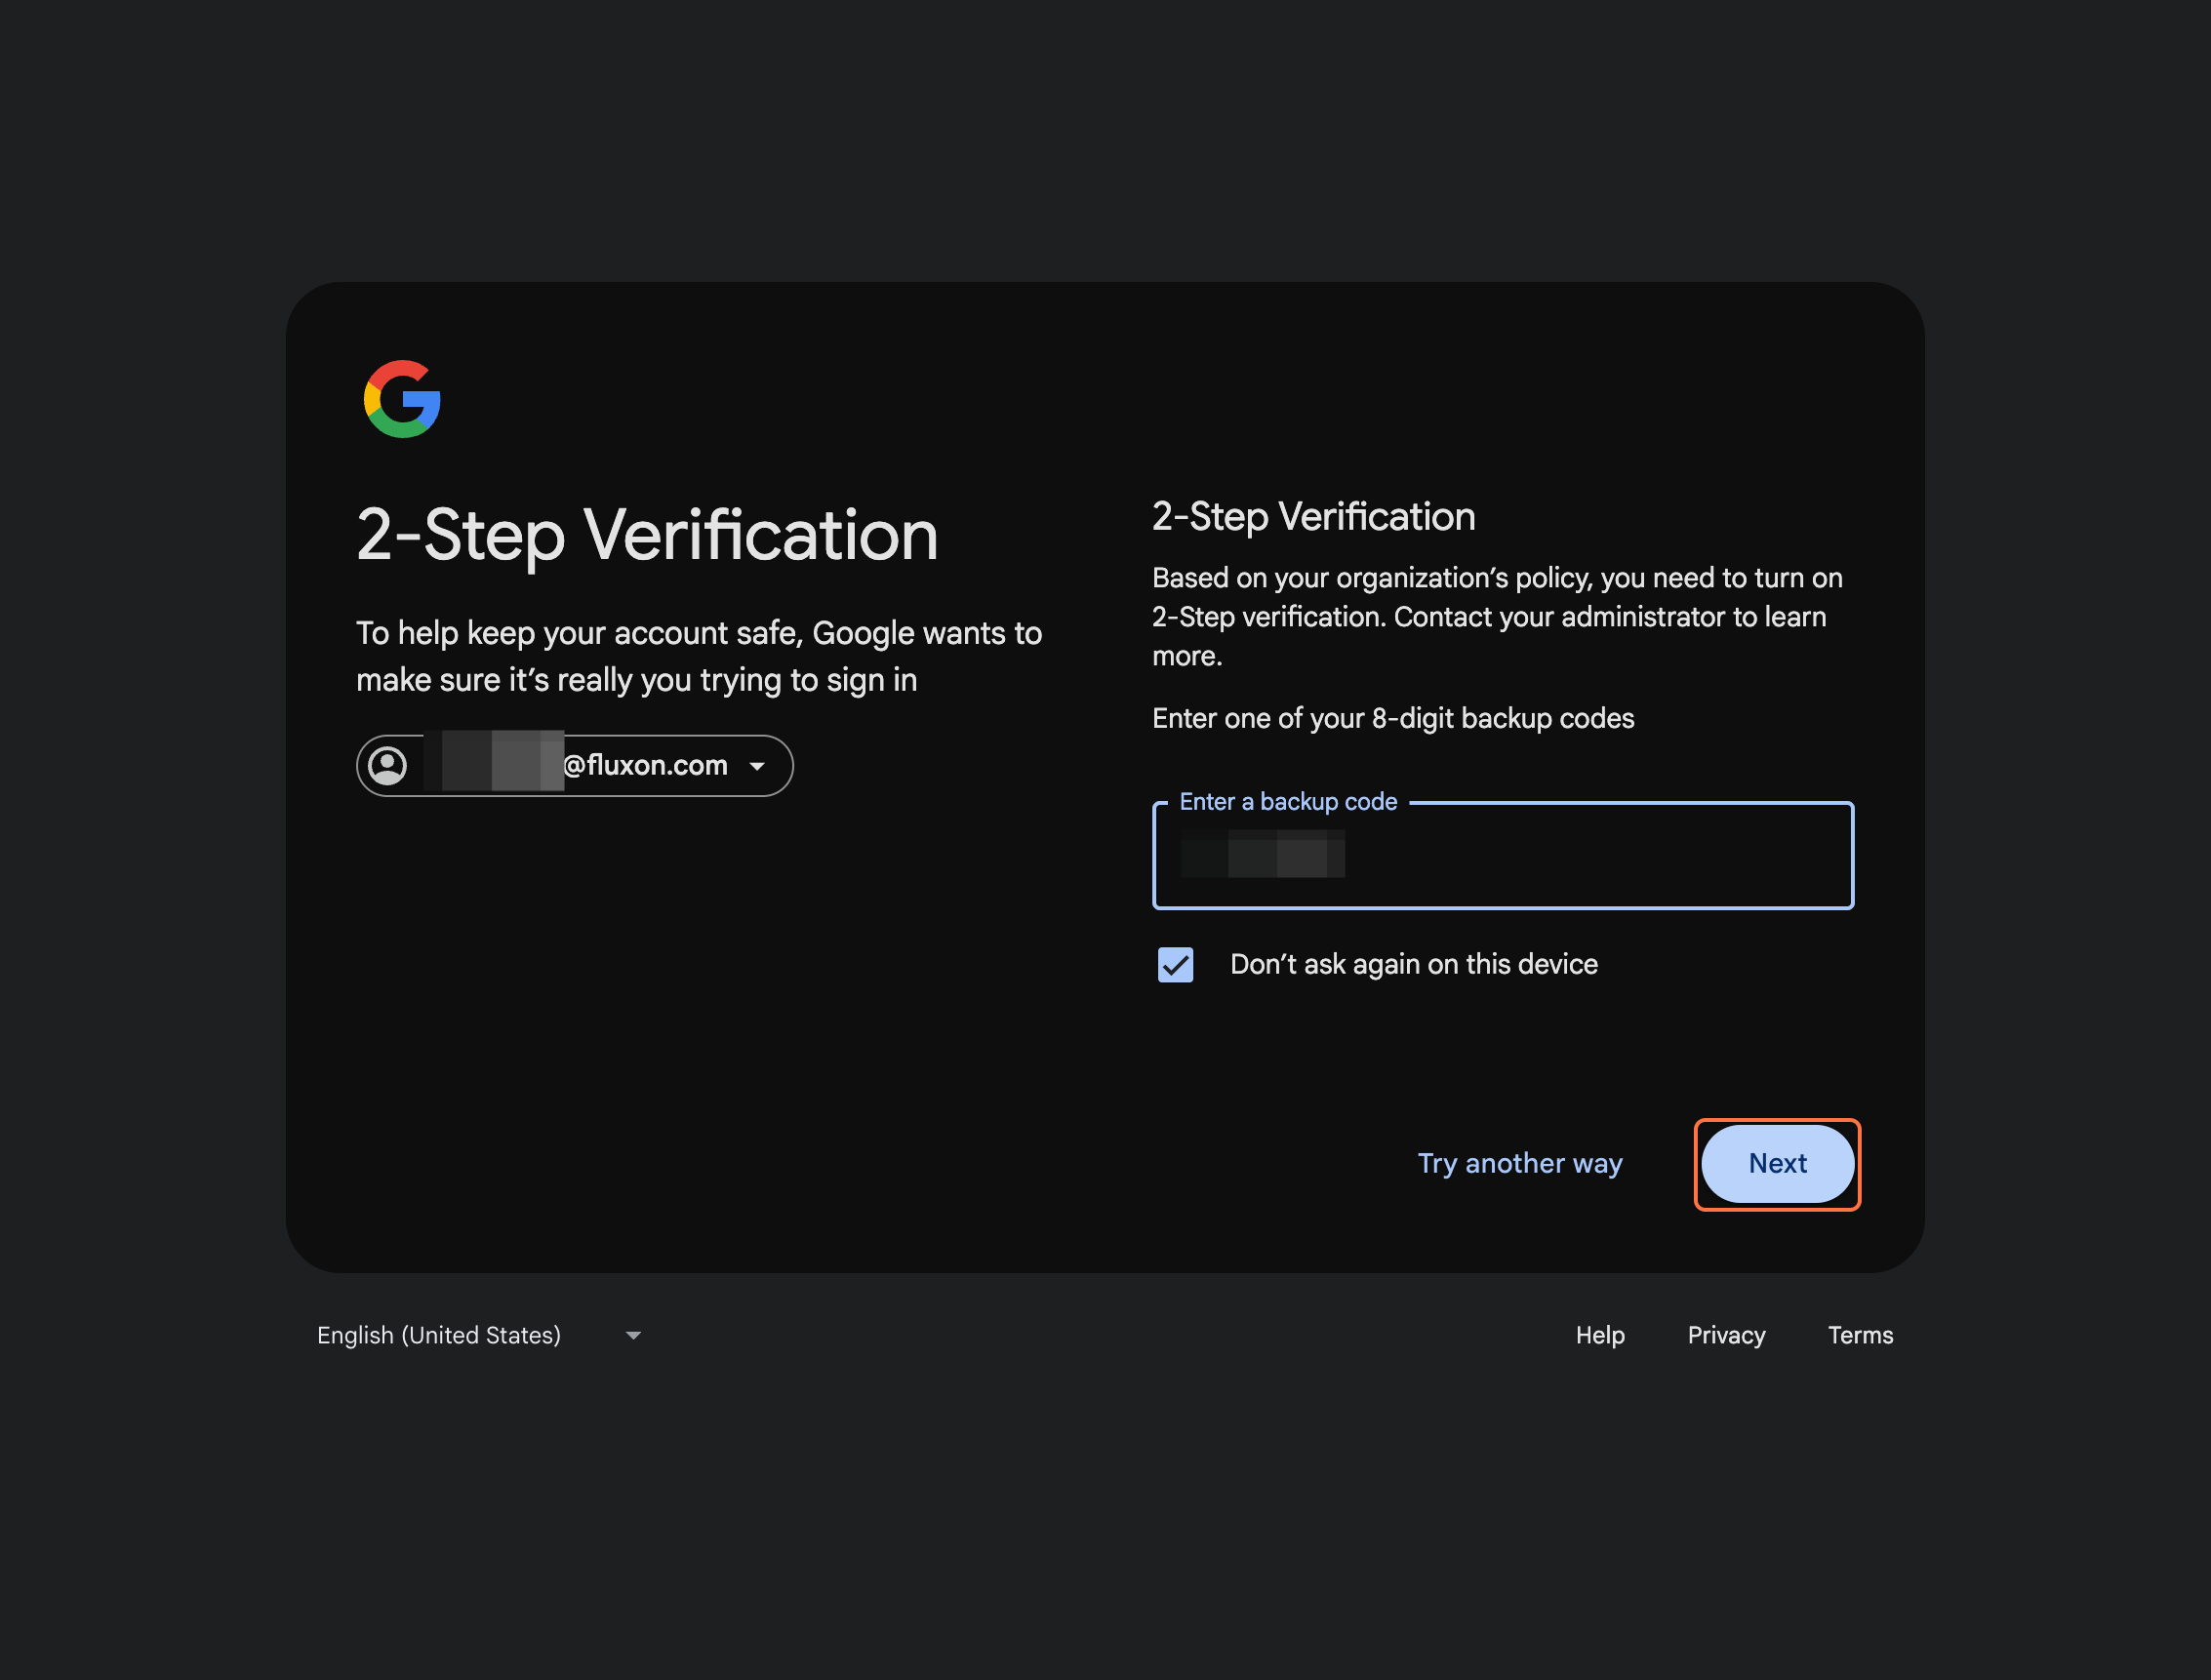
Step 3
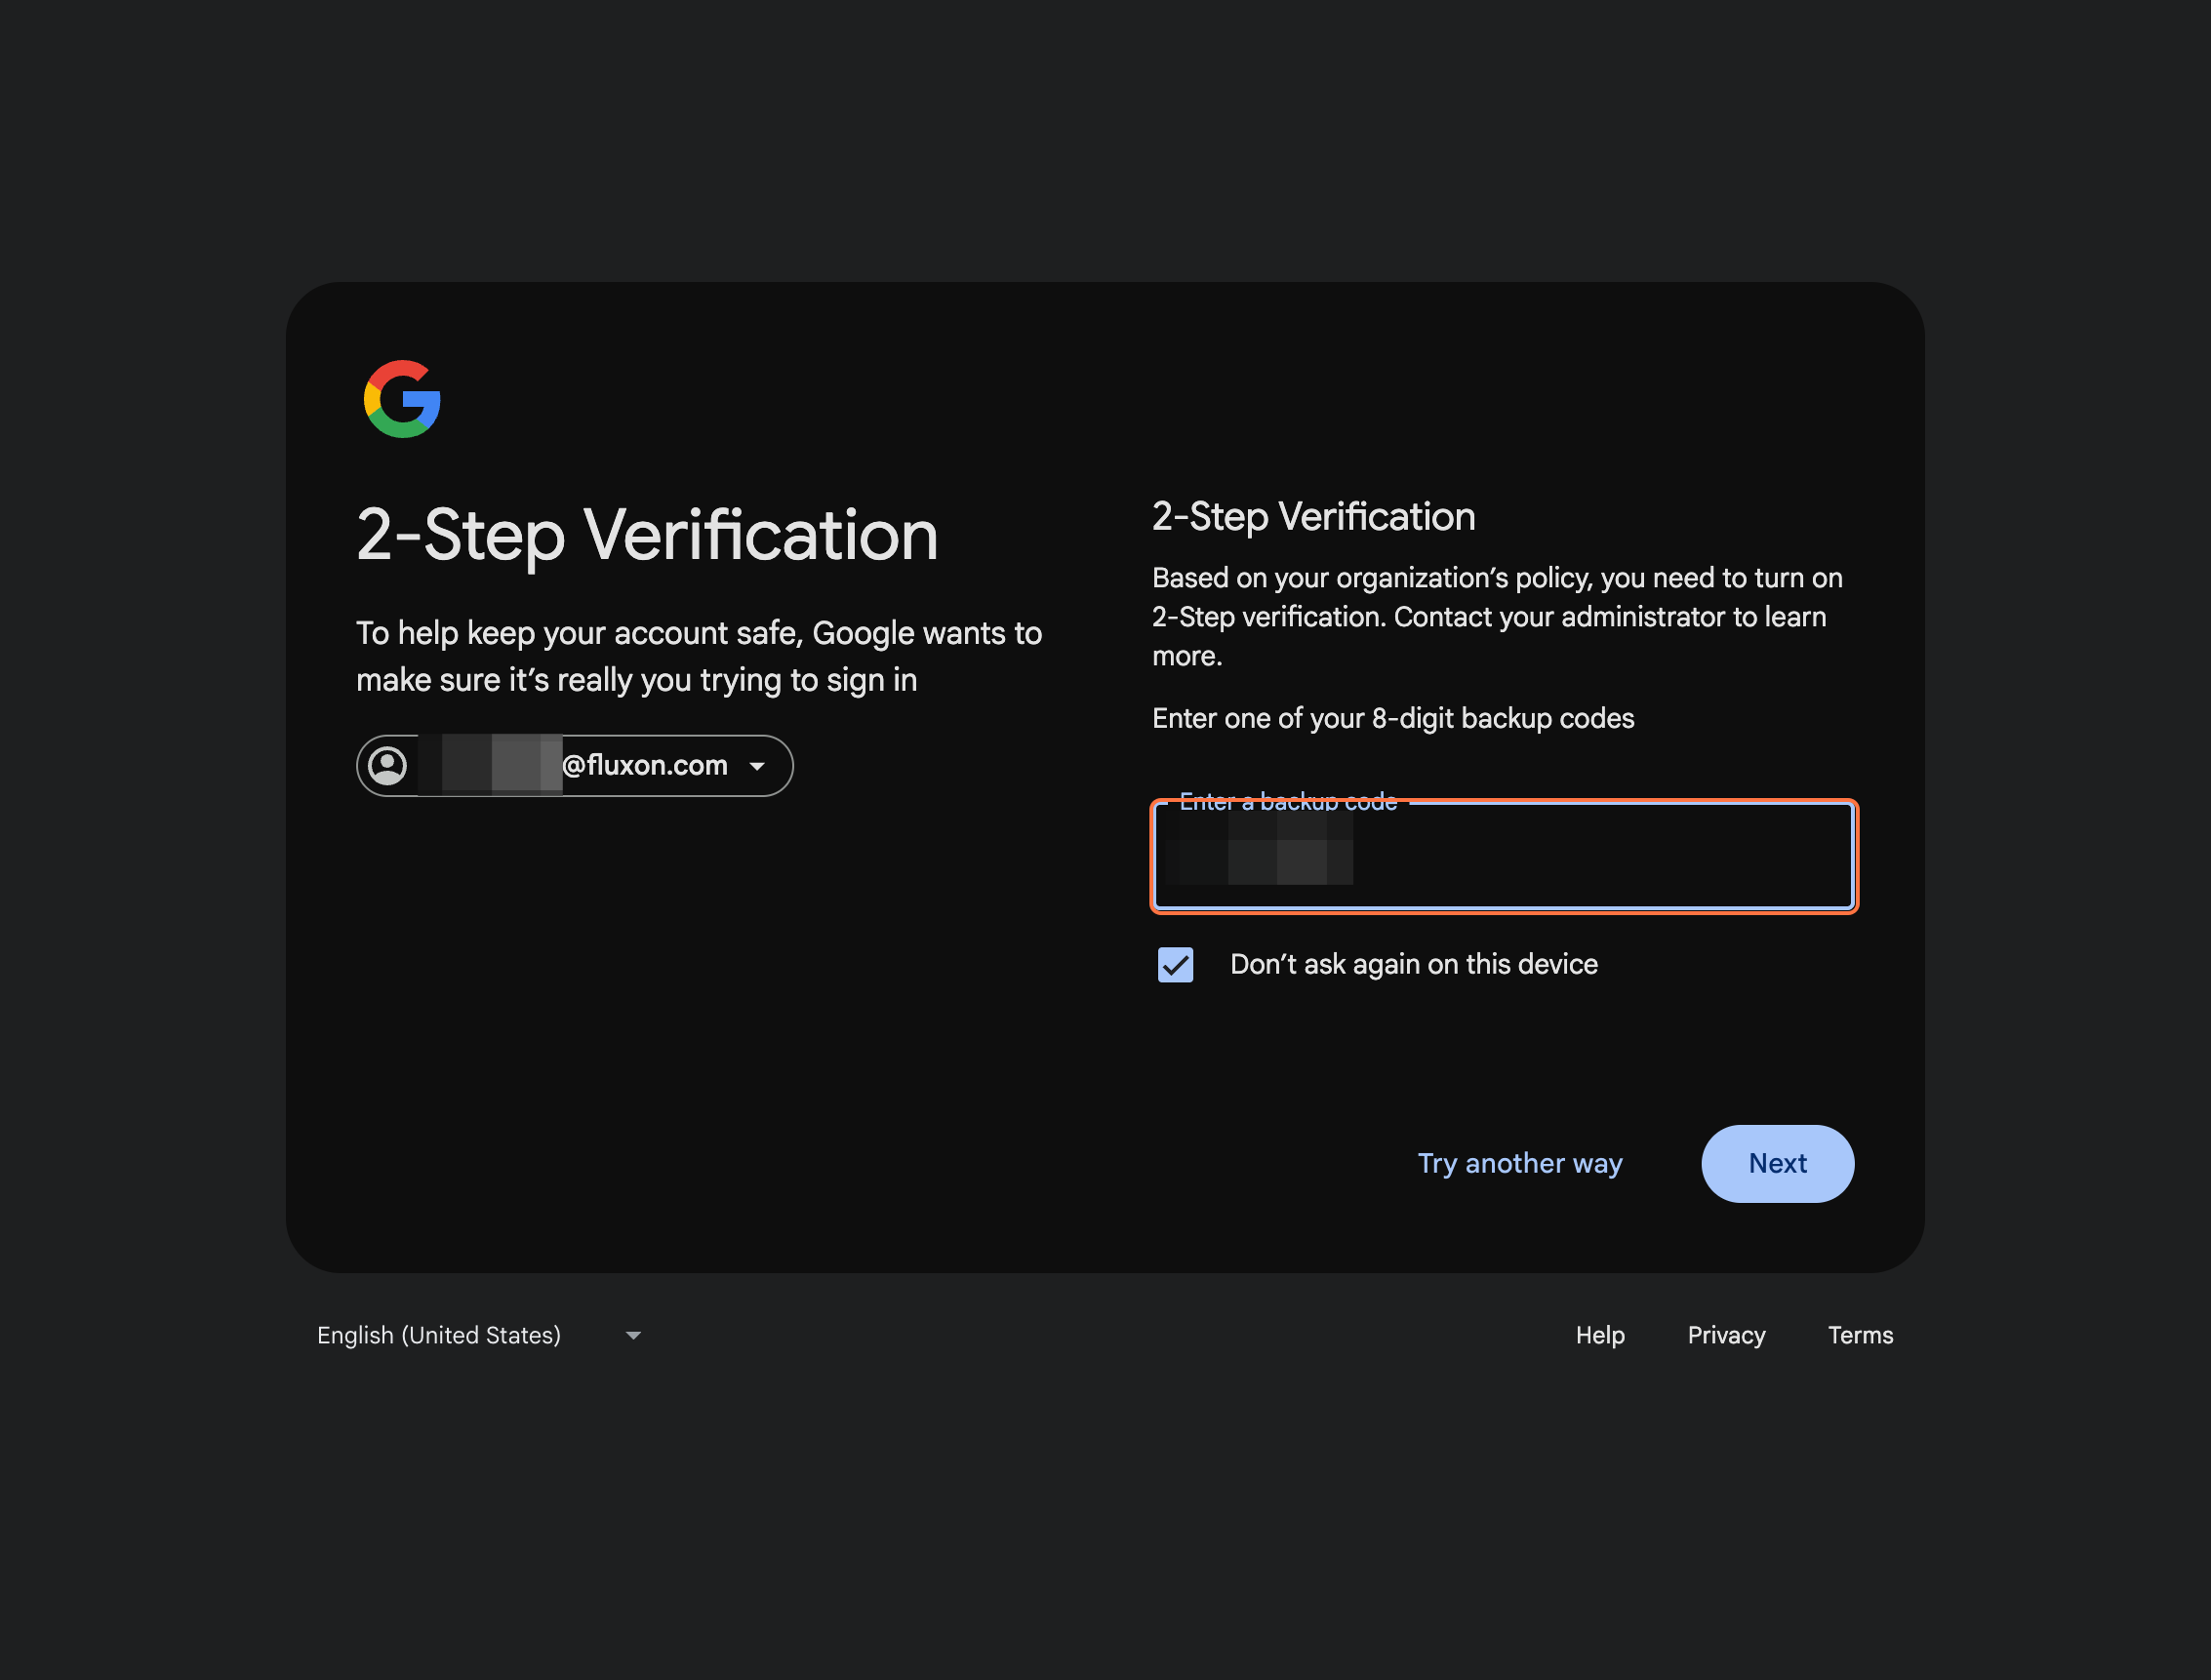
Paste one temporary backup code.
Use one backup code from the onboarding pack when Google asks for another verification step.
Step 4
Click Next to move forward.
Once the backup code is accepted, continue to the next page.
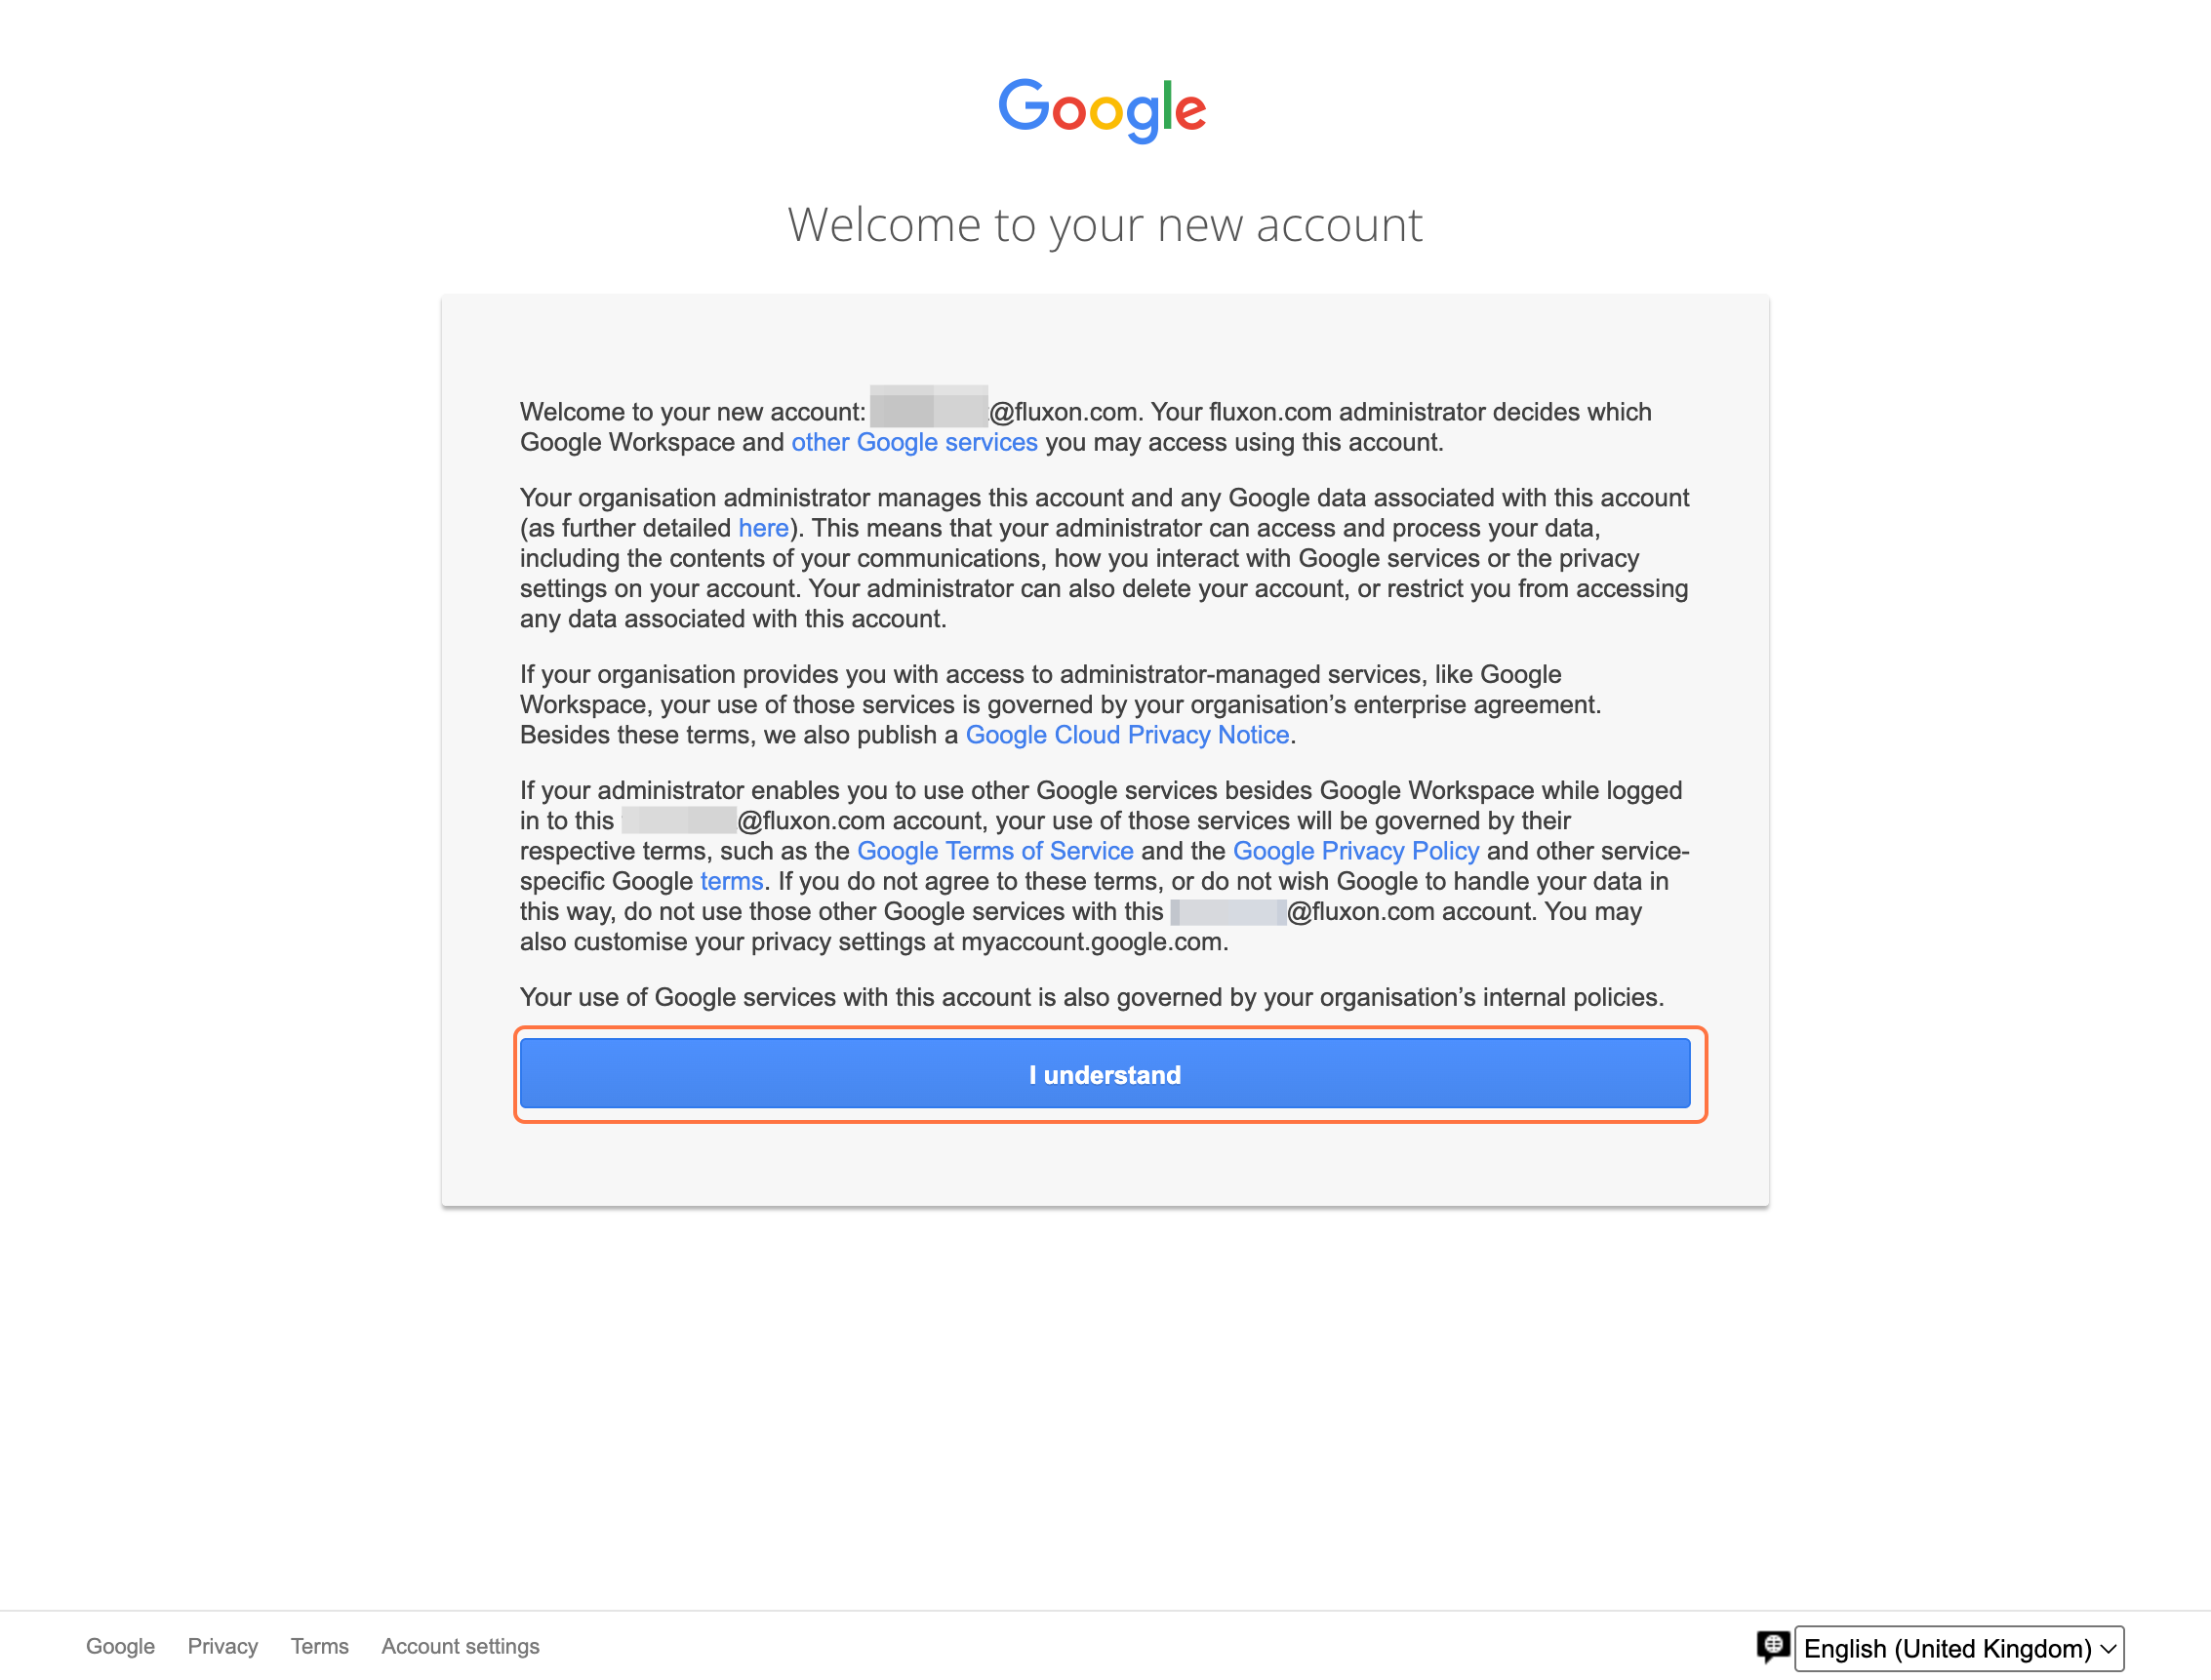
Step 5
Click I understand.
Acknowledge the account security message to proceed.
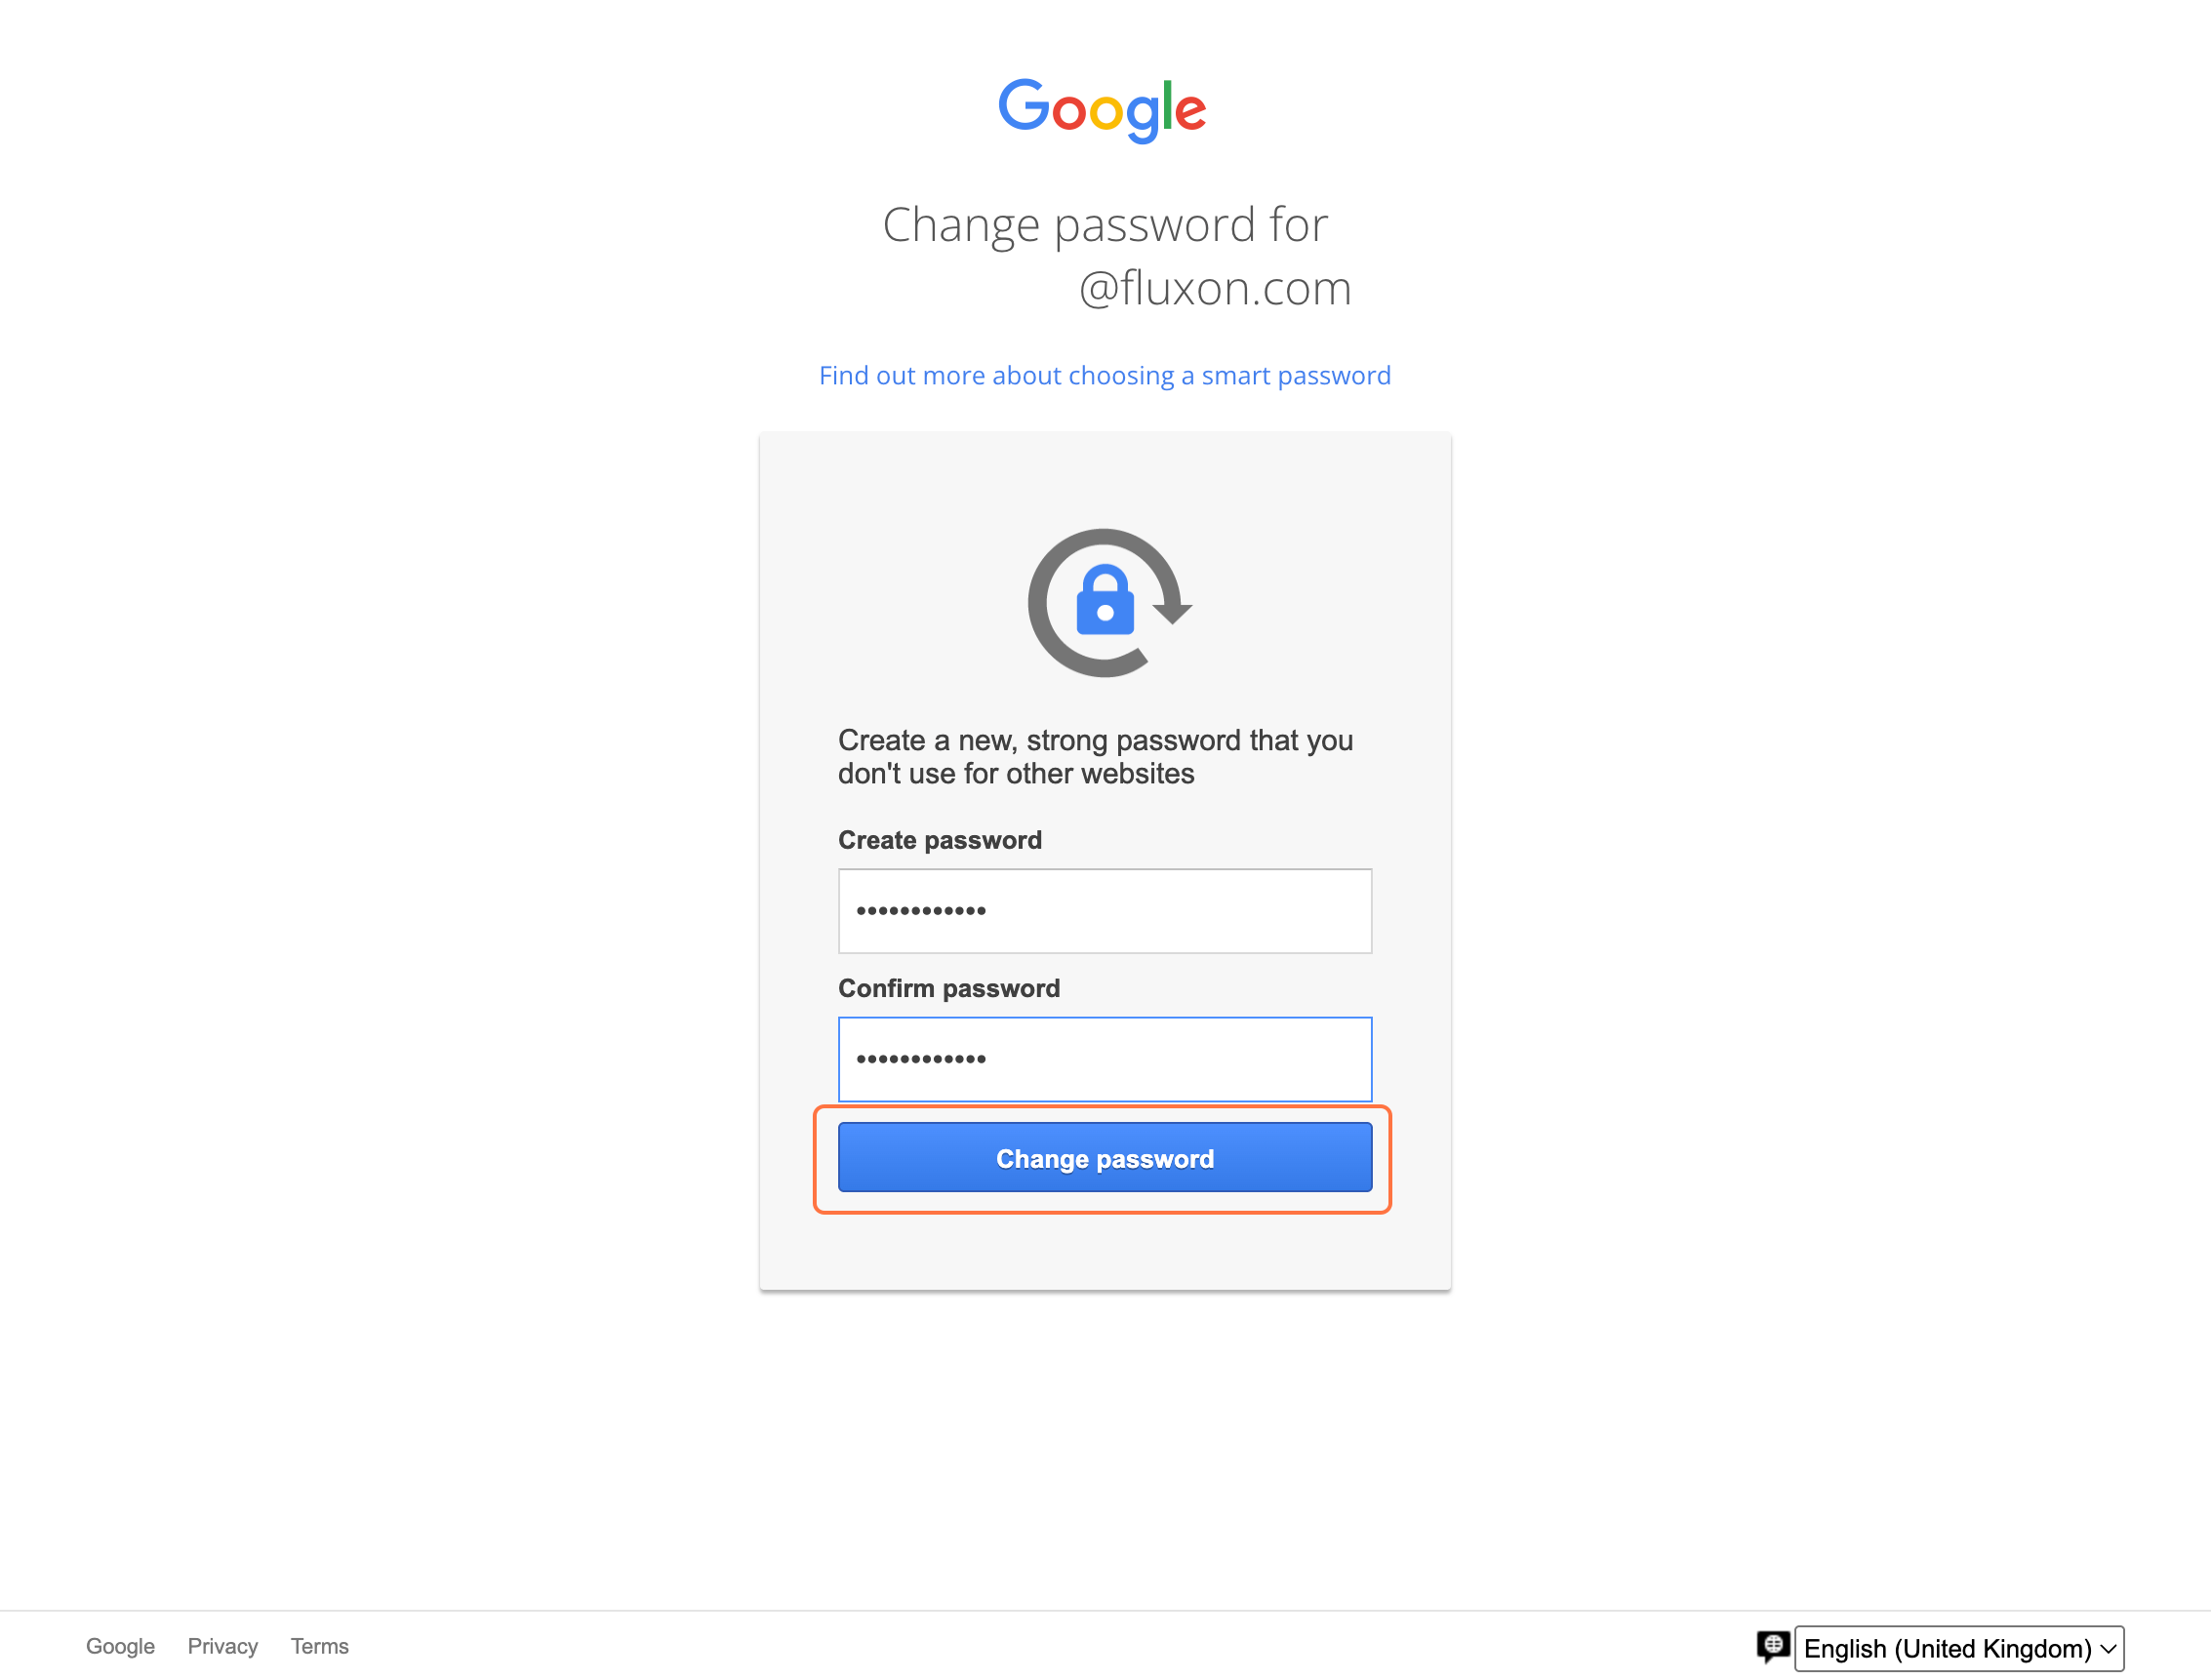
Step 6
Choose your new strong password.
Create the password you will use going forward and submit the change.
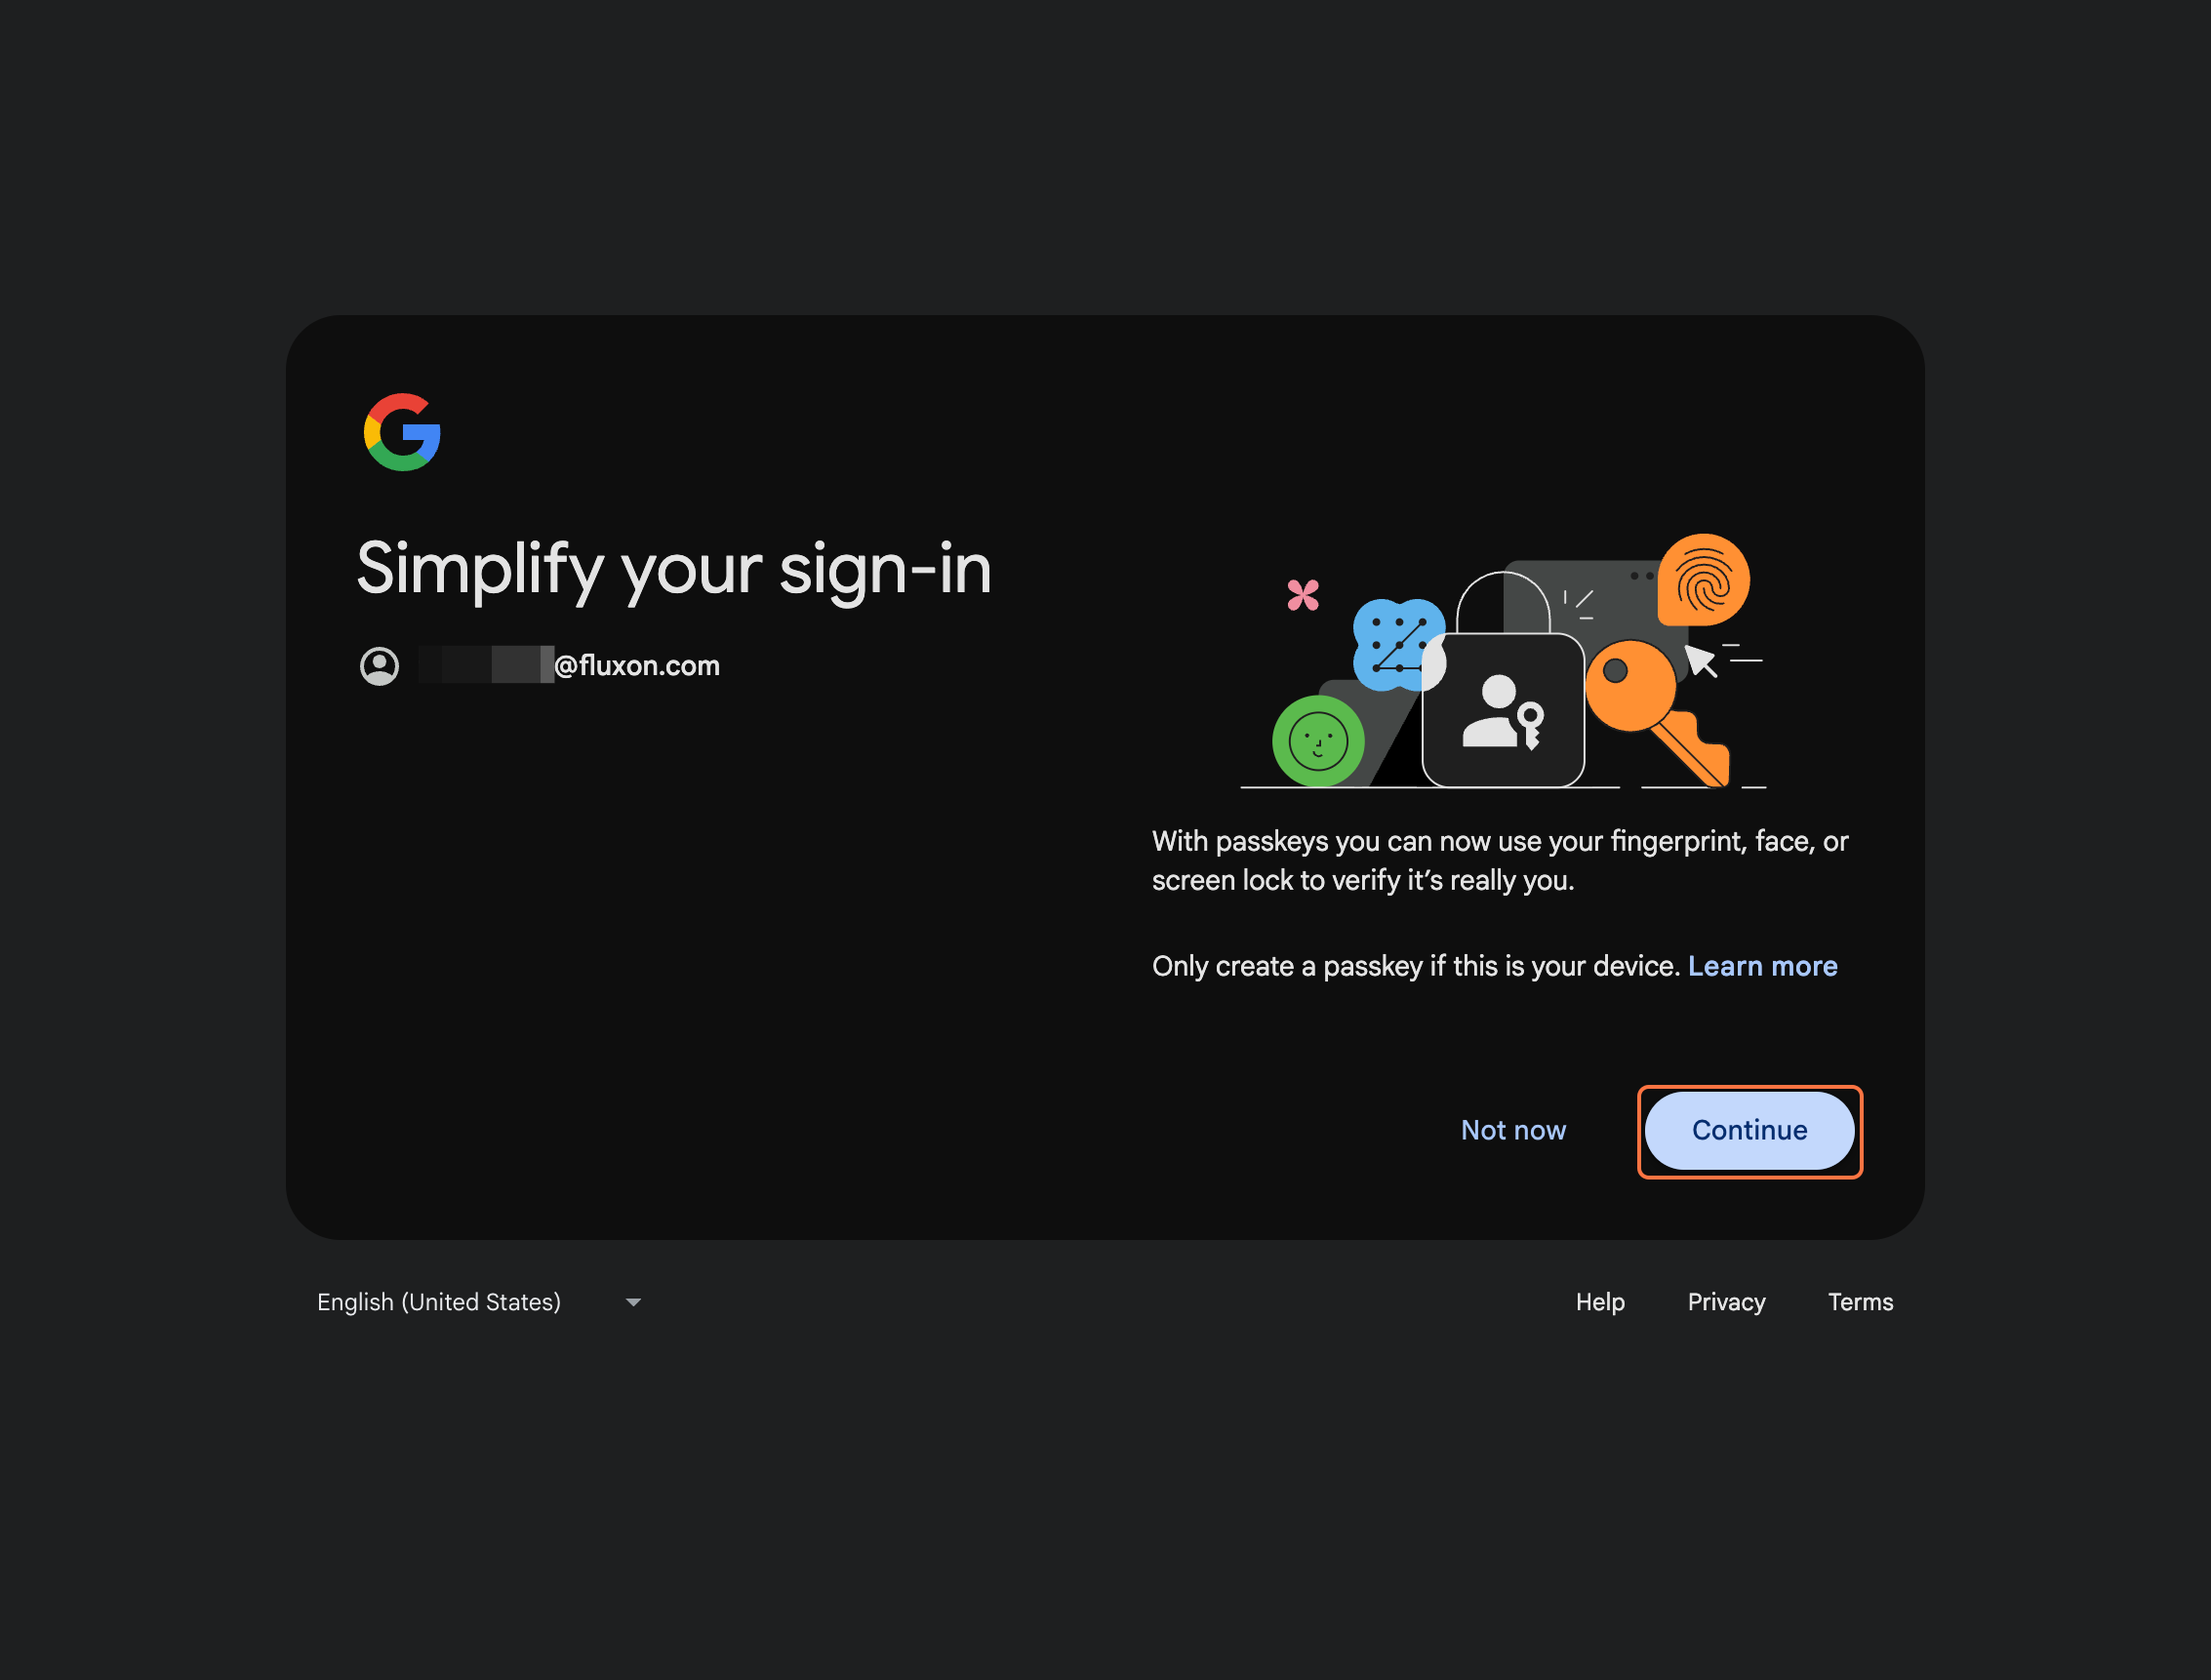
Step 7
On the simplify your sign-in screen, click Continue.
This takes you into the 2-step verification enrollment flow.
Section 2
Enable 2-Step Verification using Google Authenticator
Start 2-step verification, choose Google Authenticator as the first verification method, and verify the setup using the code from your phone.
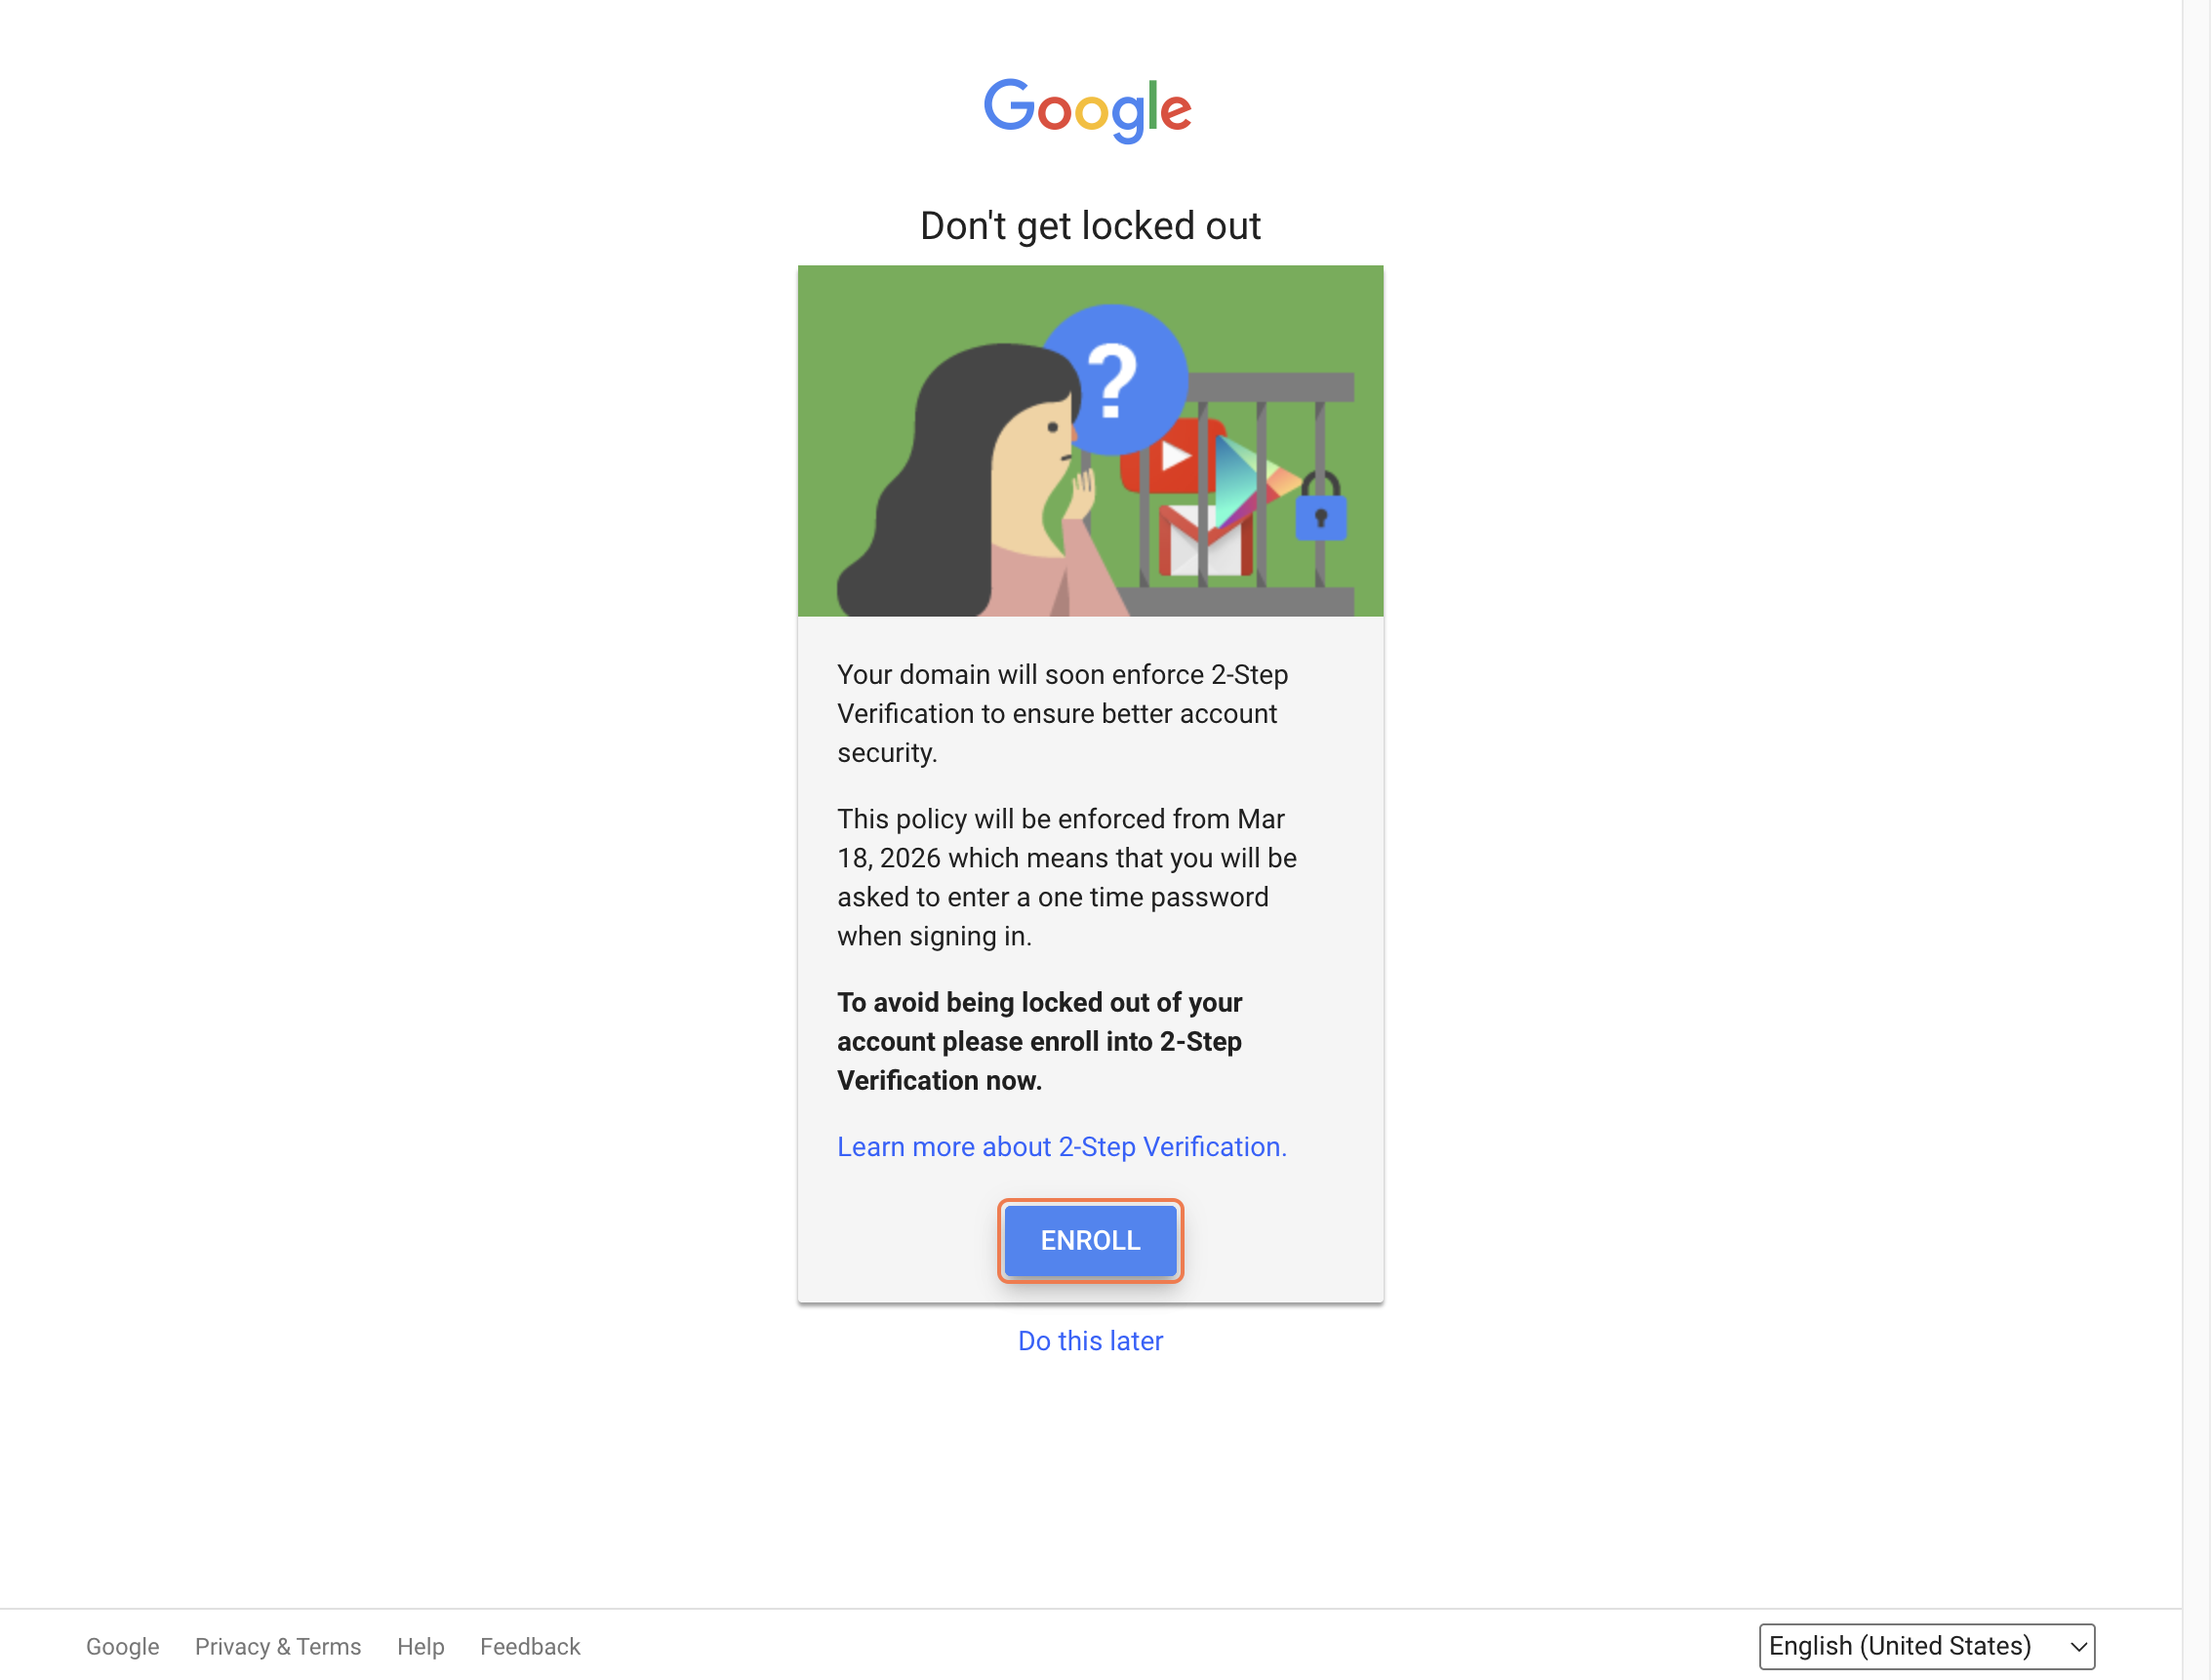
Step 8
Click ENROLL.
This starts the 2-step verification setup.
Step 9
Choose Authenticator.
Select the authenticator app option from the available security methods.

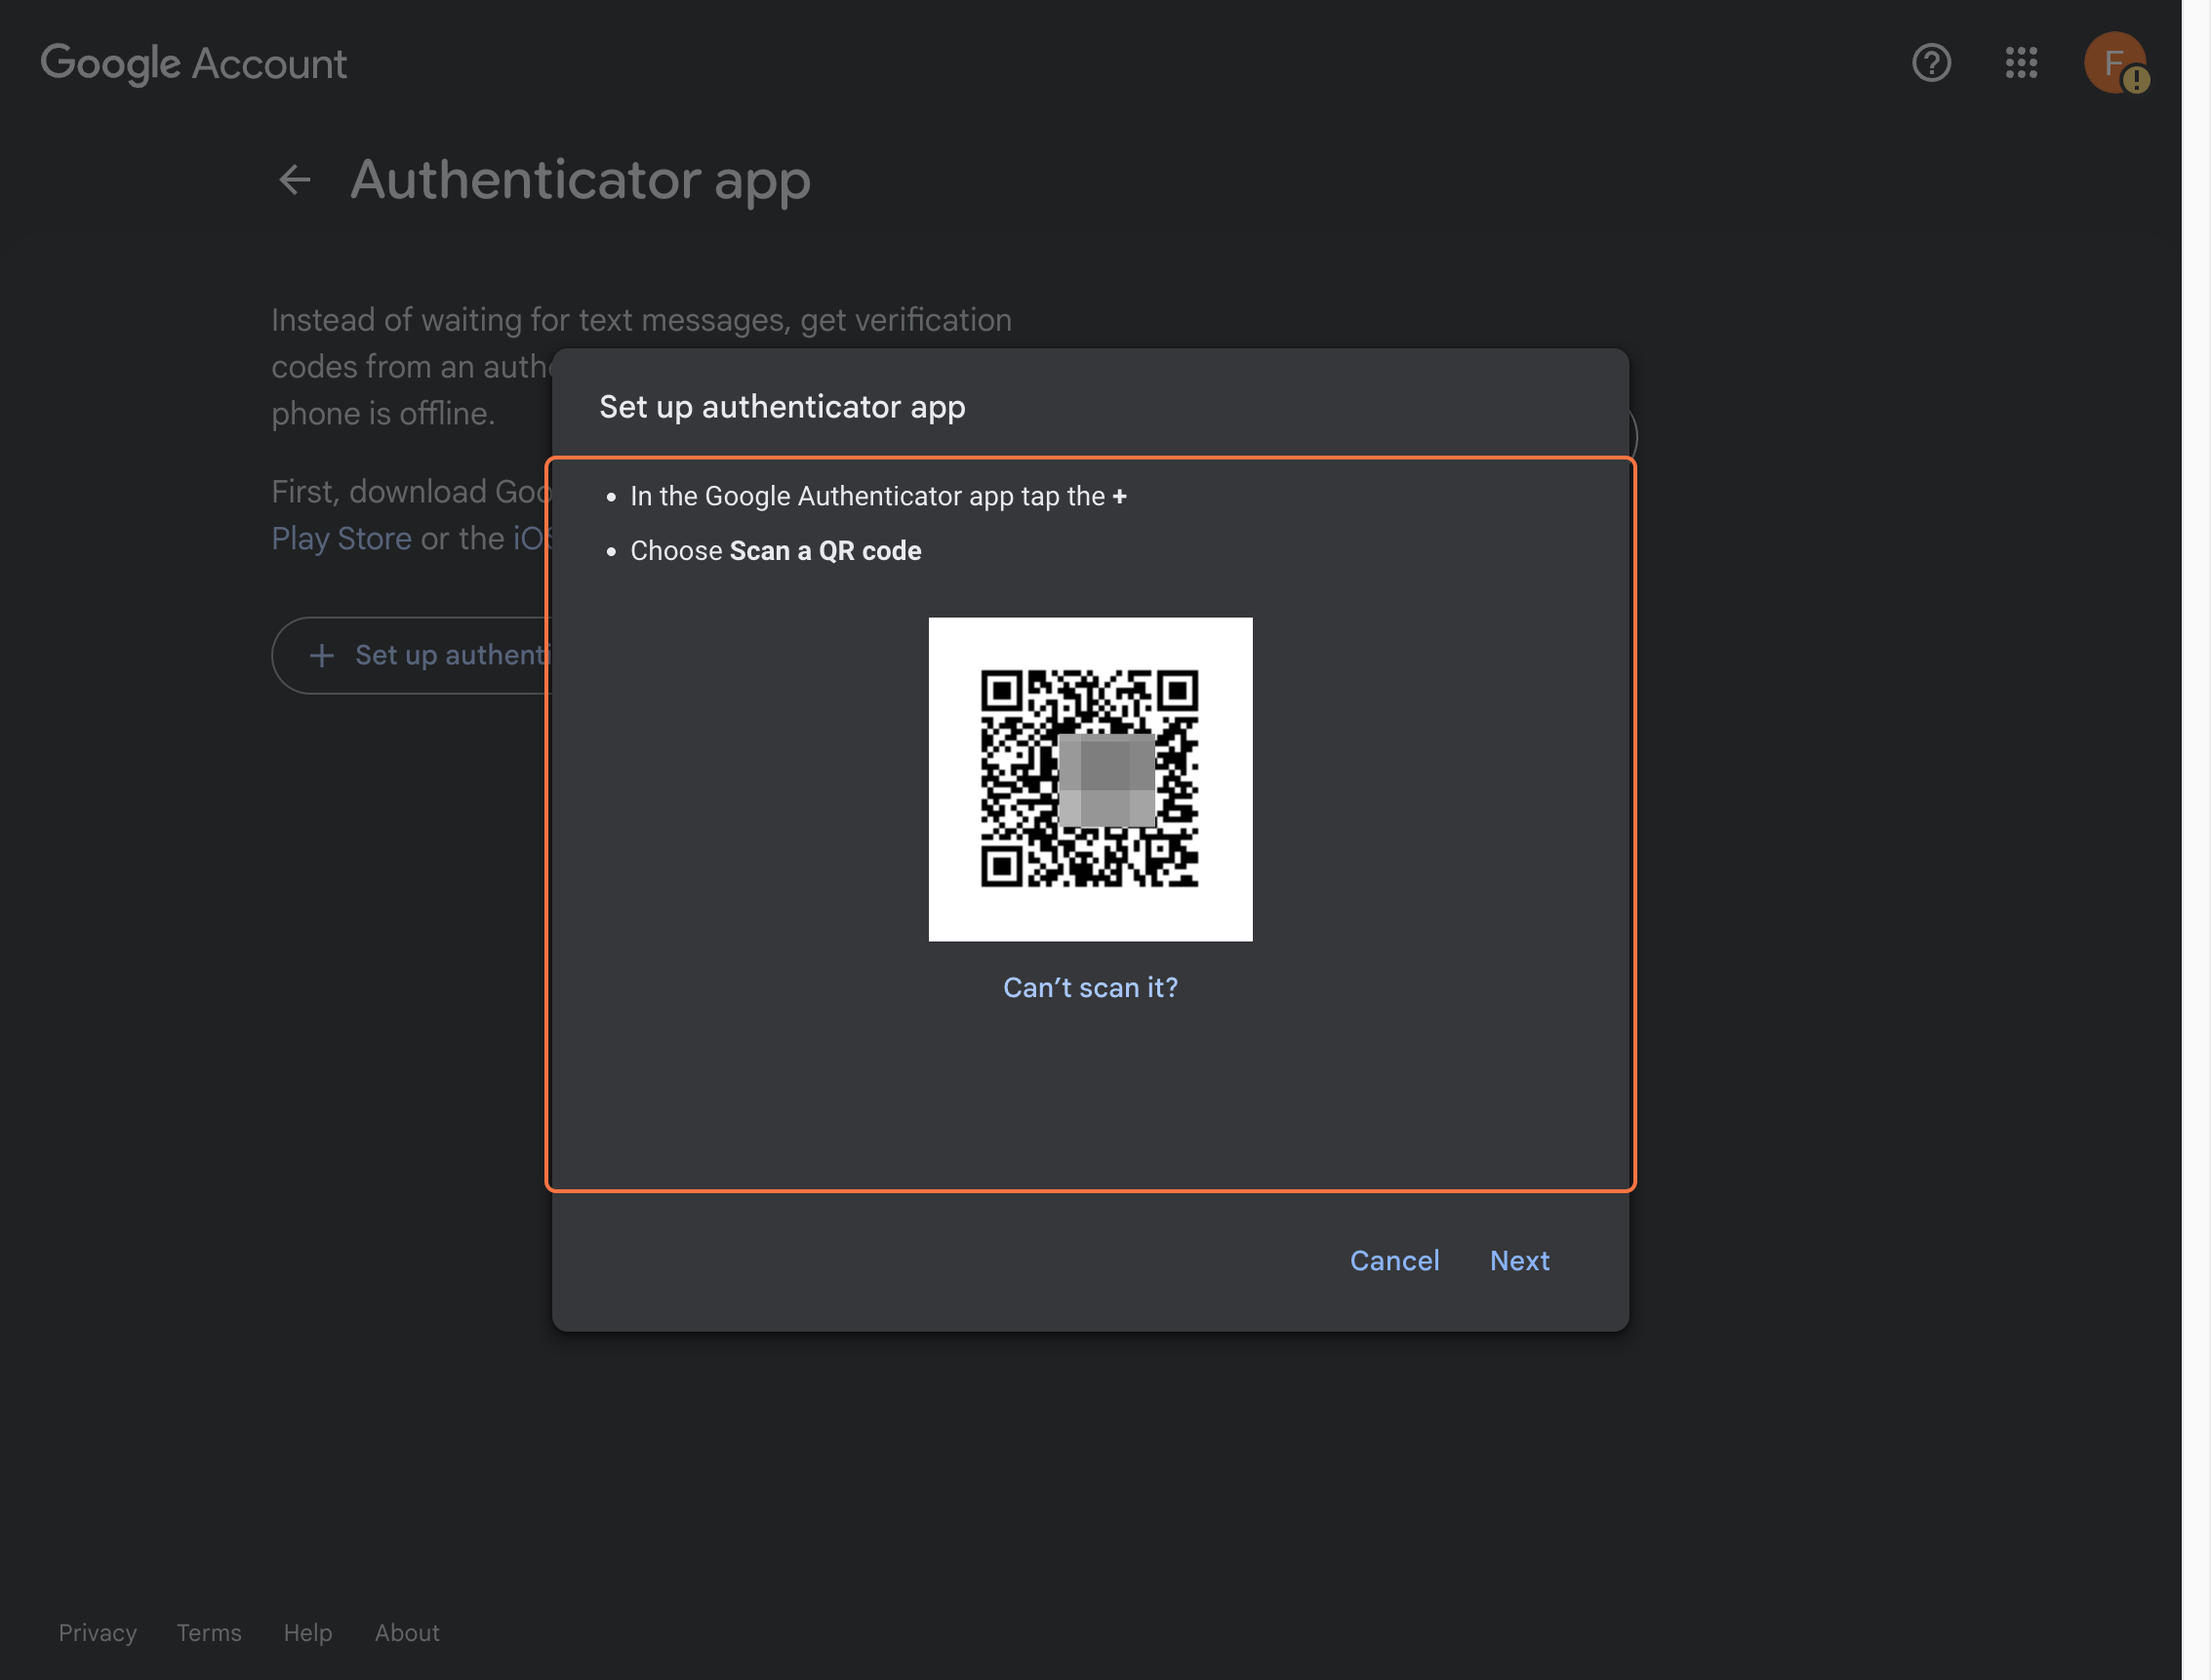
Step 10
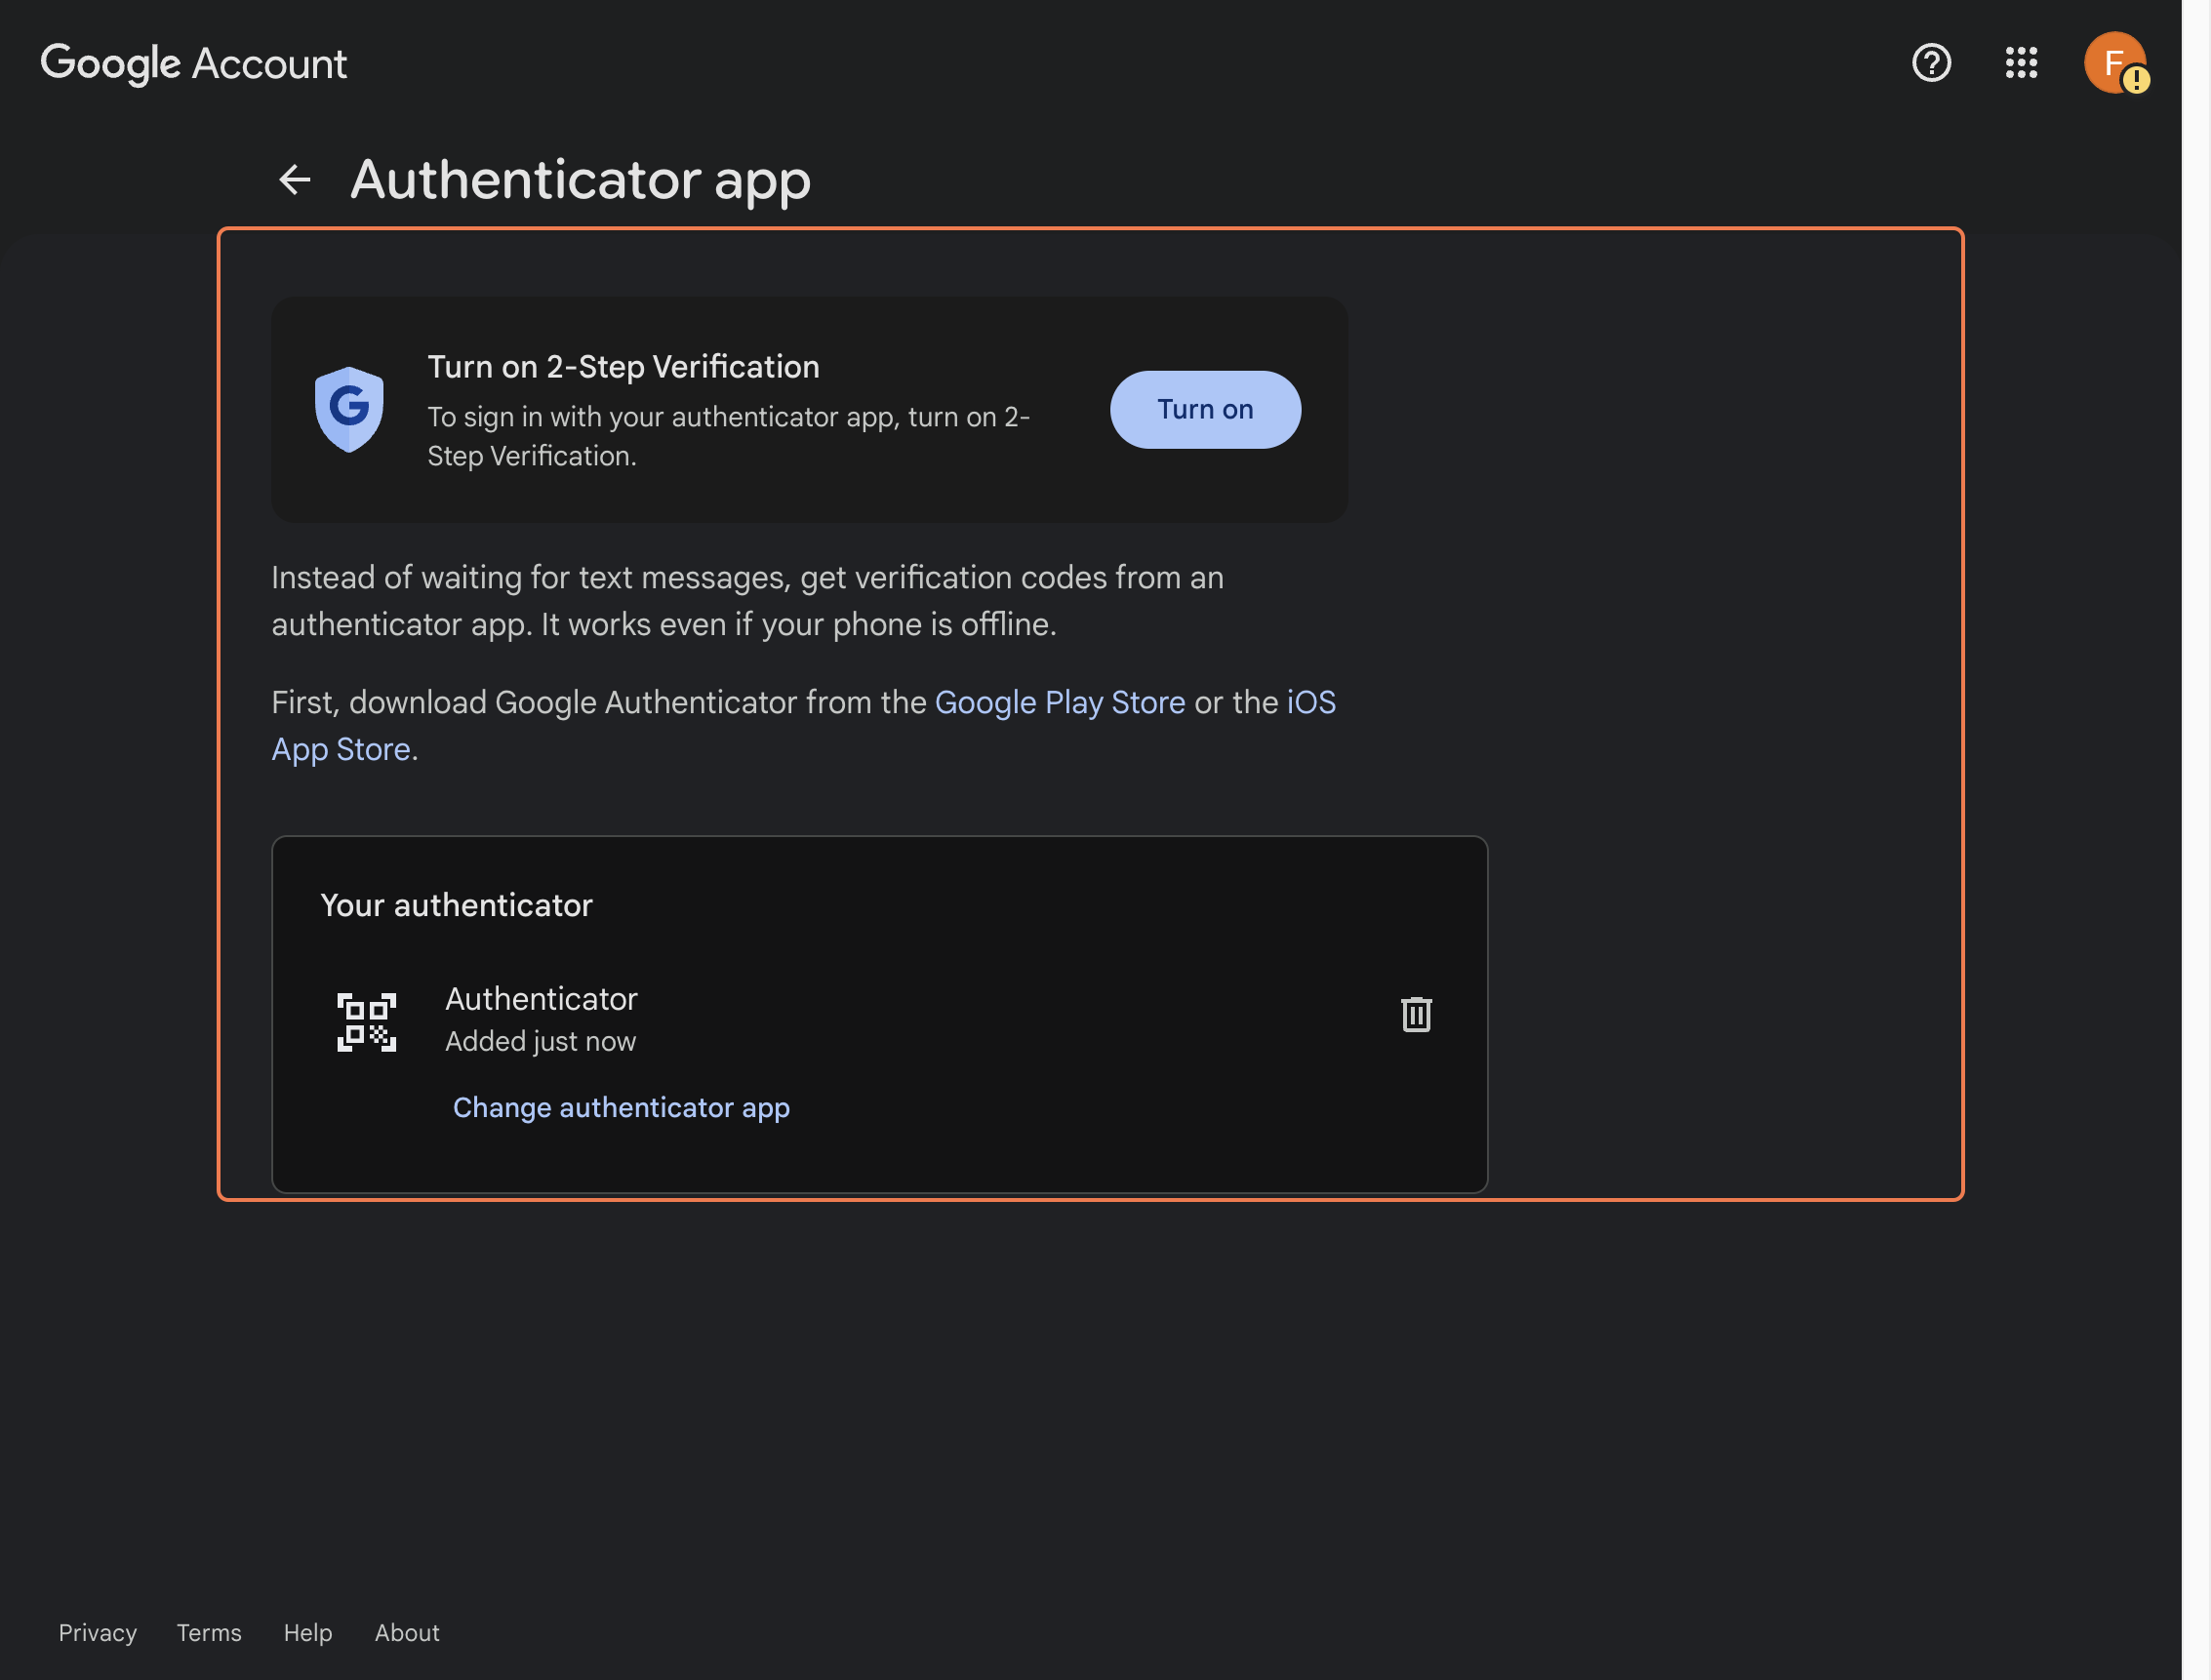
Click Set up authenticator.
This opens the screen used to connect your phone.

Step 11
In Google Authenticator, tap the plus icon and add the account.
Scan the QR code or enter the setup key manually.
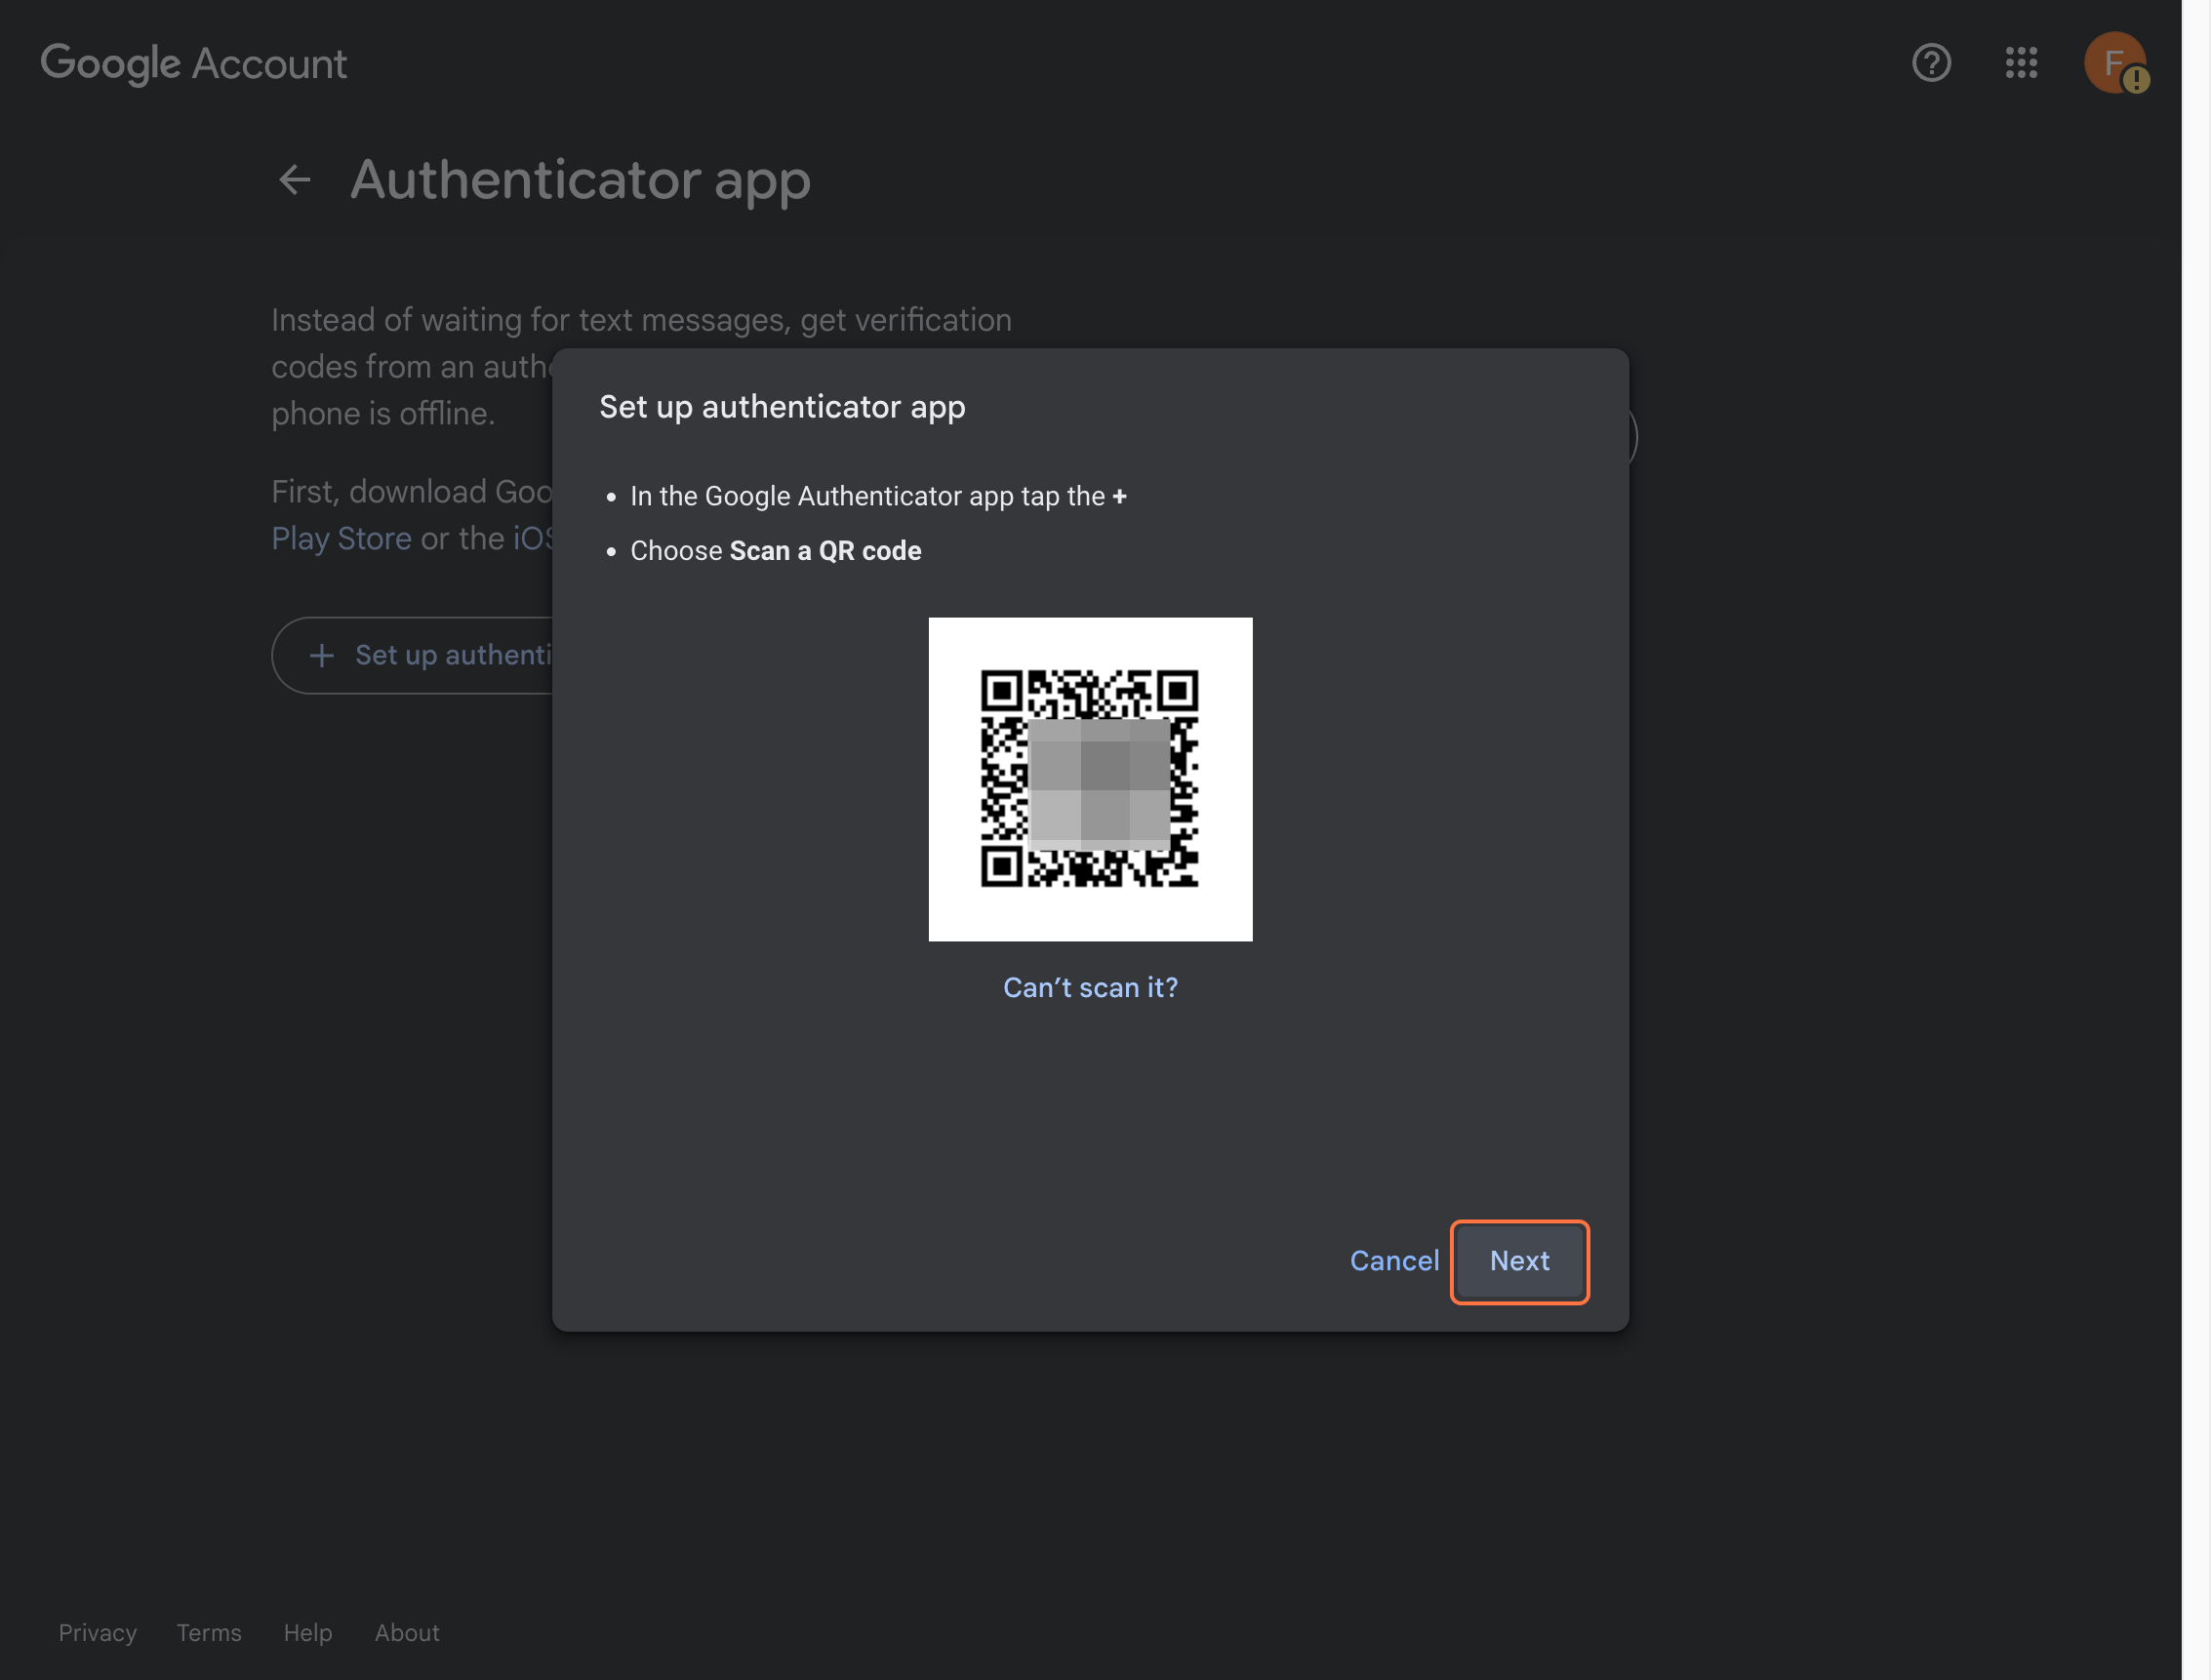
Step 12
Click Next after the account appears in the app.
Return to the browser once the authenticator setup is ready.
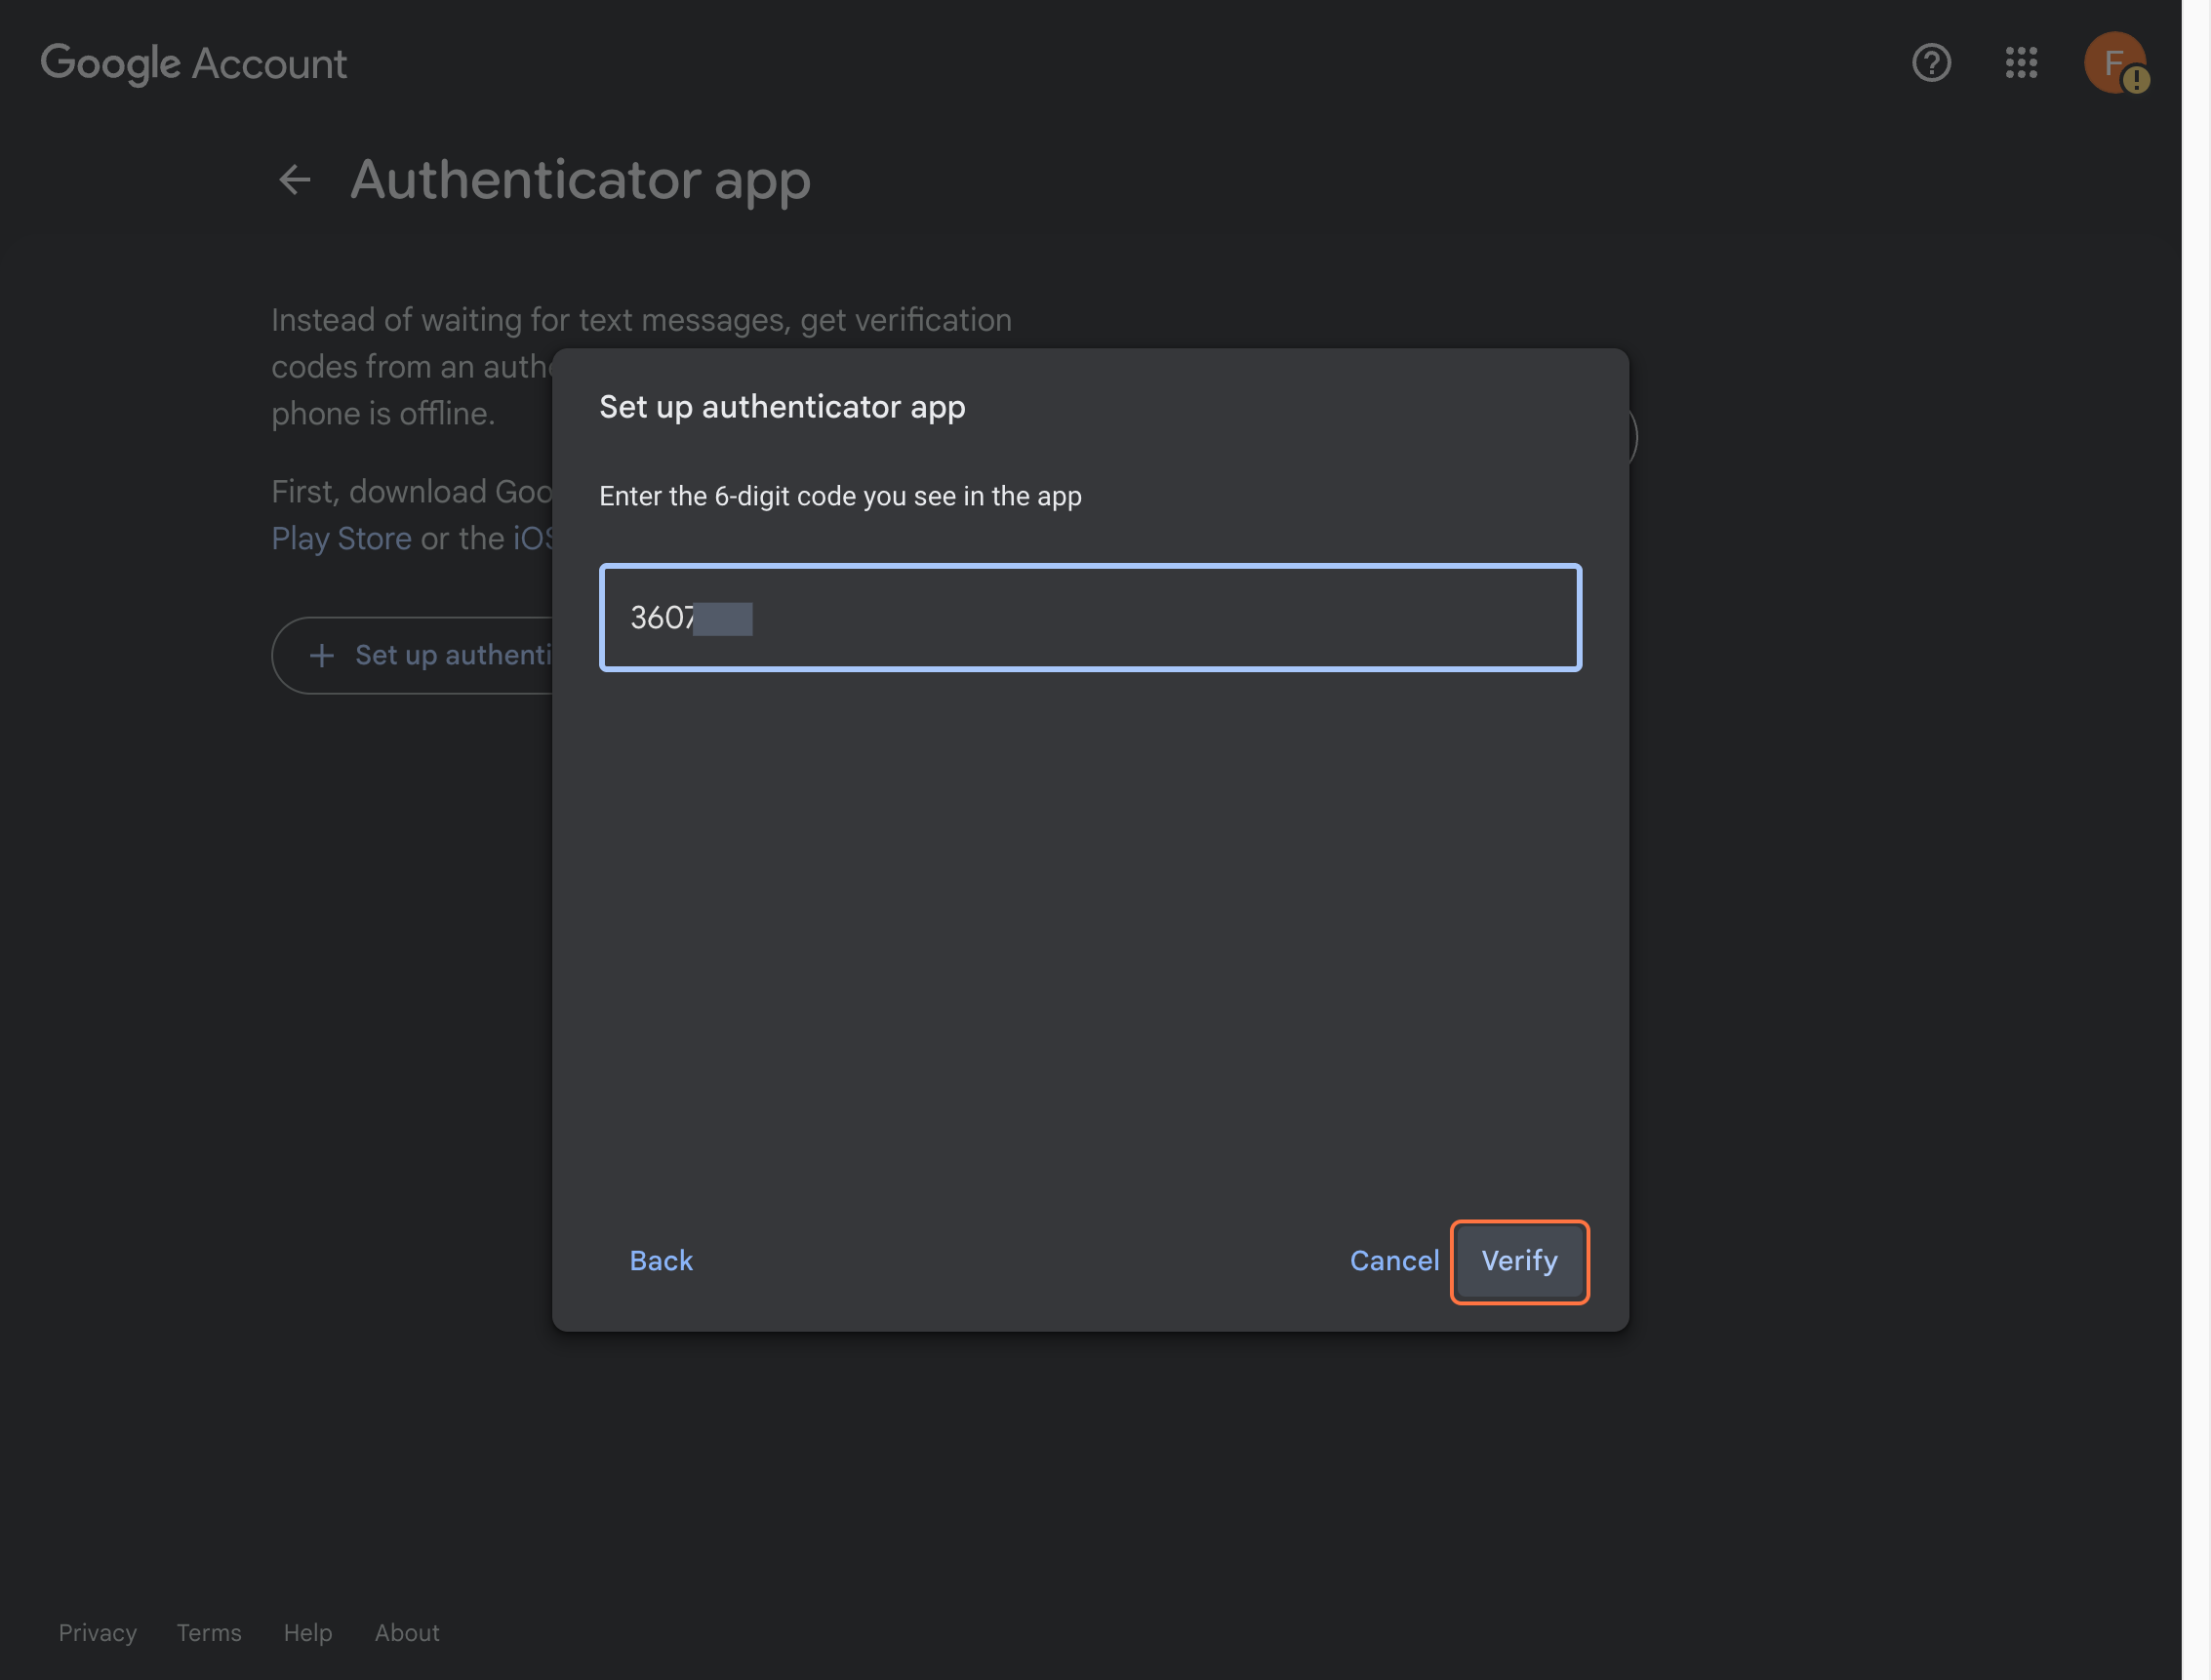
Step 13
Click Verify.
Enter the live code from Google Authenticator and submit it.
Step 14
Click Turn on 2-Step Verification.
This activates the authenticator as your main second step.
Section 3
Add backup codes as your second verification and recovery method
For this setup, you should keep a second verification path in addition to Google Authenticator. Backup codes are the recommended option for first-time setup.
Step 15
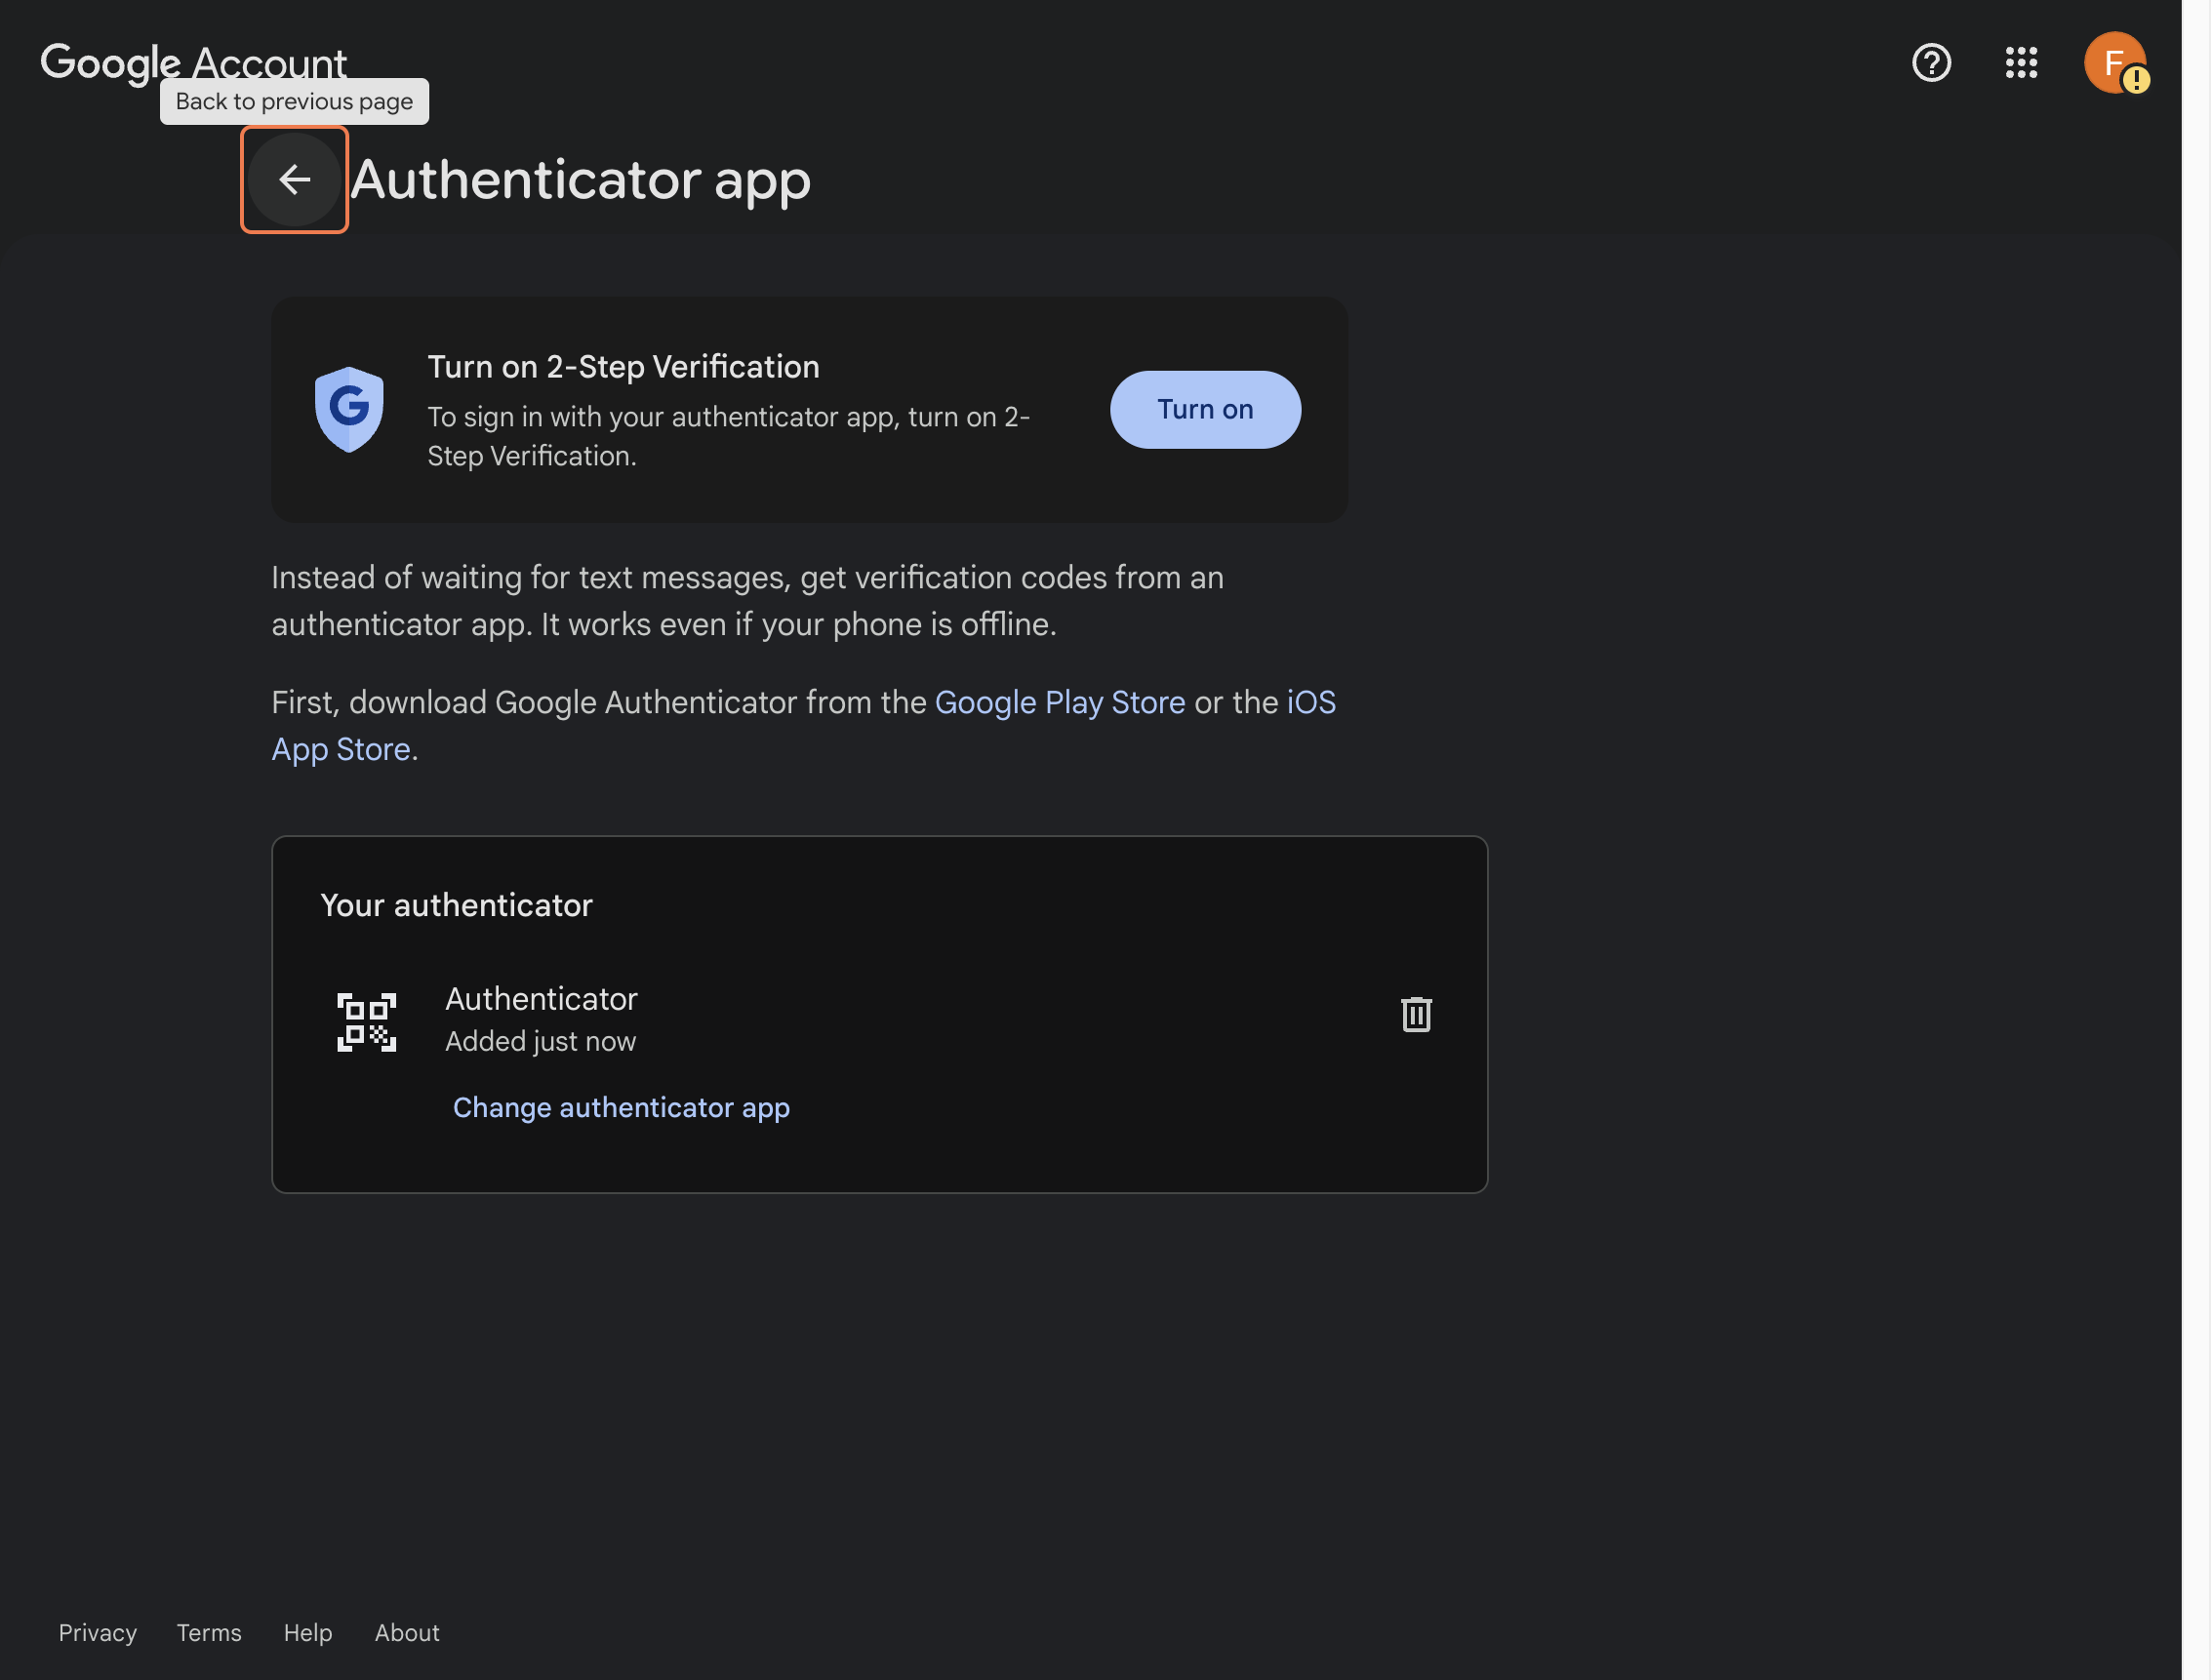
Go back to the previous page.
Return to the main security settings area after the first activation step.
Step 16
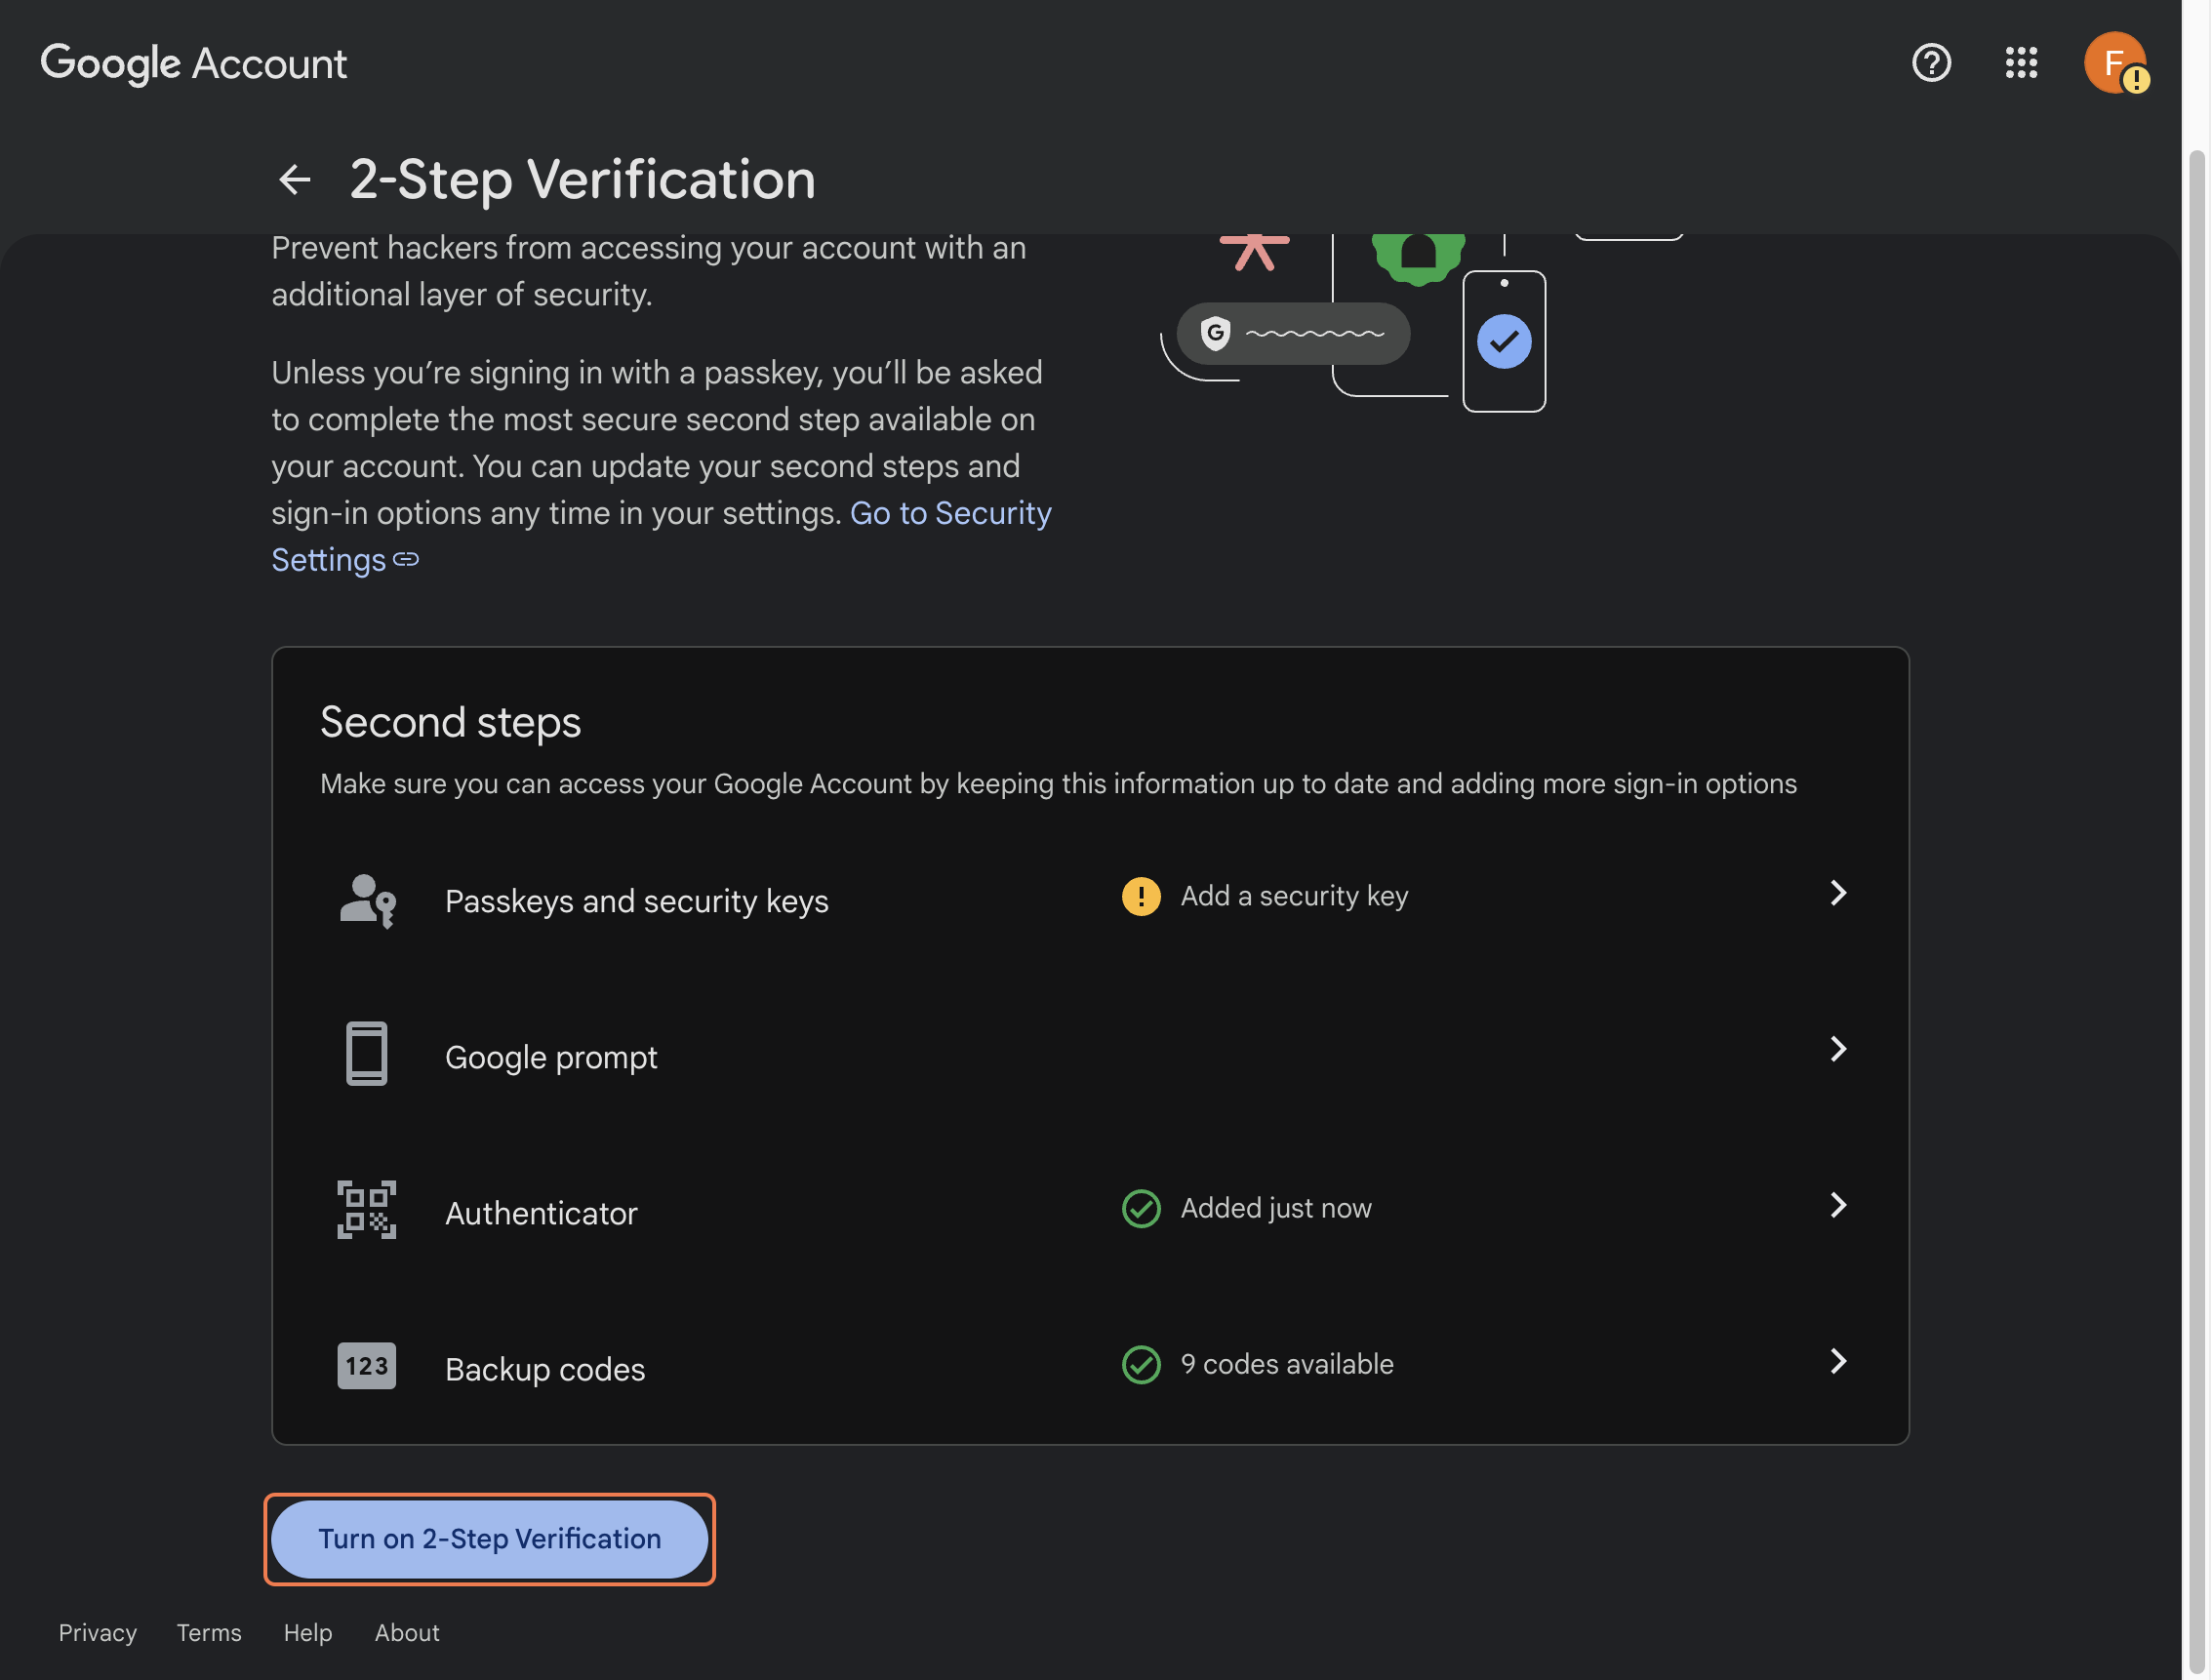
If prompted again, click Turn on 2-Step Verification.
Continue through the activation flow if Google asks for another confirmation.
Step 17
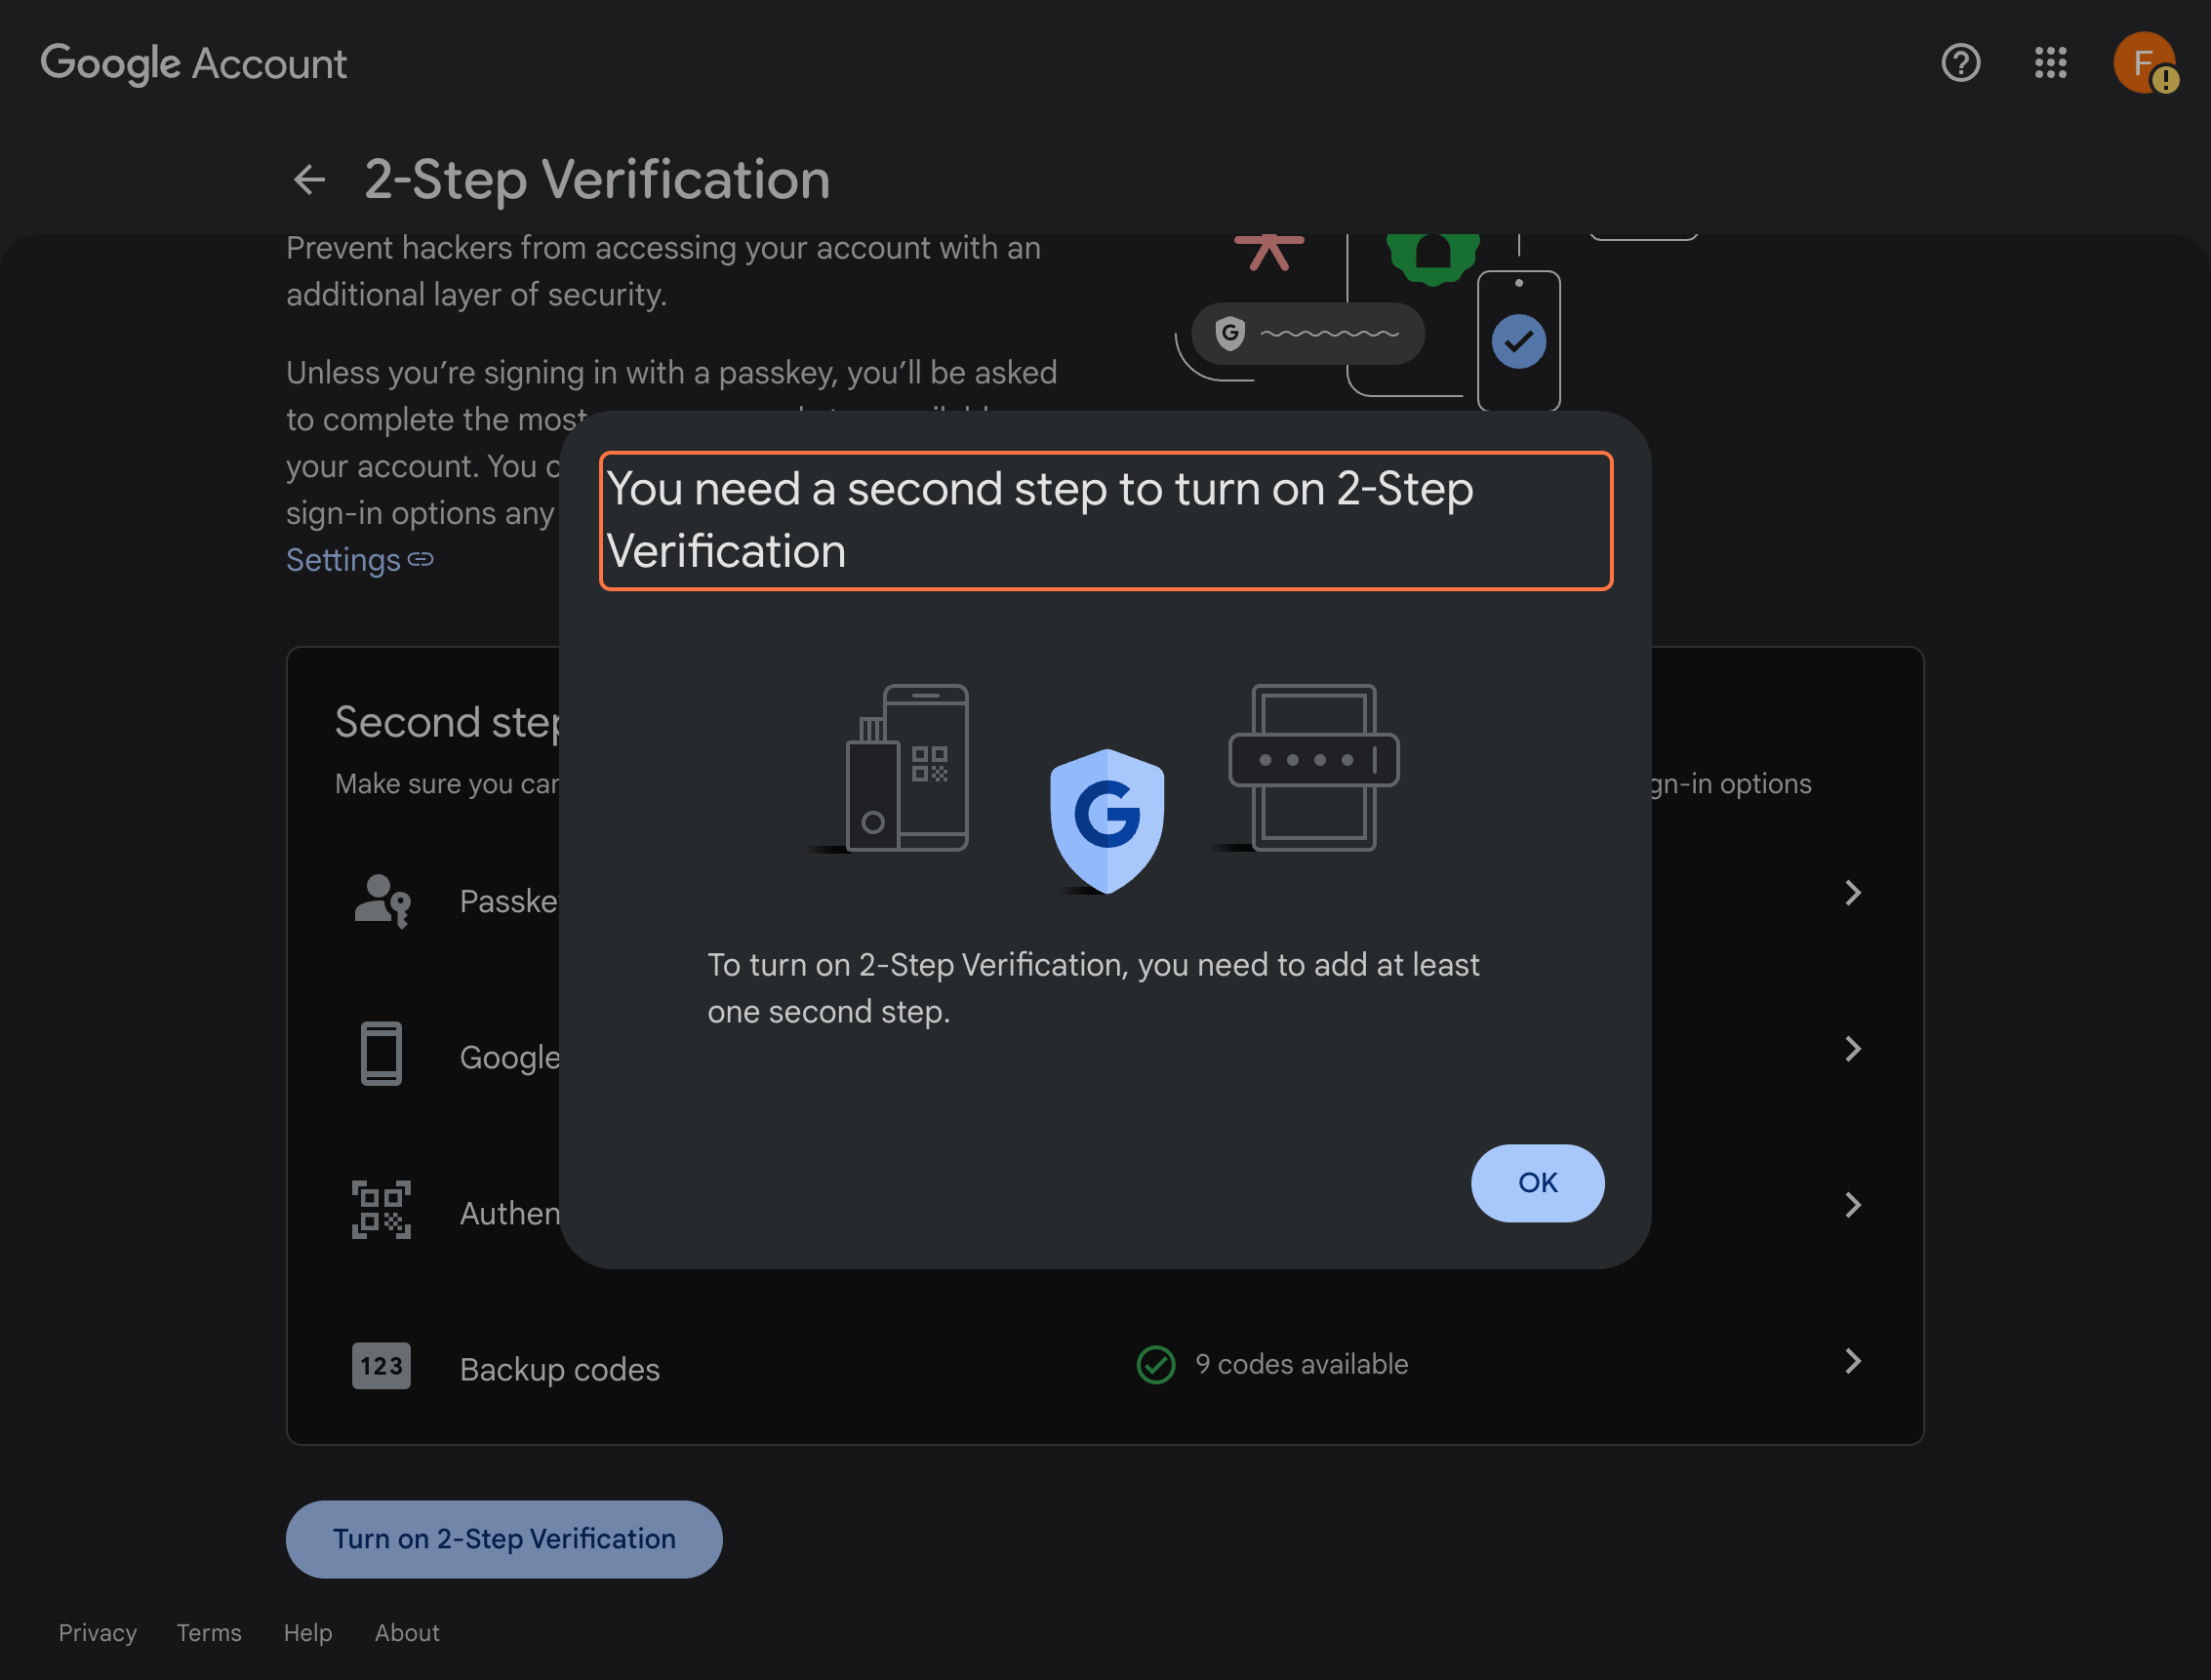
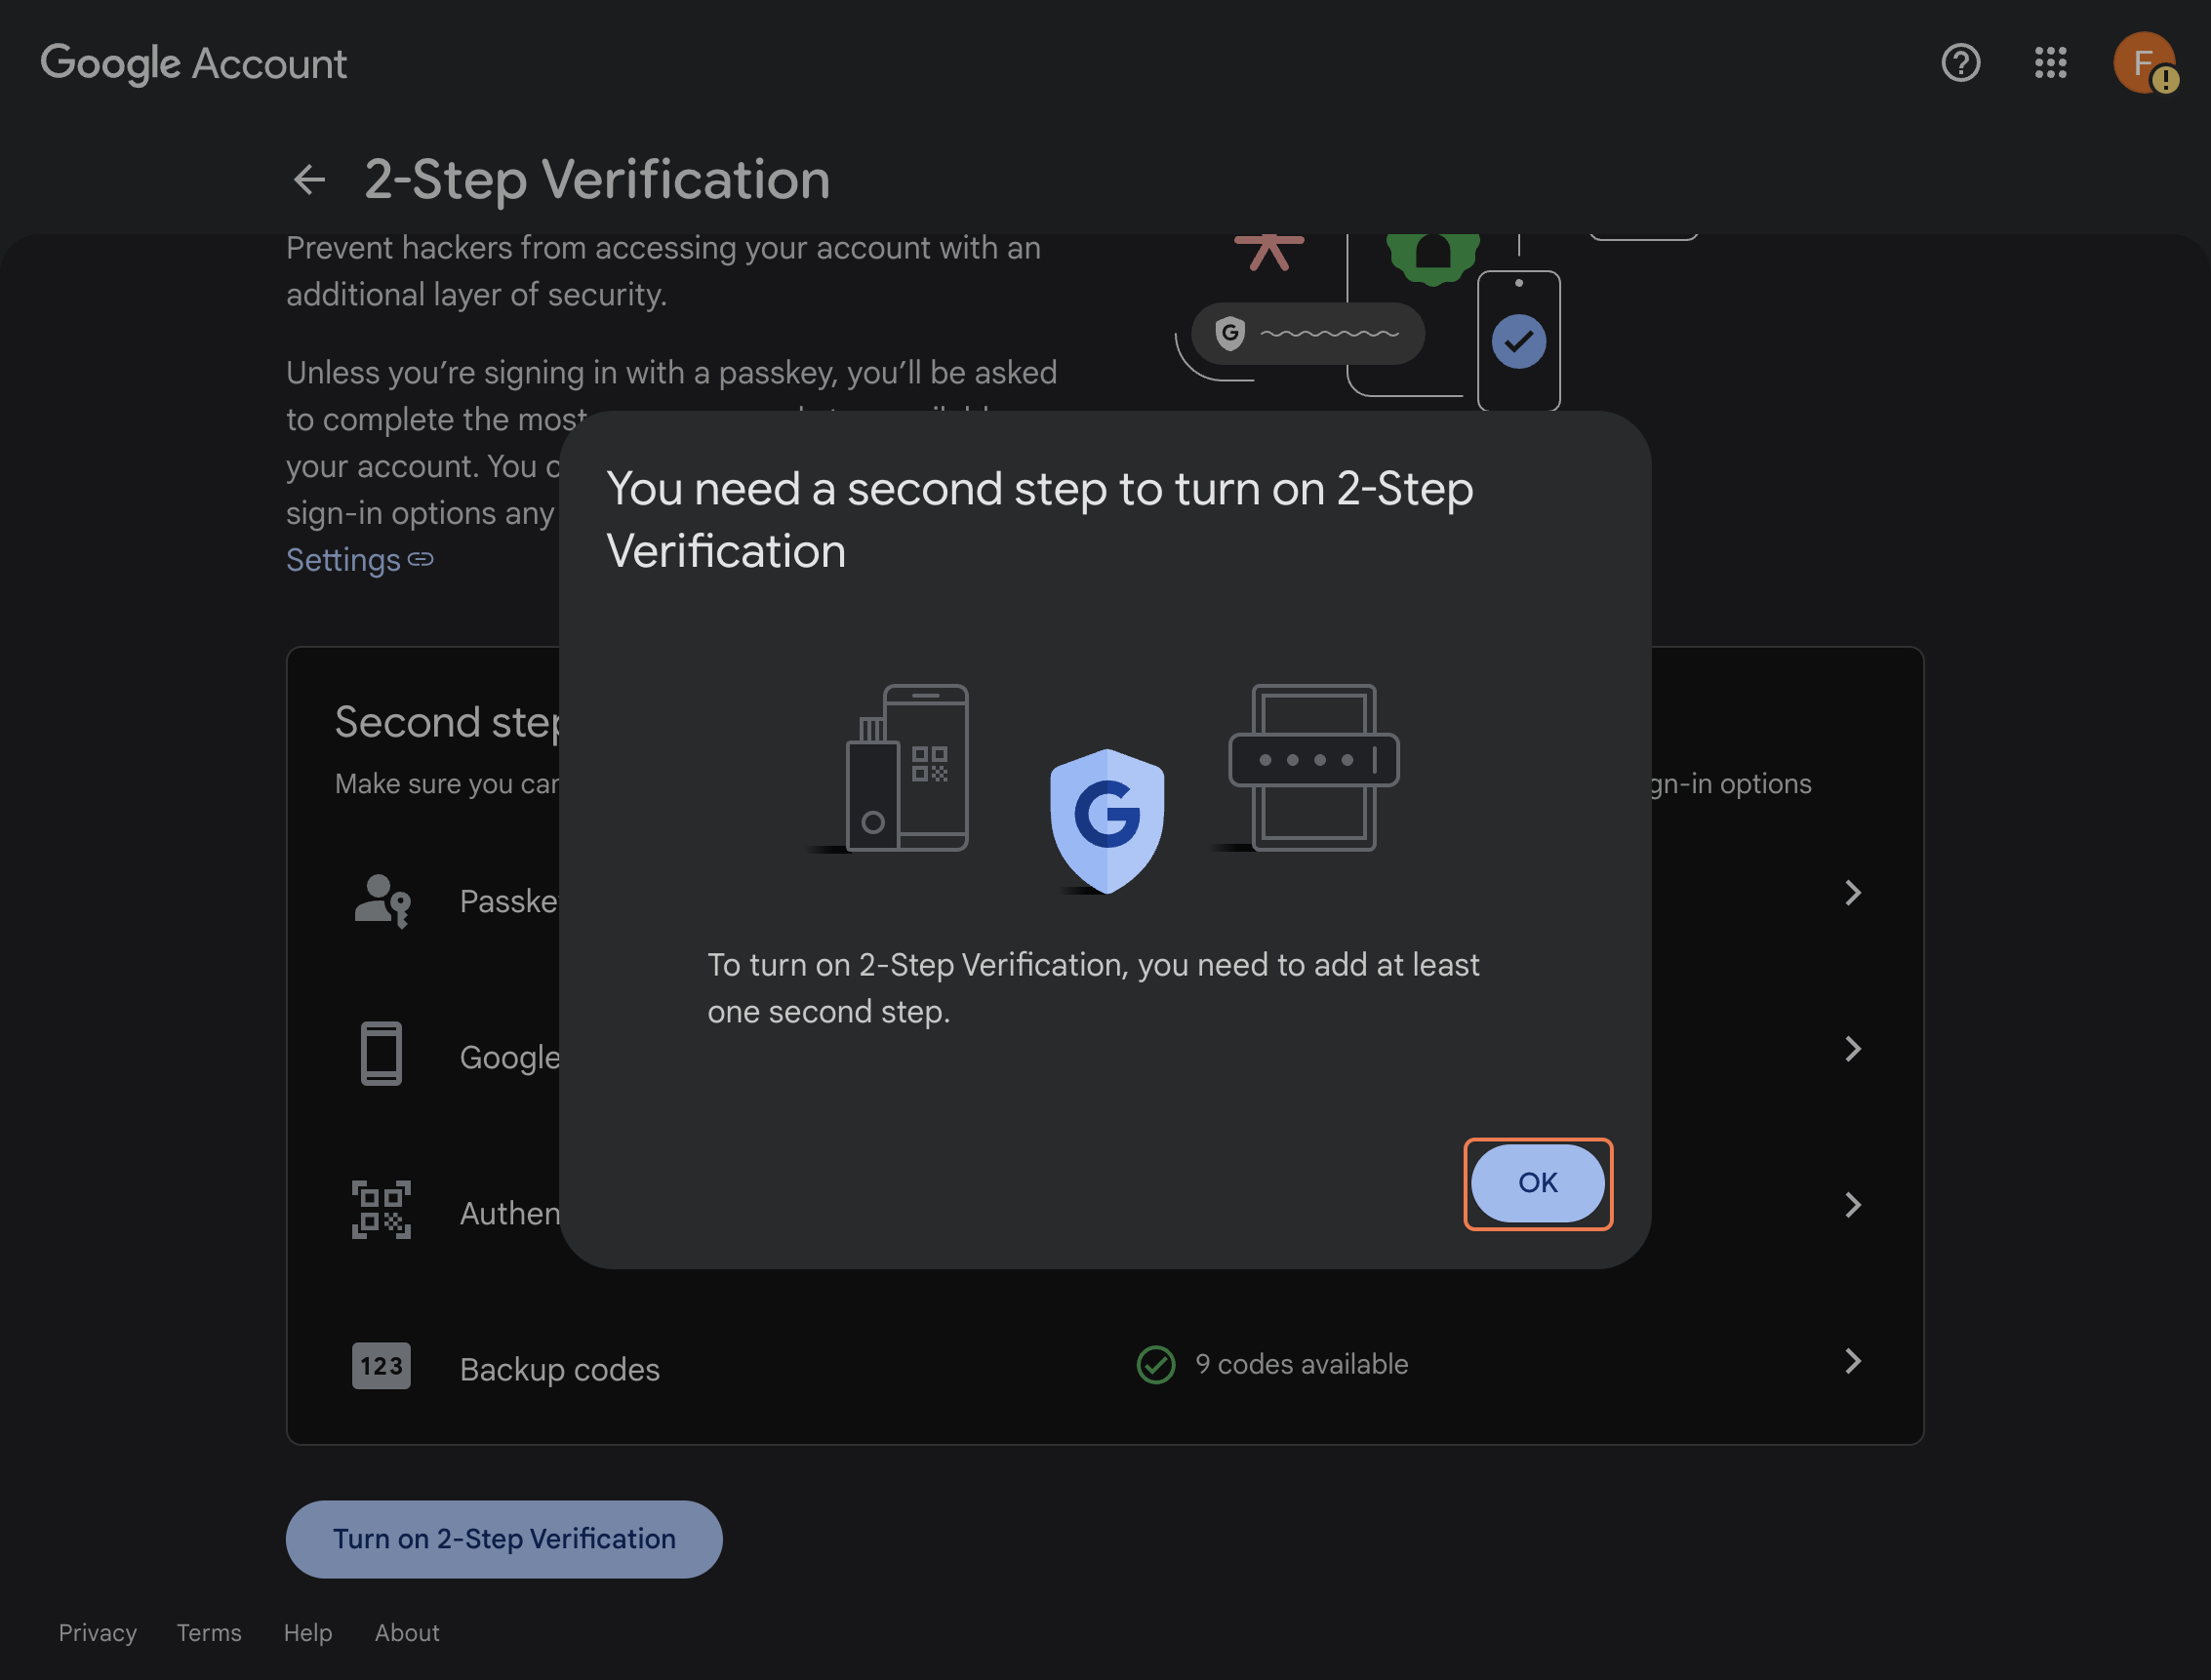
Review the message about needing a second step.
This means Google wants one more verification or recovery method before 2-Step Verification can be considered fully complete.
Step 18
Click OK to continue.
Move ahead so you can add the recommended second method for this first-time setup.
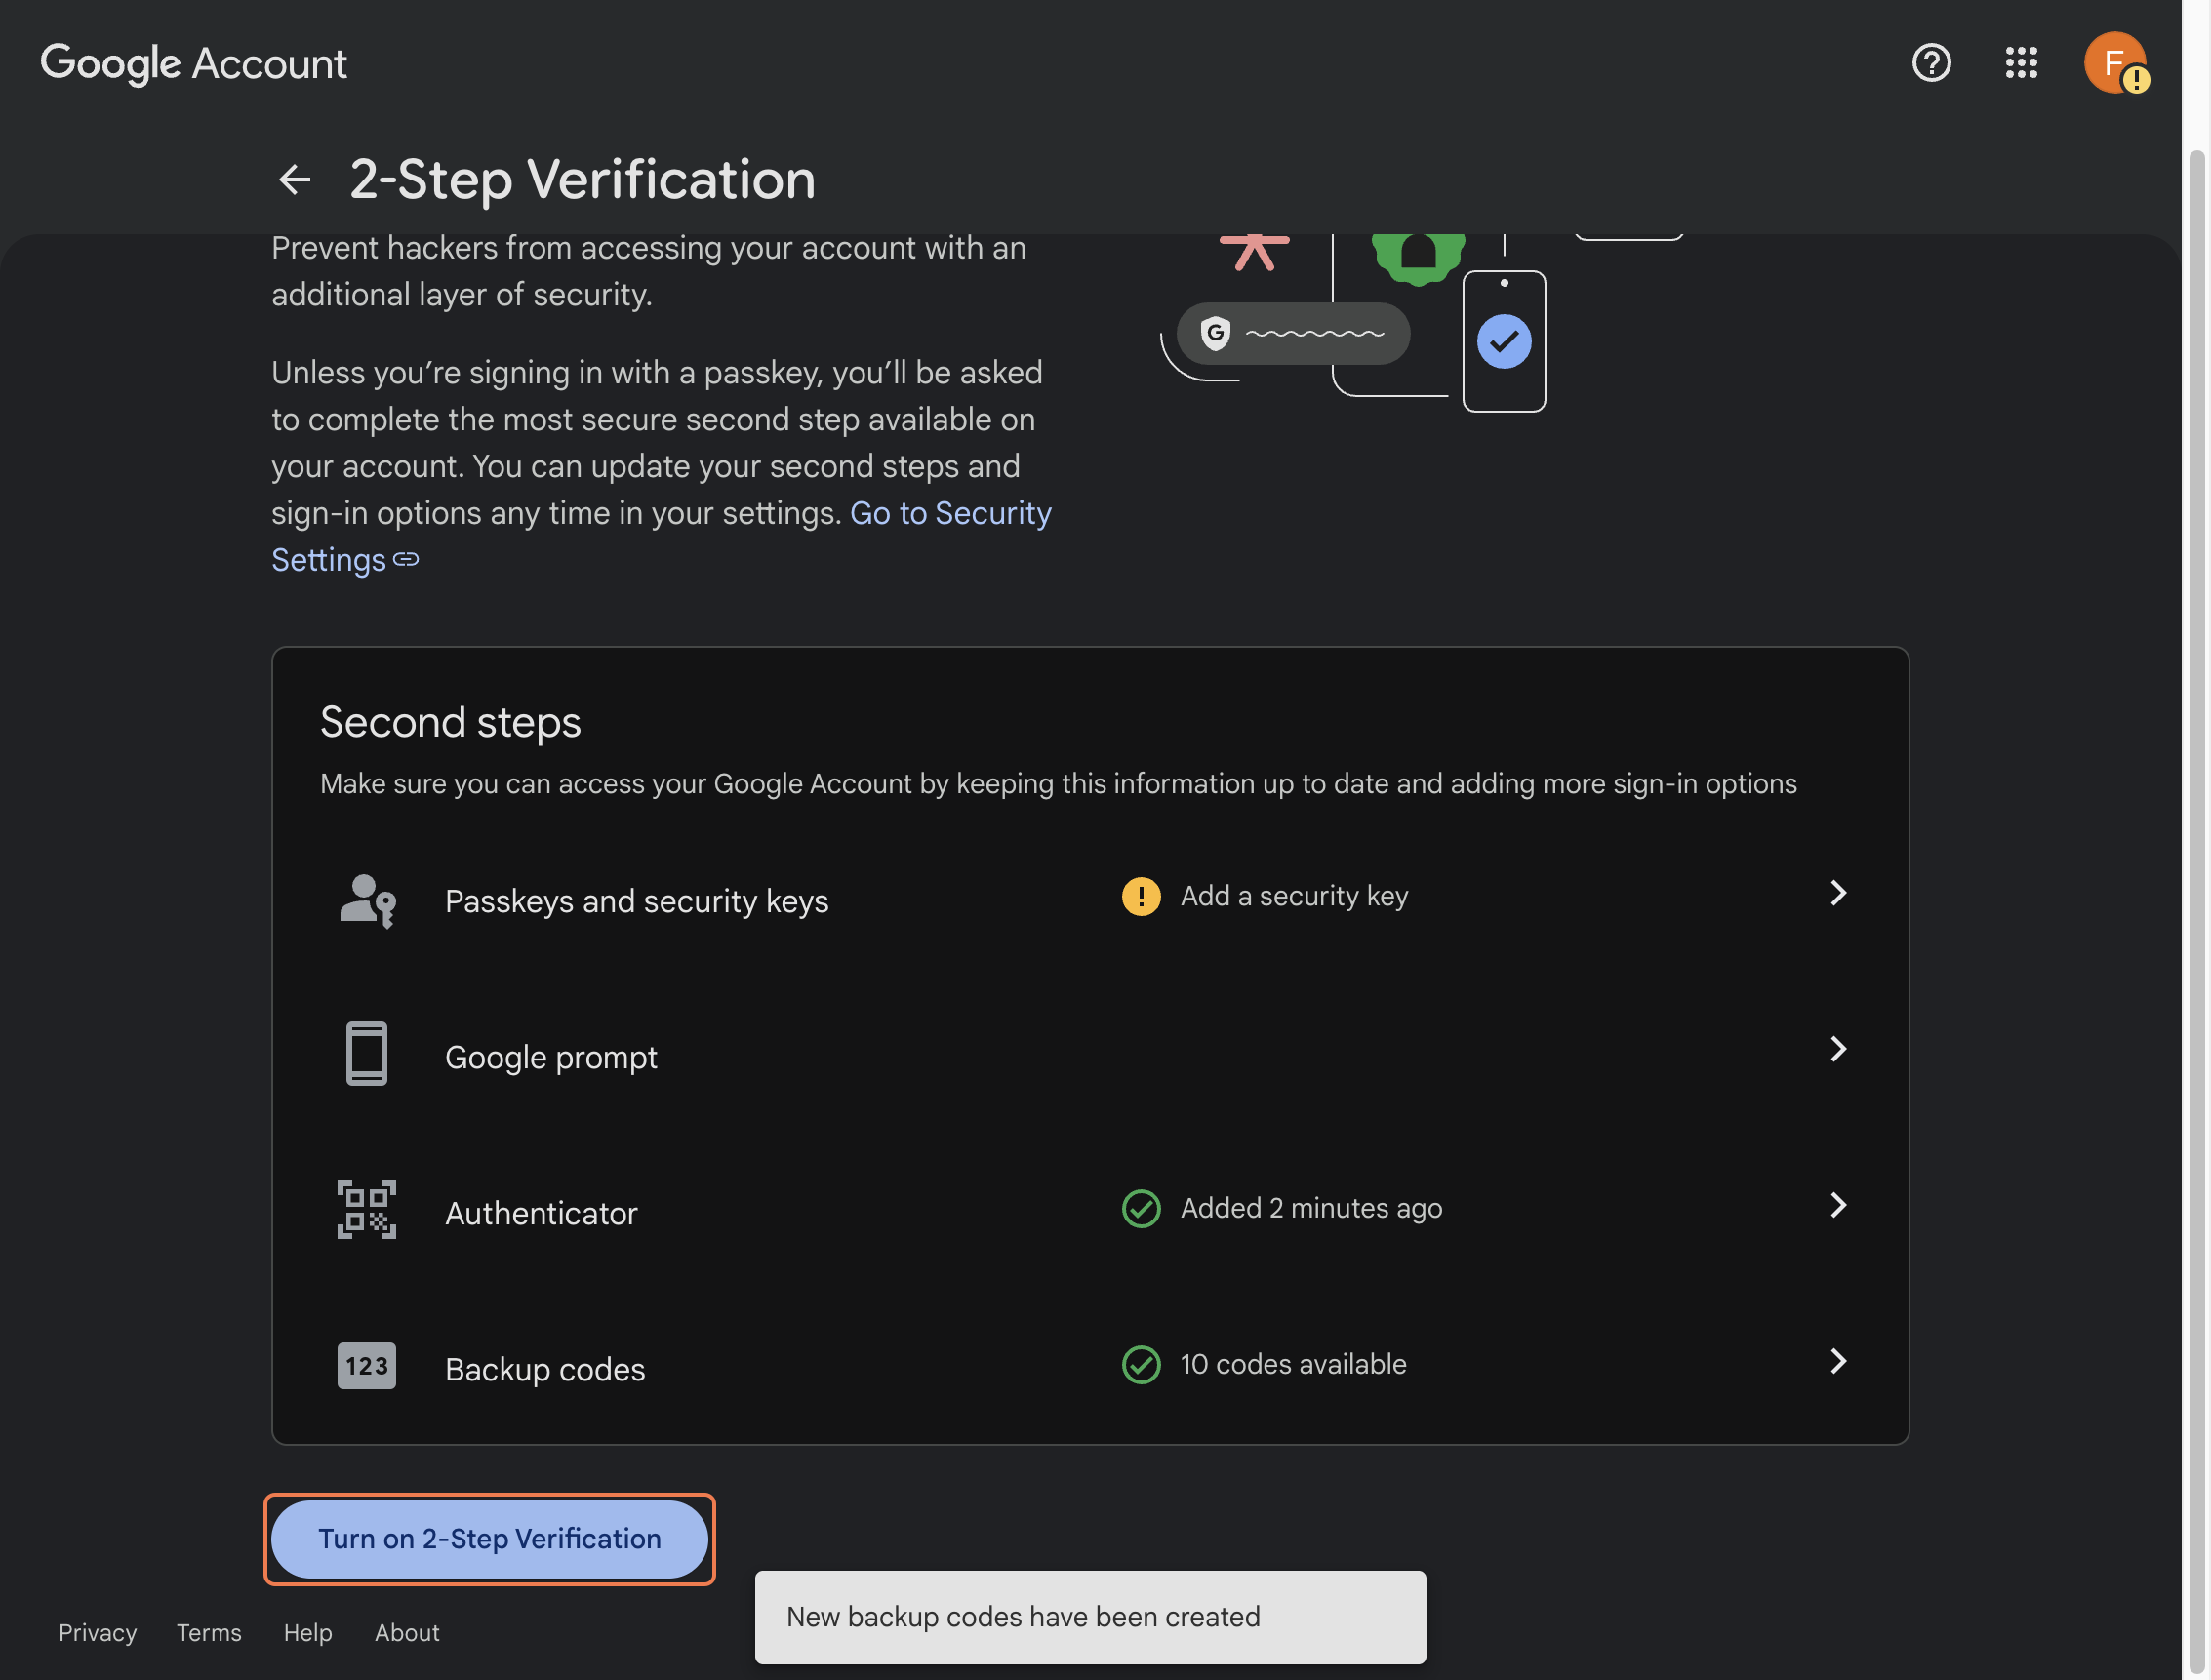
Step 21
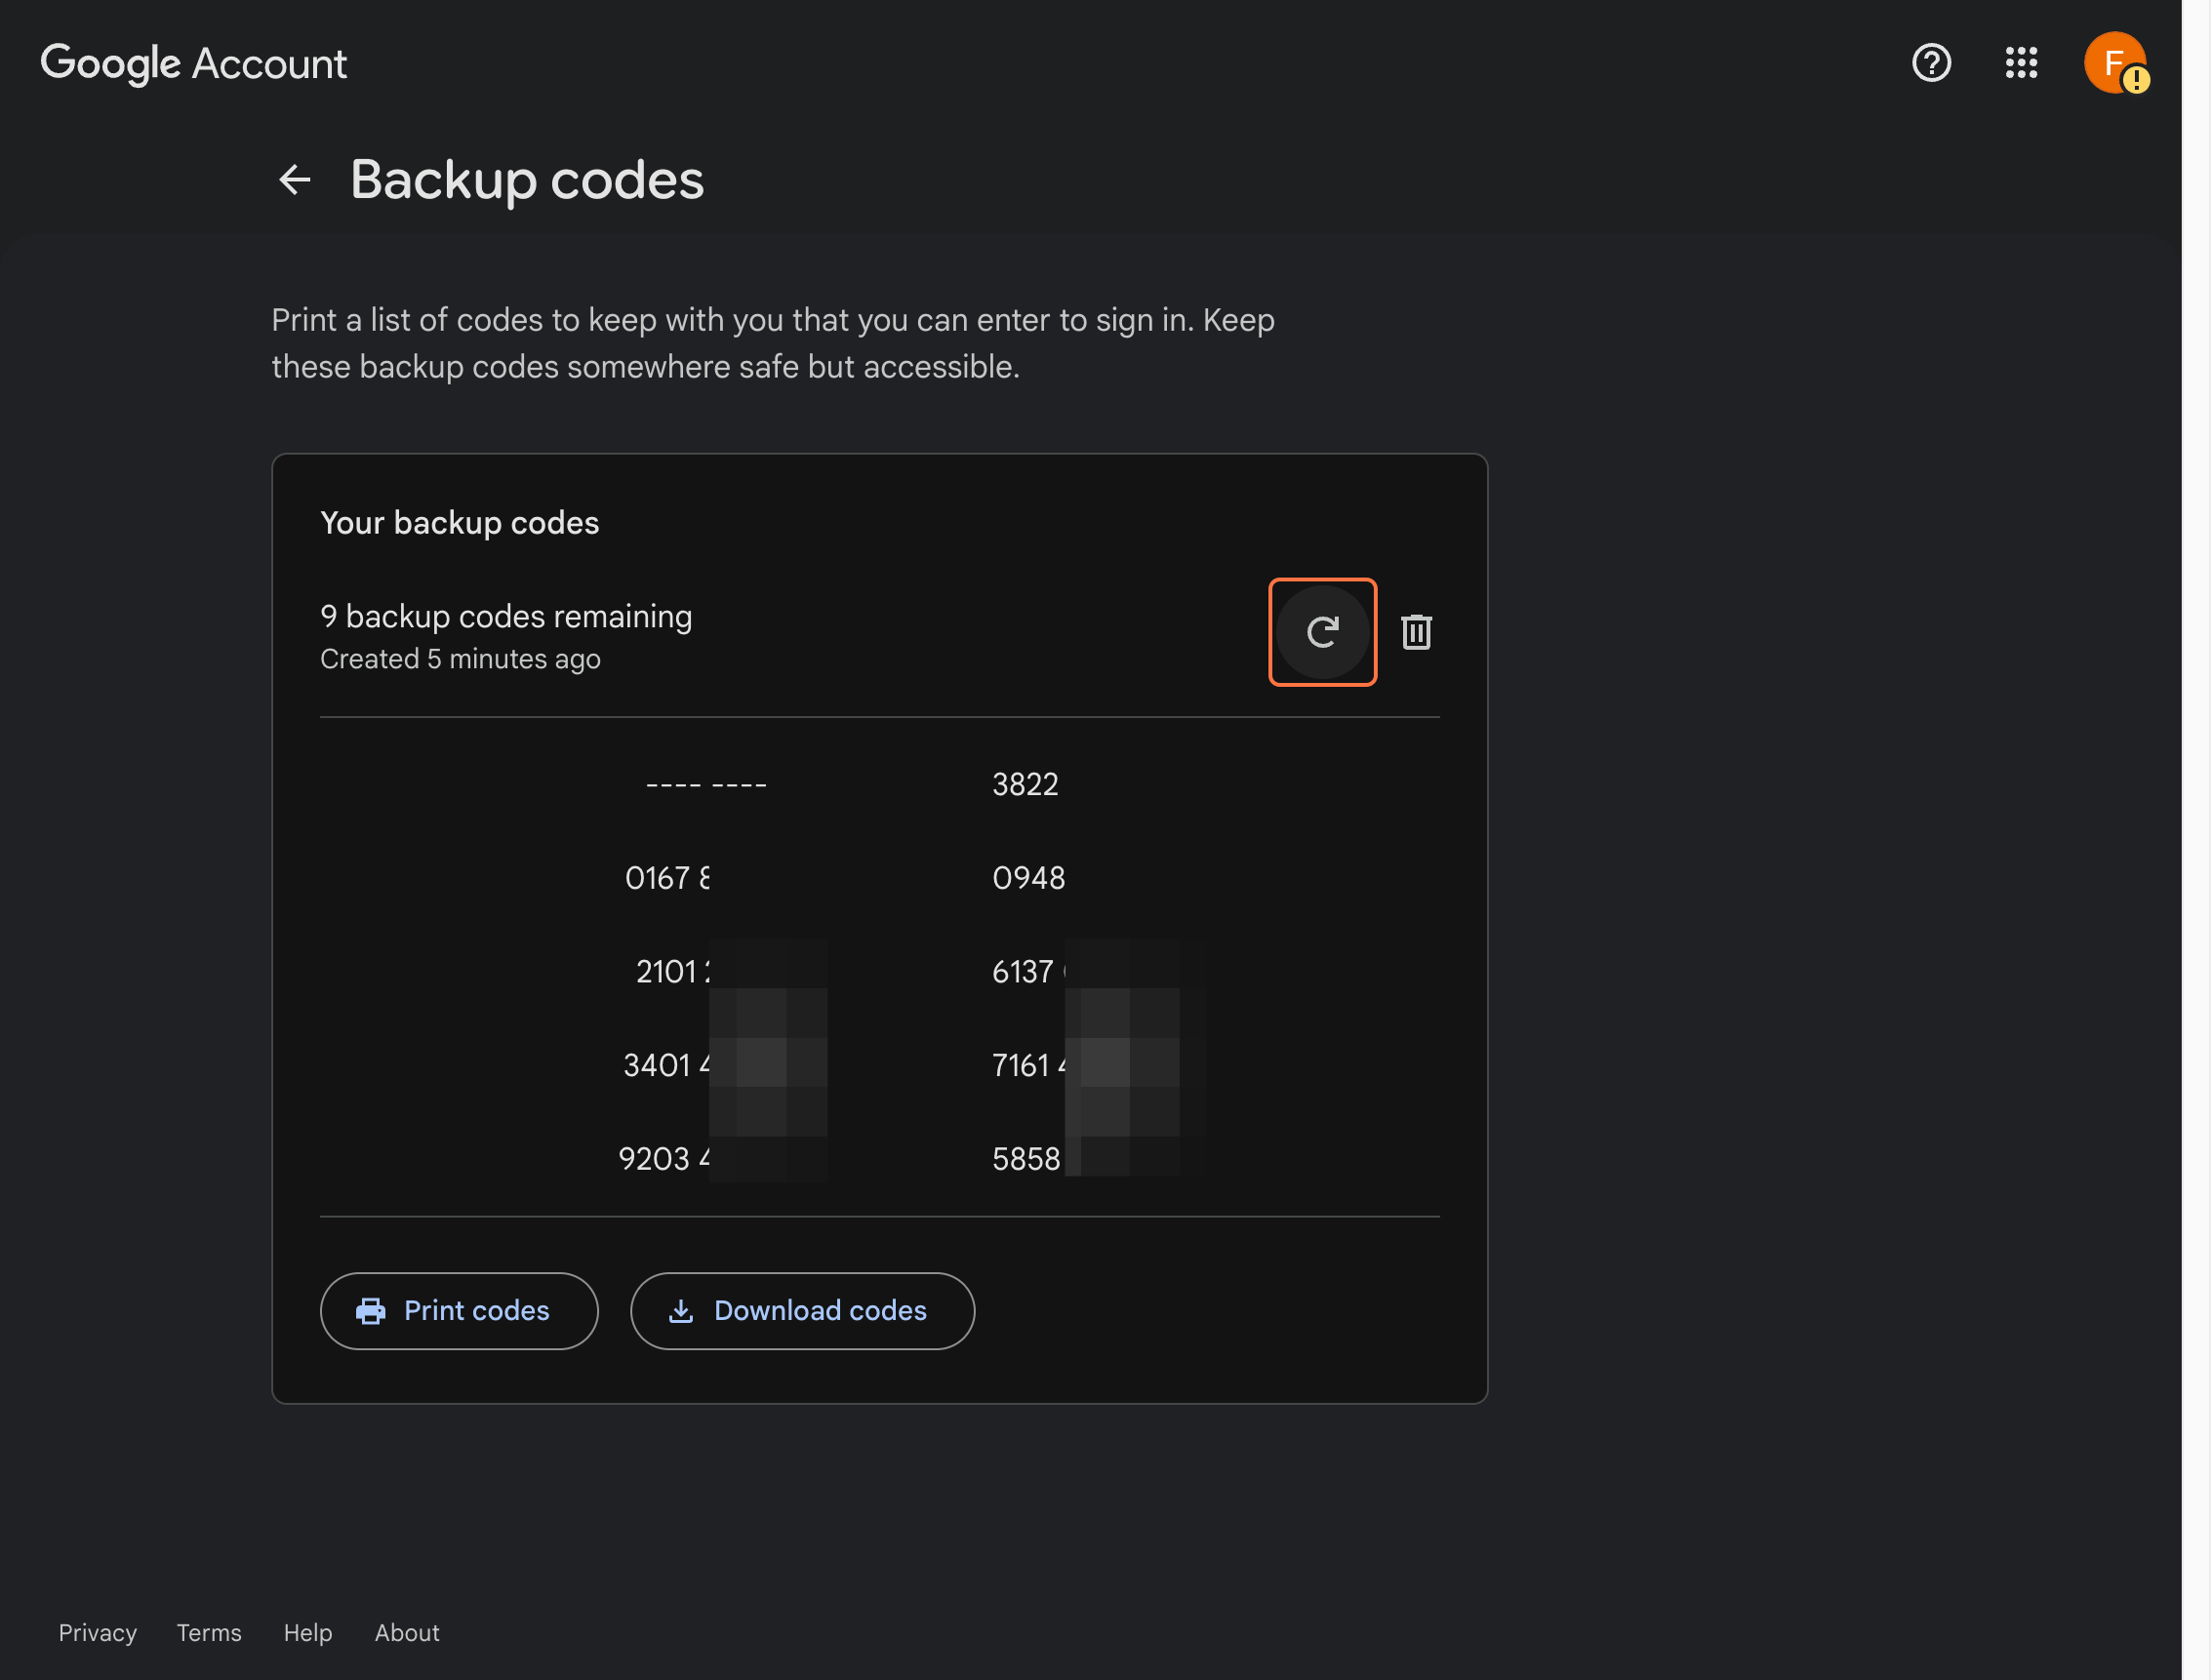
Open Backup codes.
Find the backup codes section in the security settings.

Step 22
Click Generate new codes.
Create a fresh set of recovery codes for the account.
Step 23
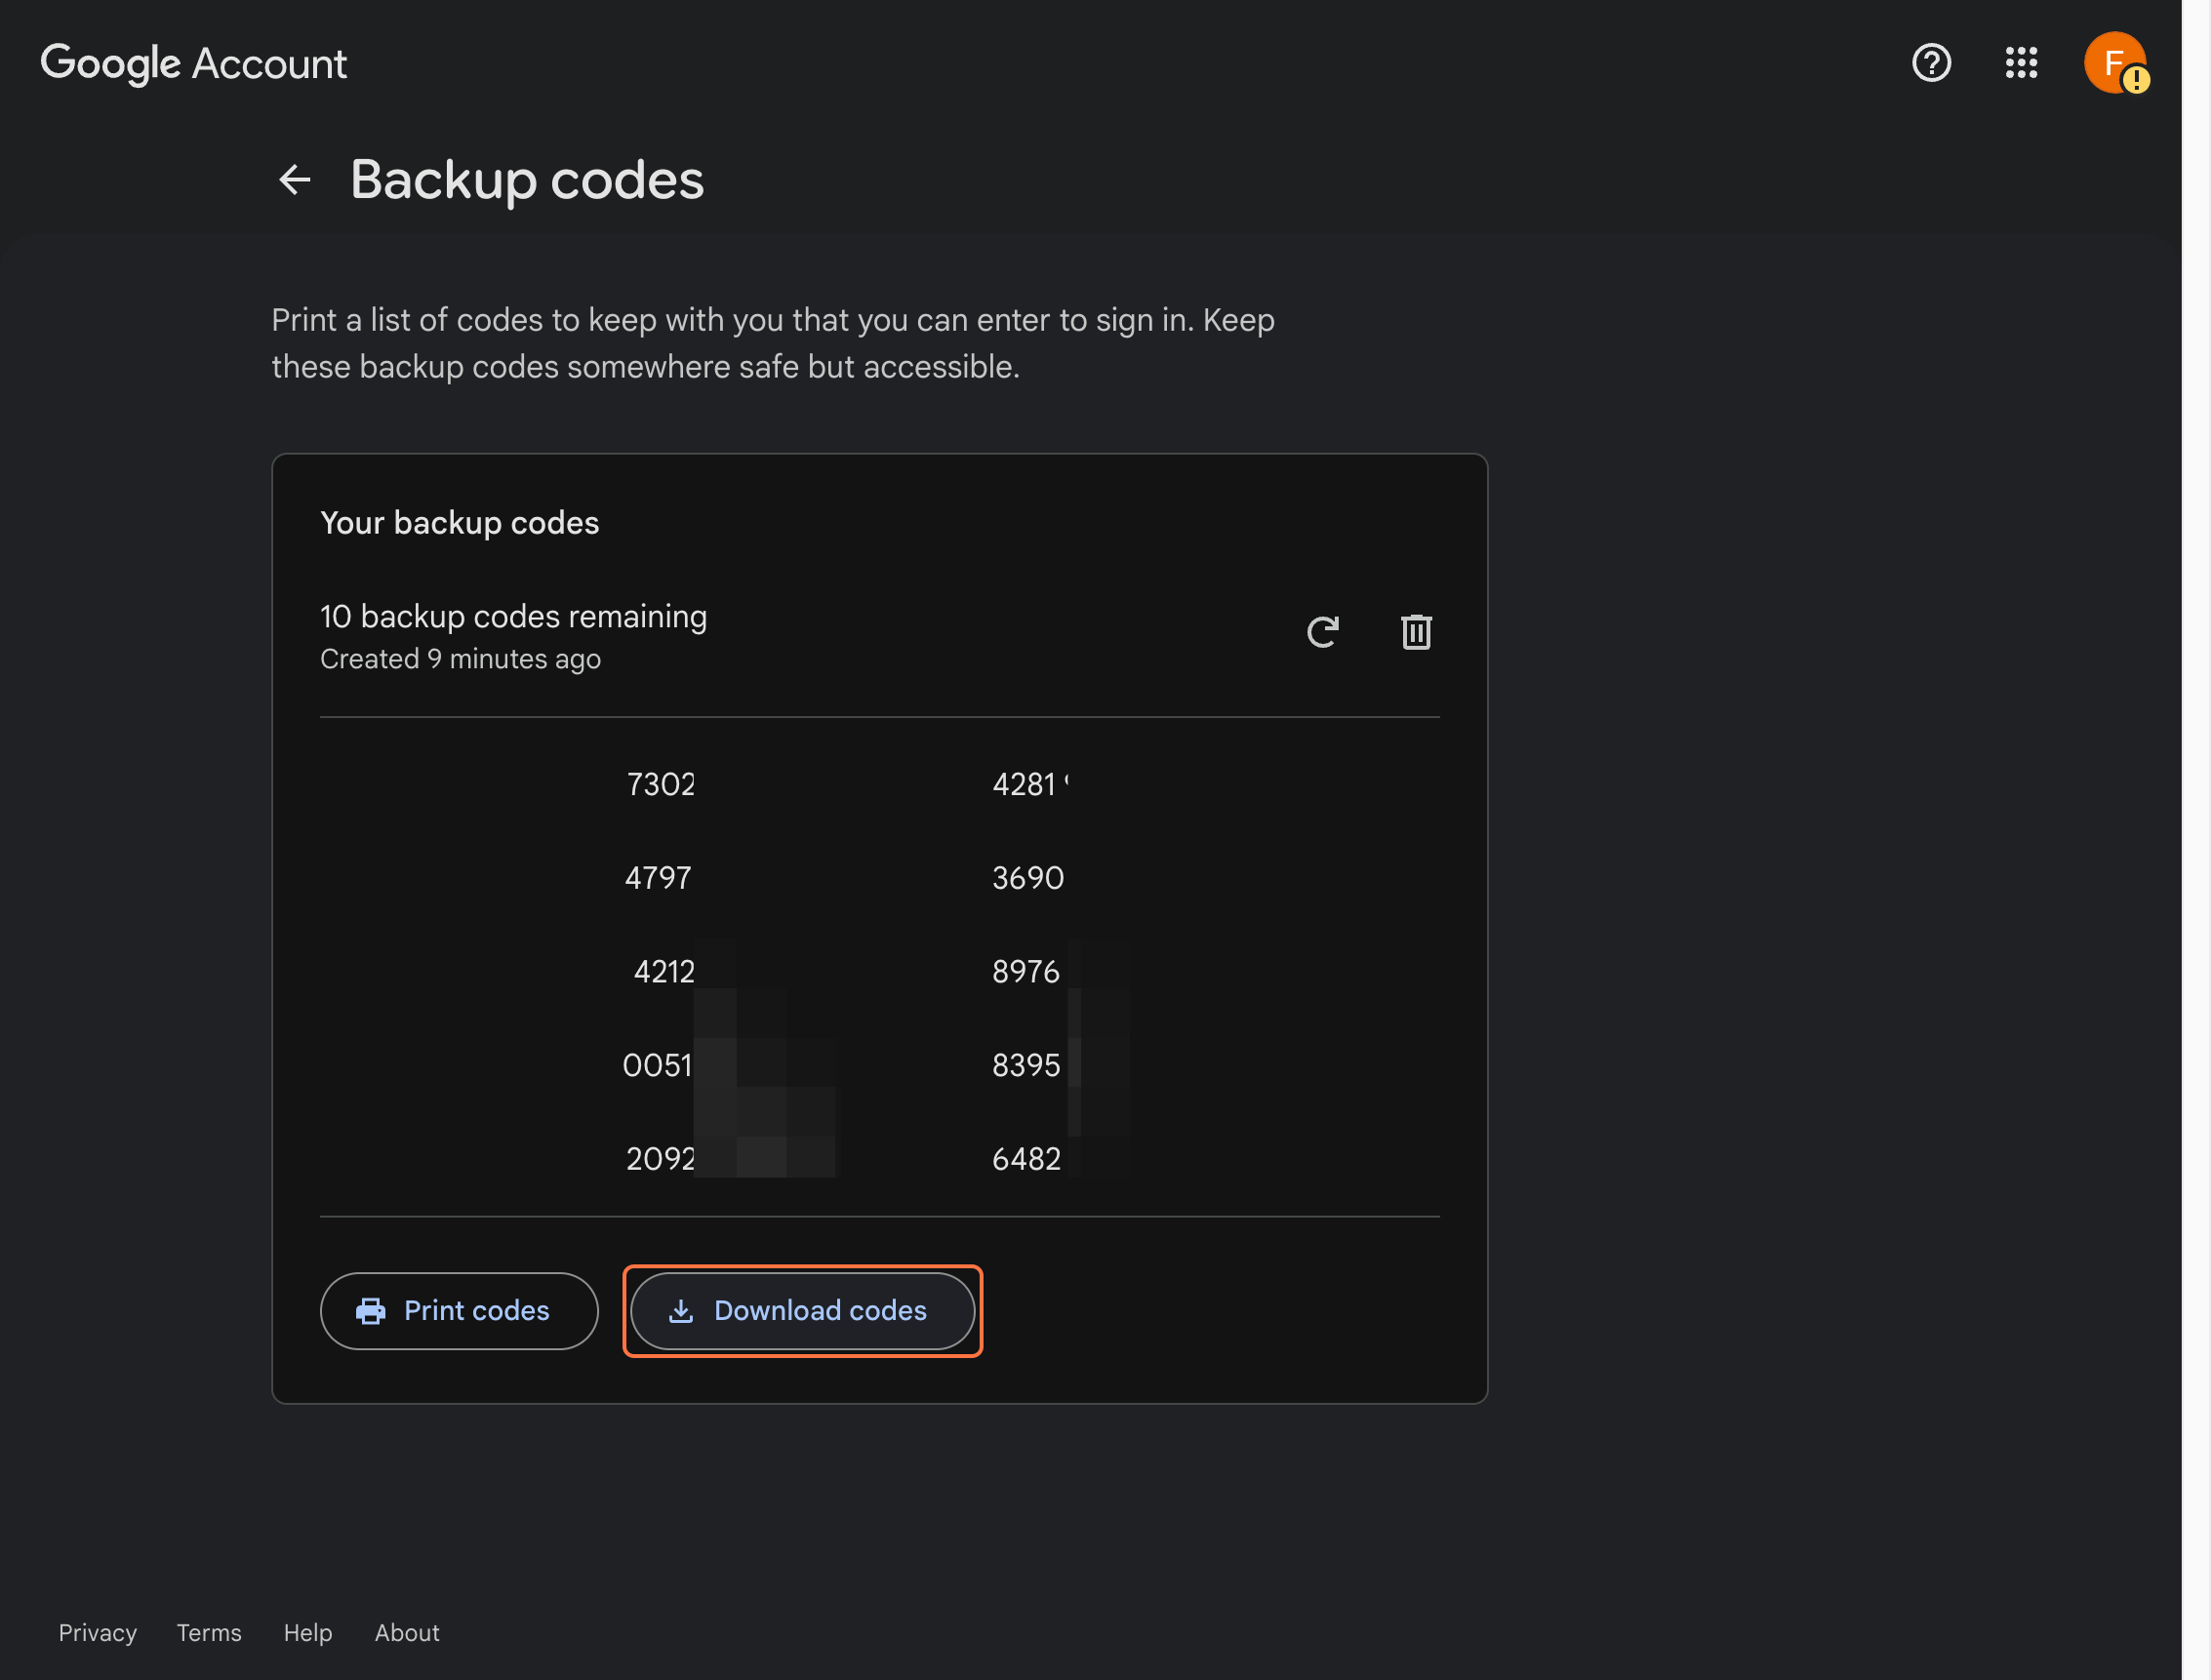
Click Get new codes.
Approve the action so Google generates the replacement set.

Step 24
Click Download codes.
Save the file in a secure place that only you can access.
Step 25
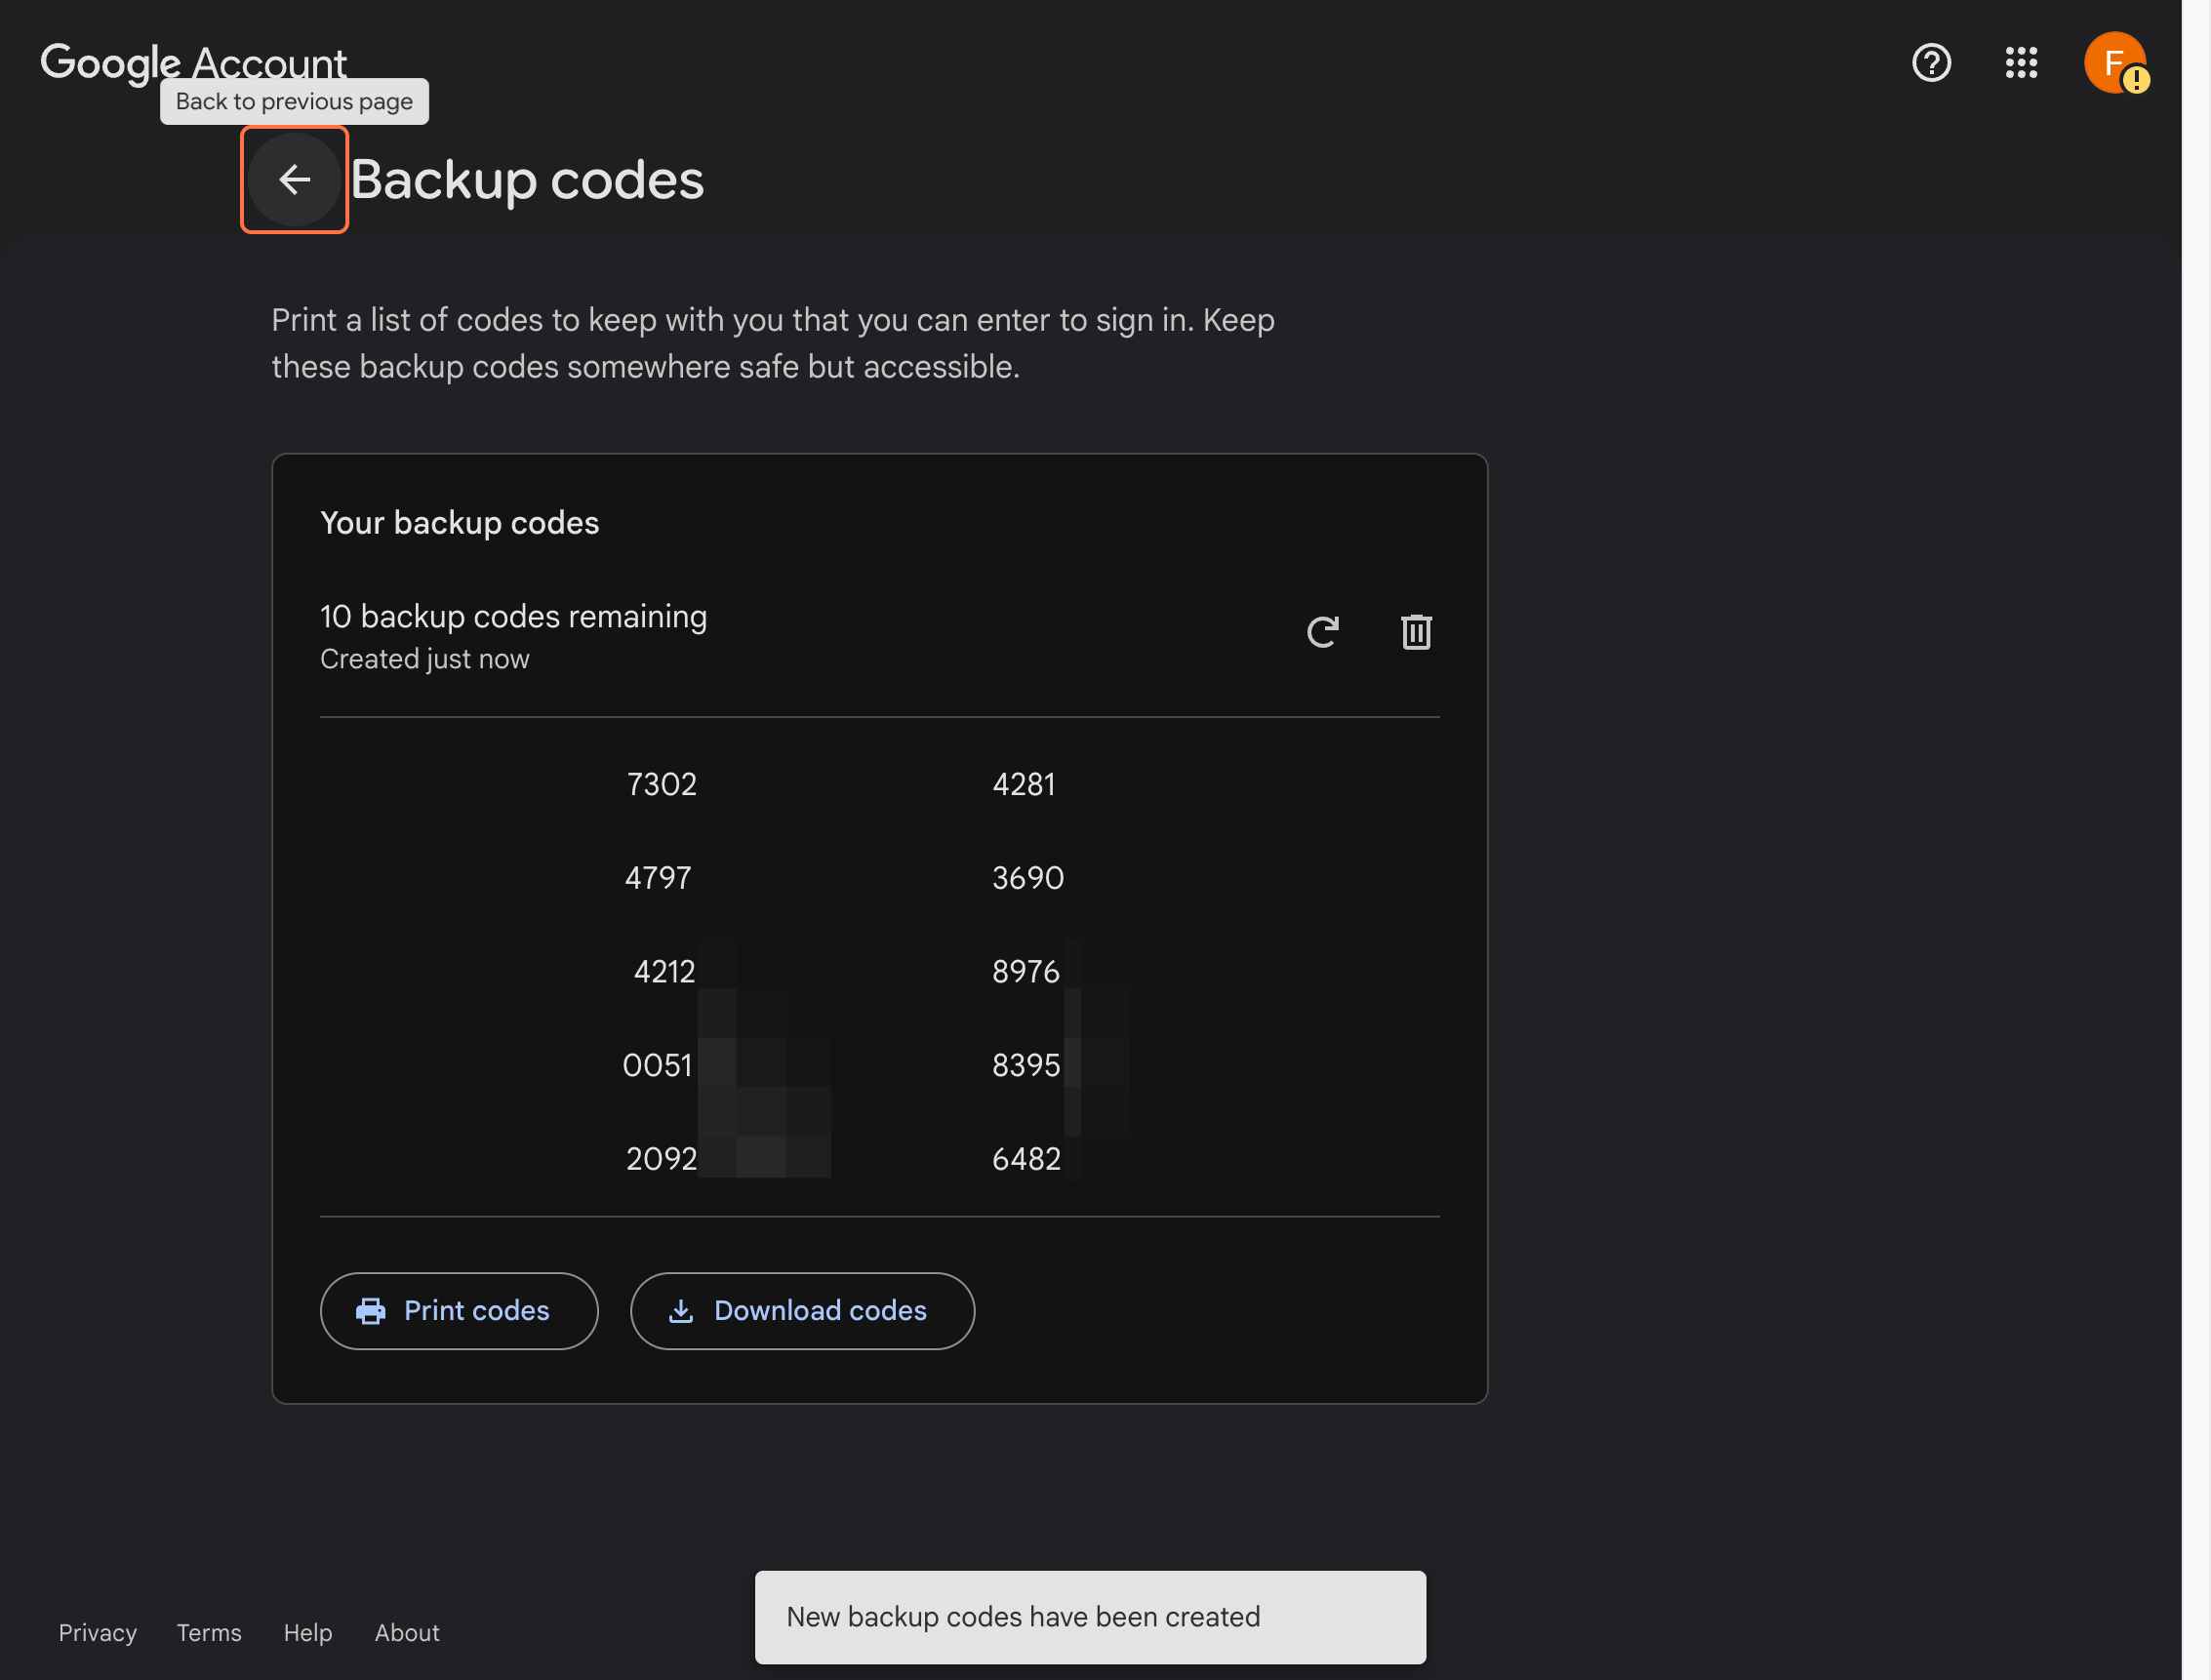
Go back to the previous page.
Return to the main 2-step verification settings once the codes are saved.
Step 26
Click Turn on 2-Step Verification.
Complete the last confirmation if Google asks again.
Optional
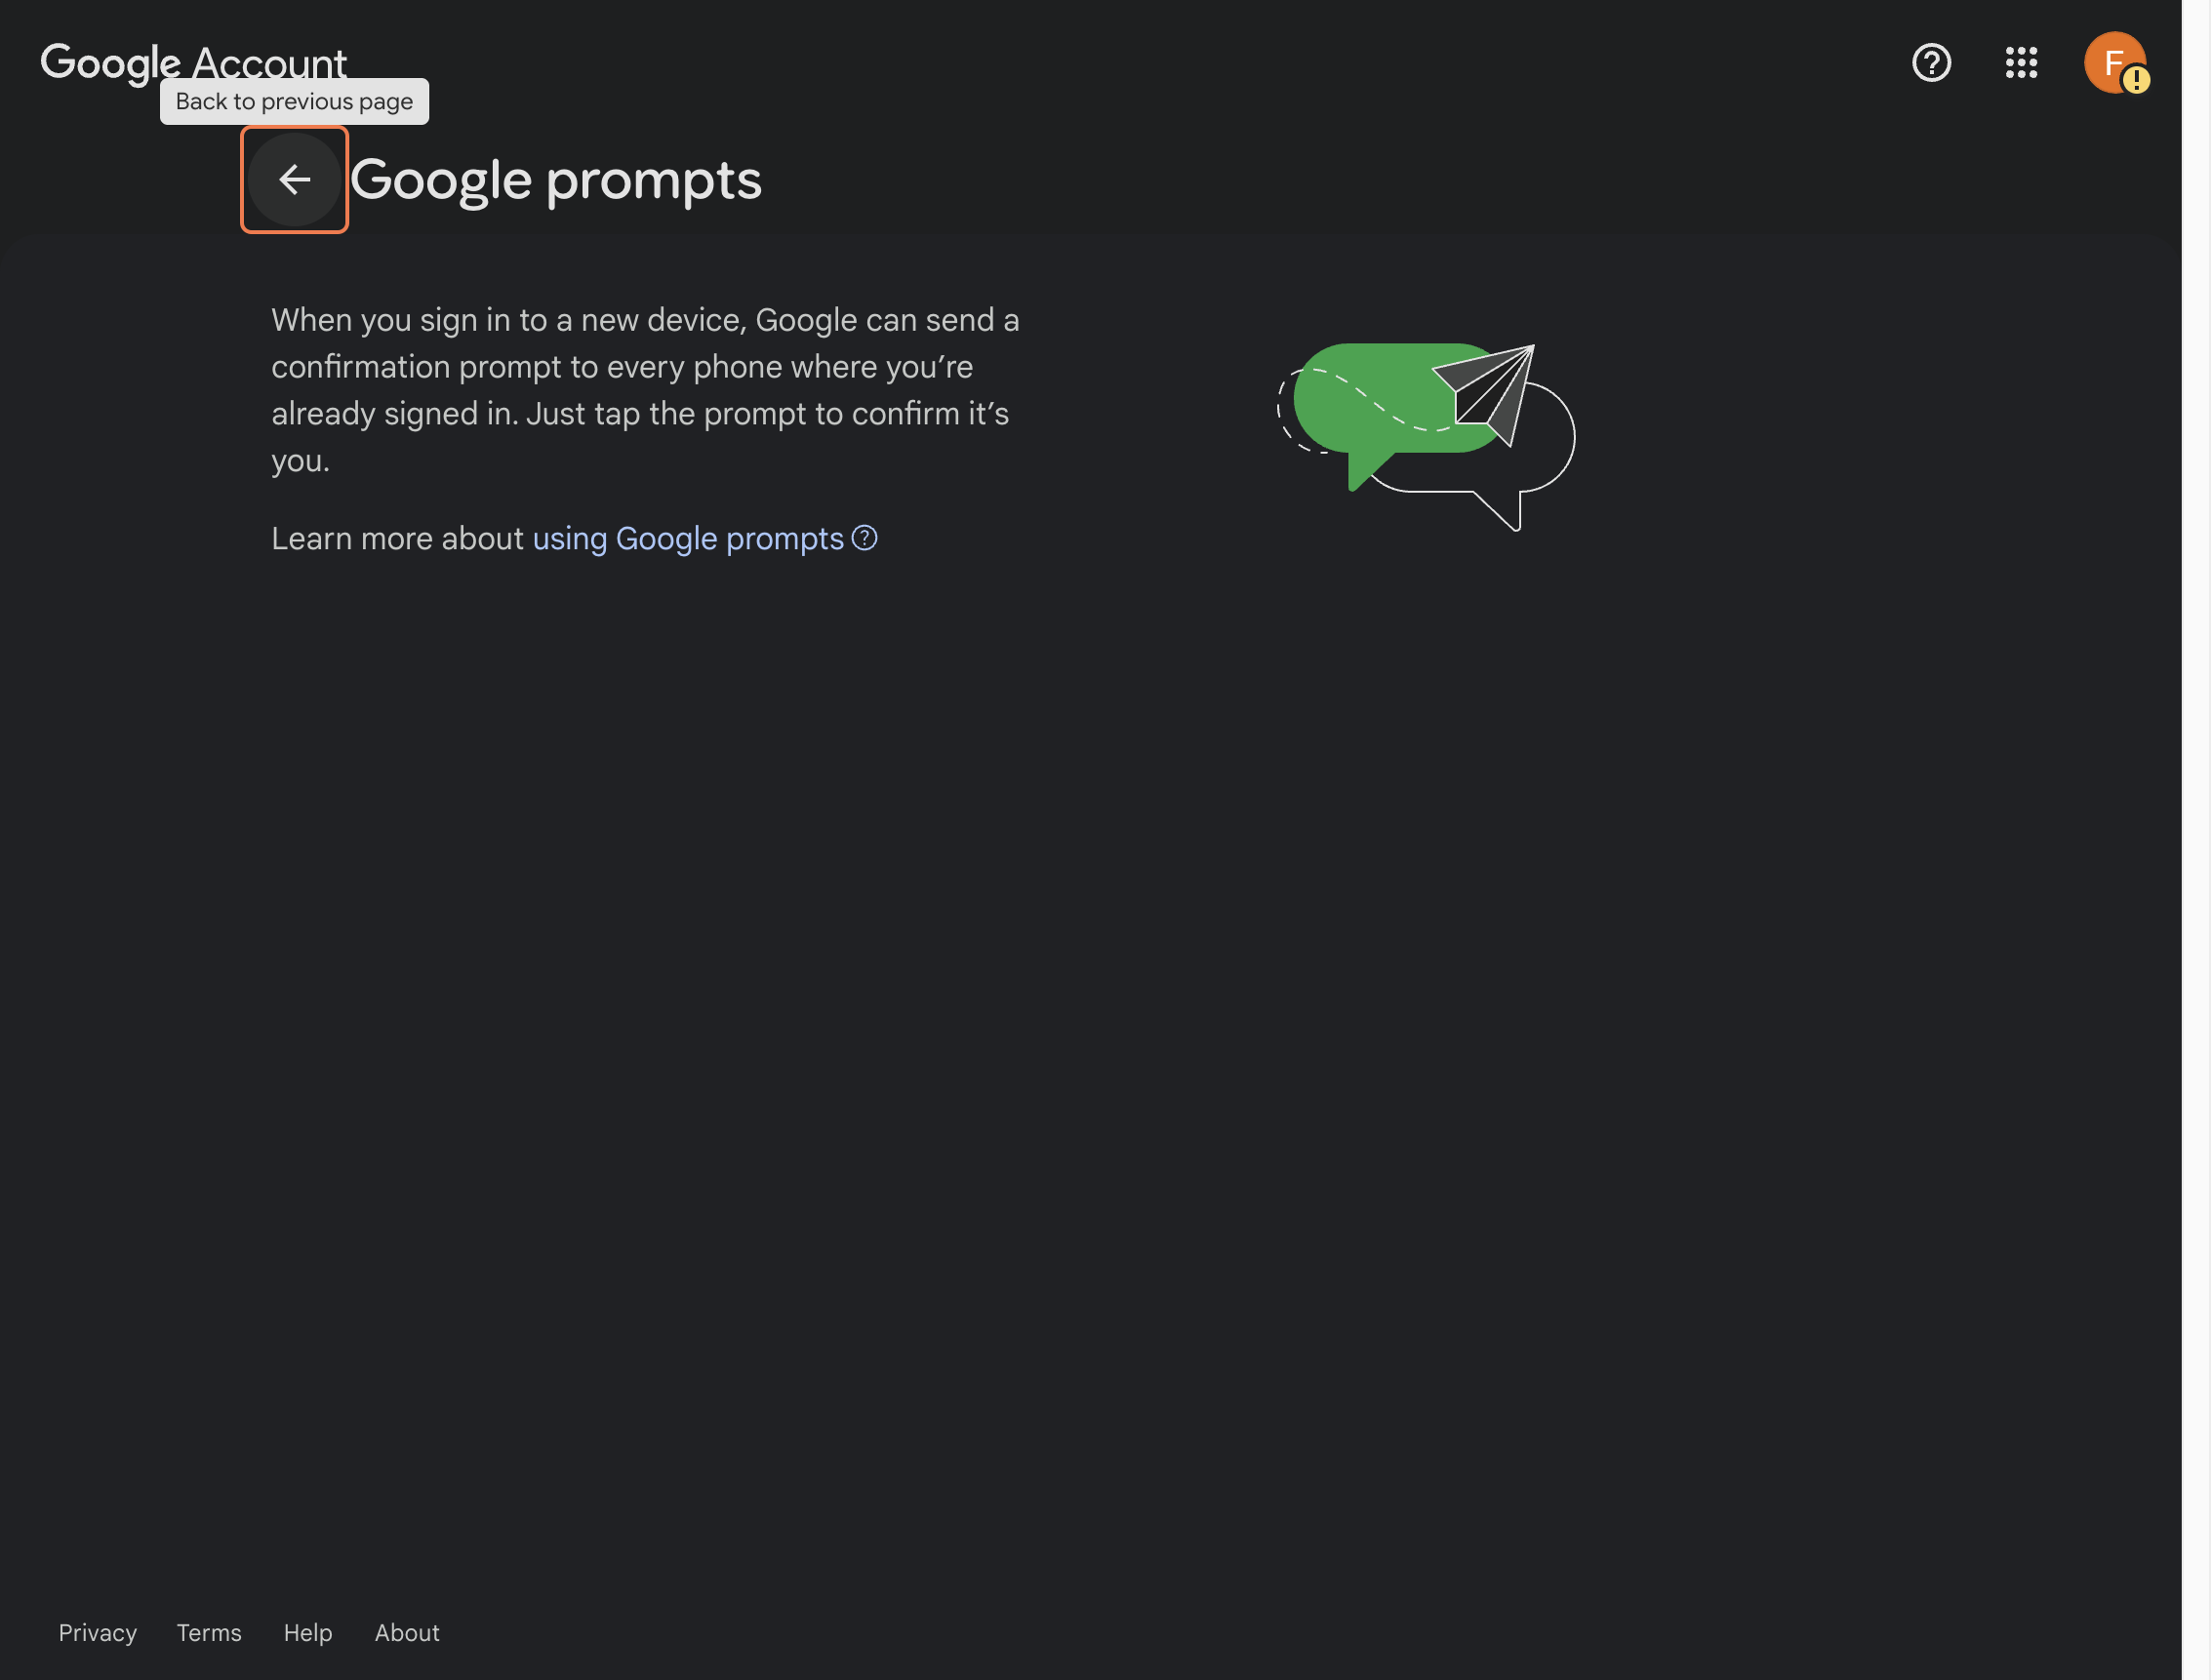
Add Google Prompt later, if needed
Google Prompt can be used as another verification method, but it usually works only if your workforce account is already signed in on your mobile phone.
Recommended note: For first login, backup codes are the safer path. Use Google Prompt only if your workforce account is already signed in on your phone or if you want to add it later after mobile sign-in is working.
Optional Step 19
Choose Google Prompt.
Select Google Prompt if you already have this workforce account signed in on your mobile phone.
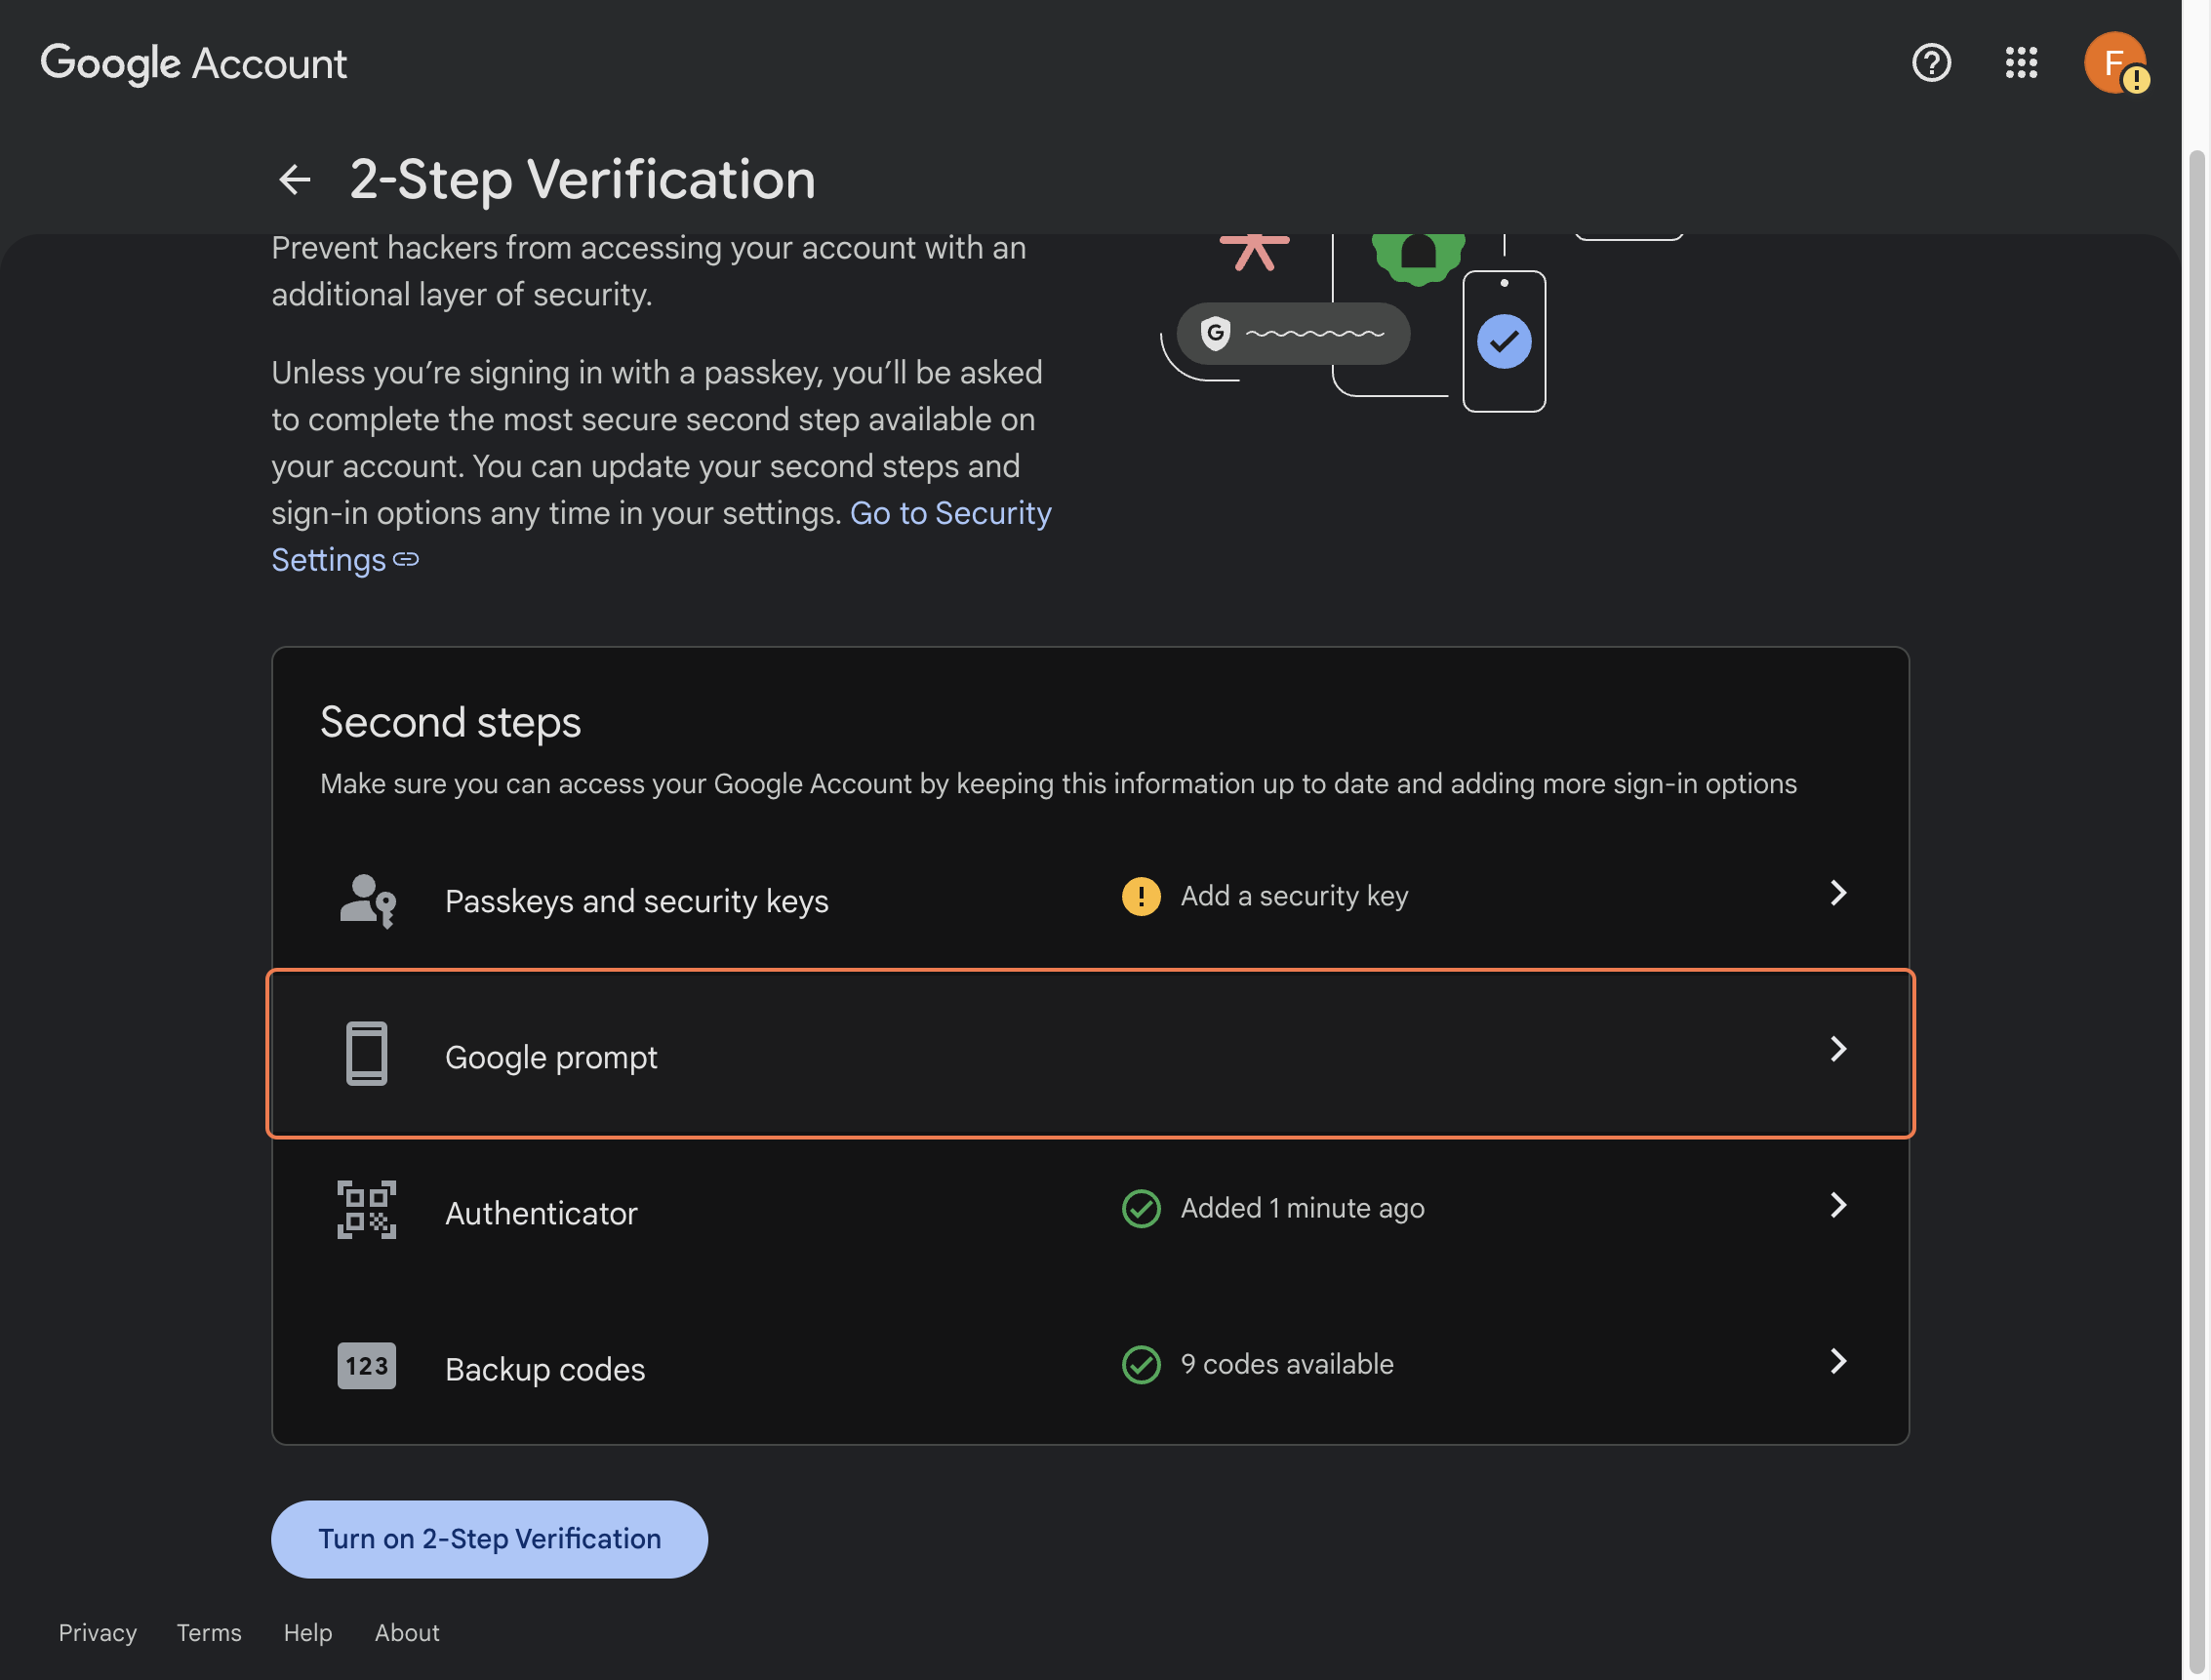
Optional Step 20
Go back to the previous page.
After reviewing or setting up Google Prompt, return to the 2-Step Verification settings page.
Section 4
Finish and confirm the setup
Close out the setup flow and make sure the 2-Step Verification page shows the expected security methods.
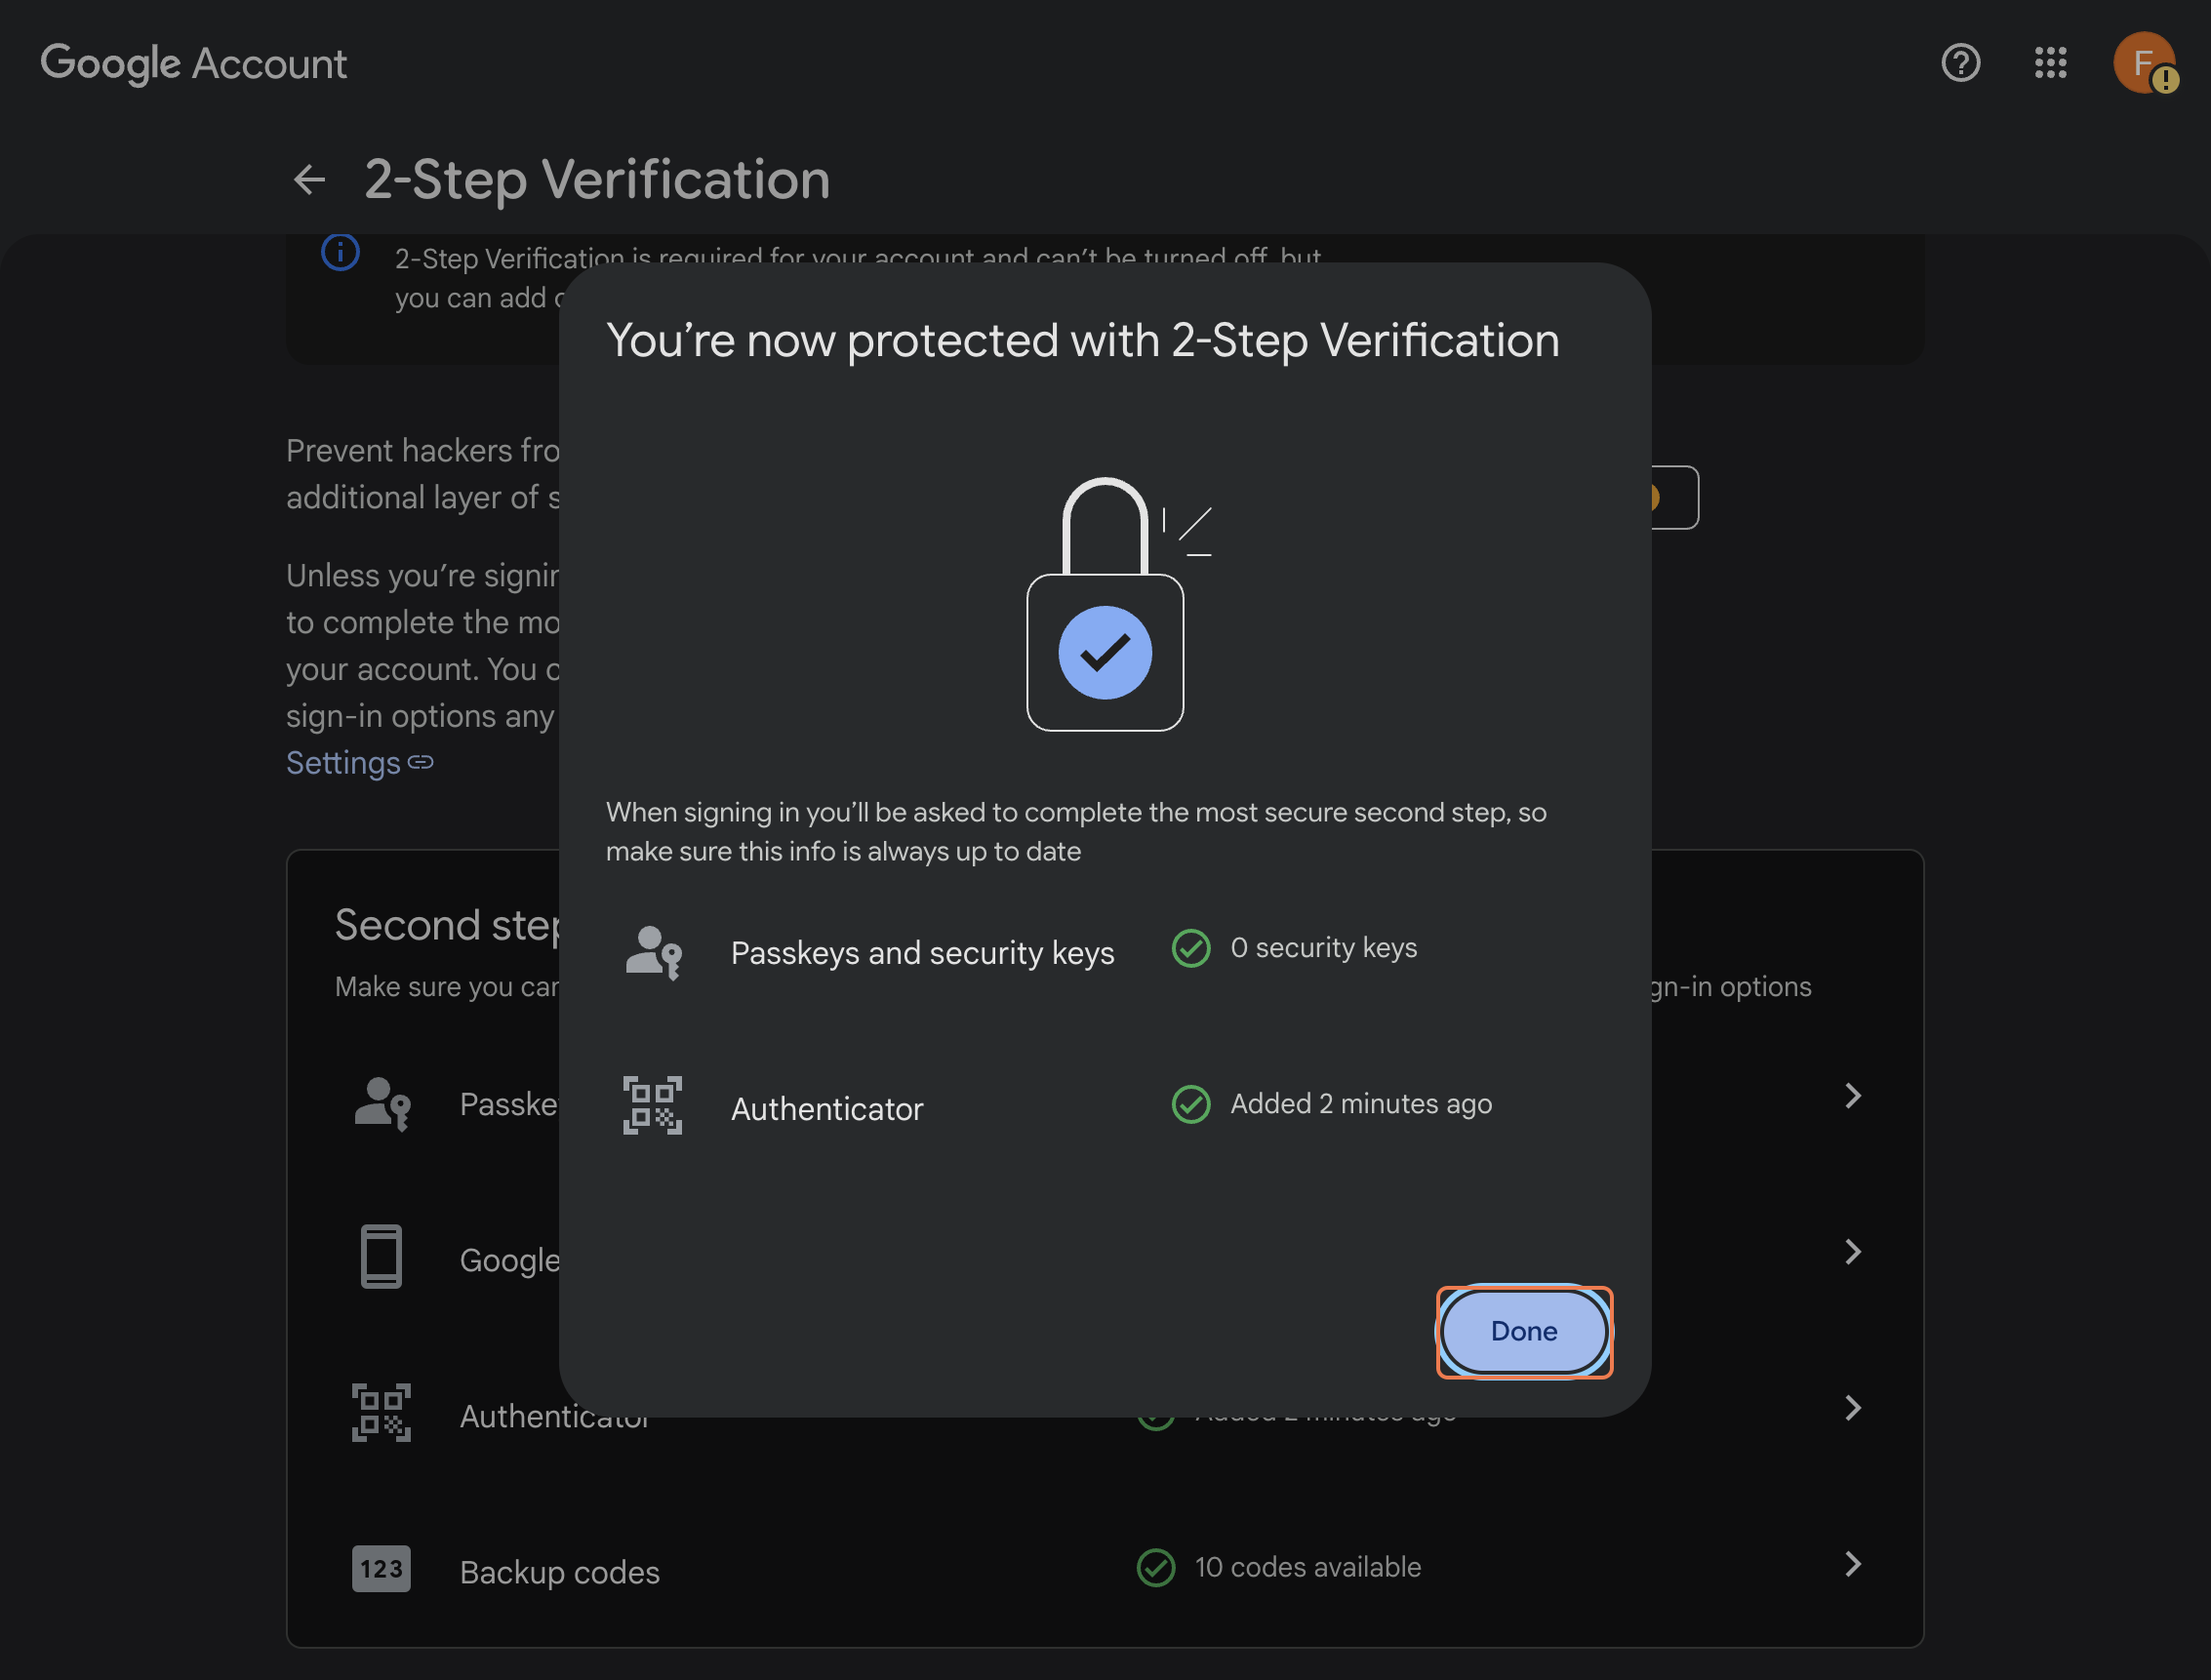
Step 27
Click Done.
Finish the guided setup after Google confirms the account is protected.
Step 28
Go back to the previous page.
Return to the main security page.
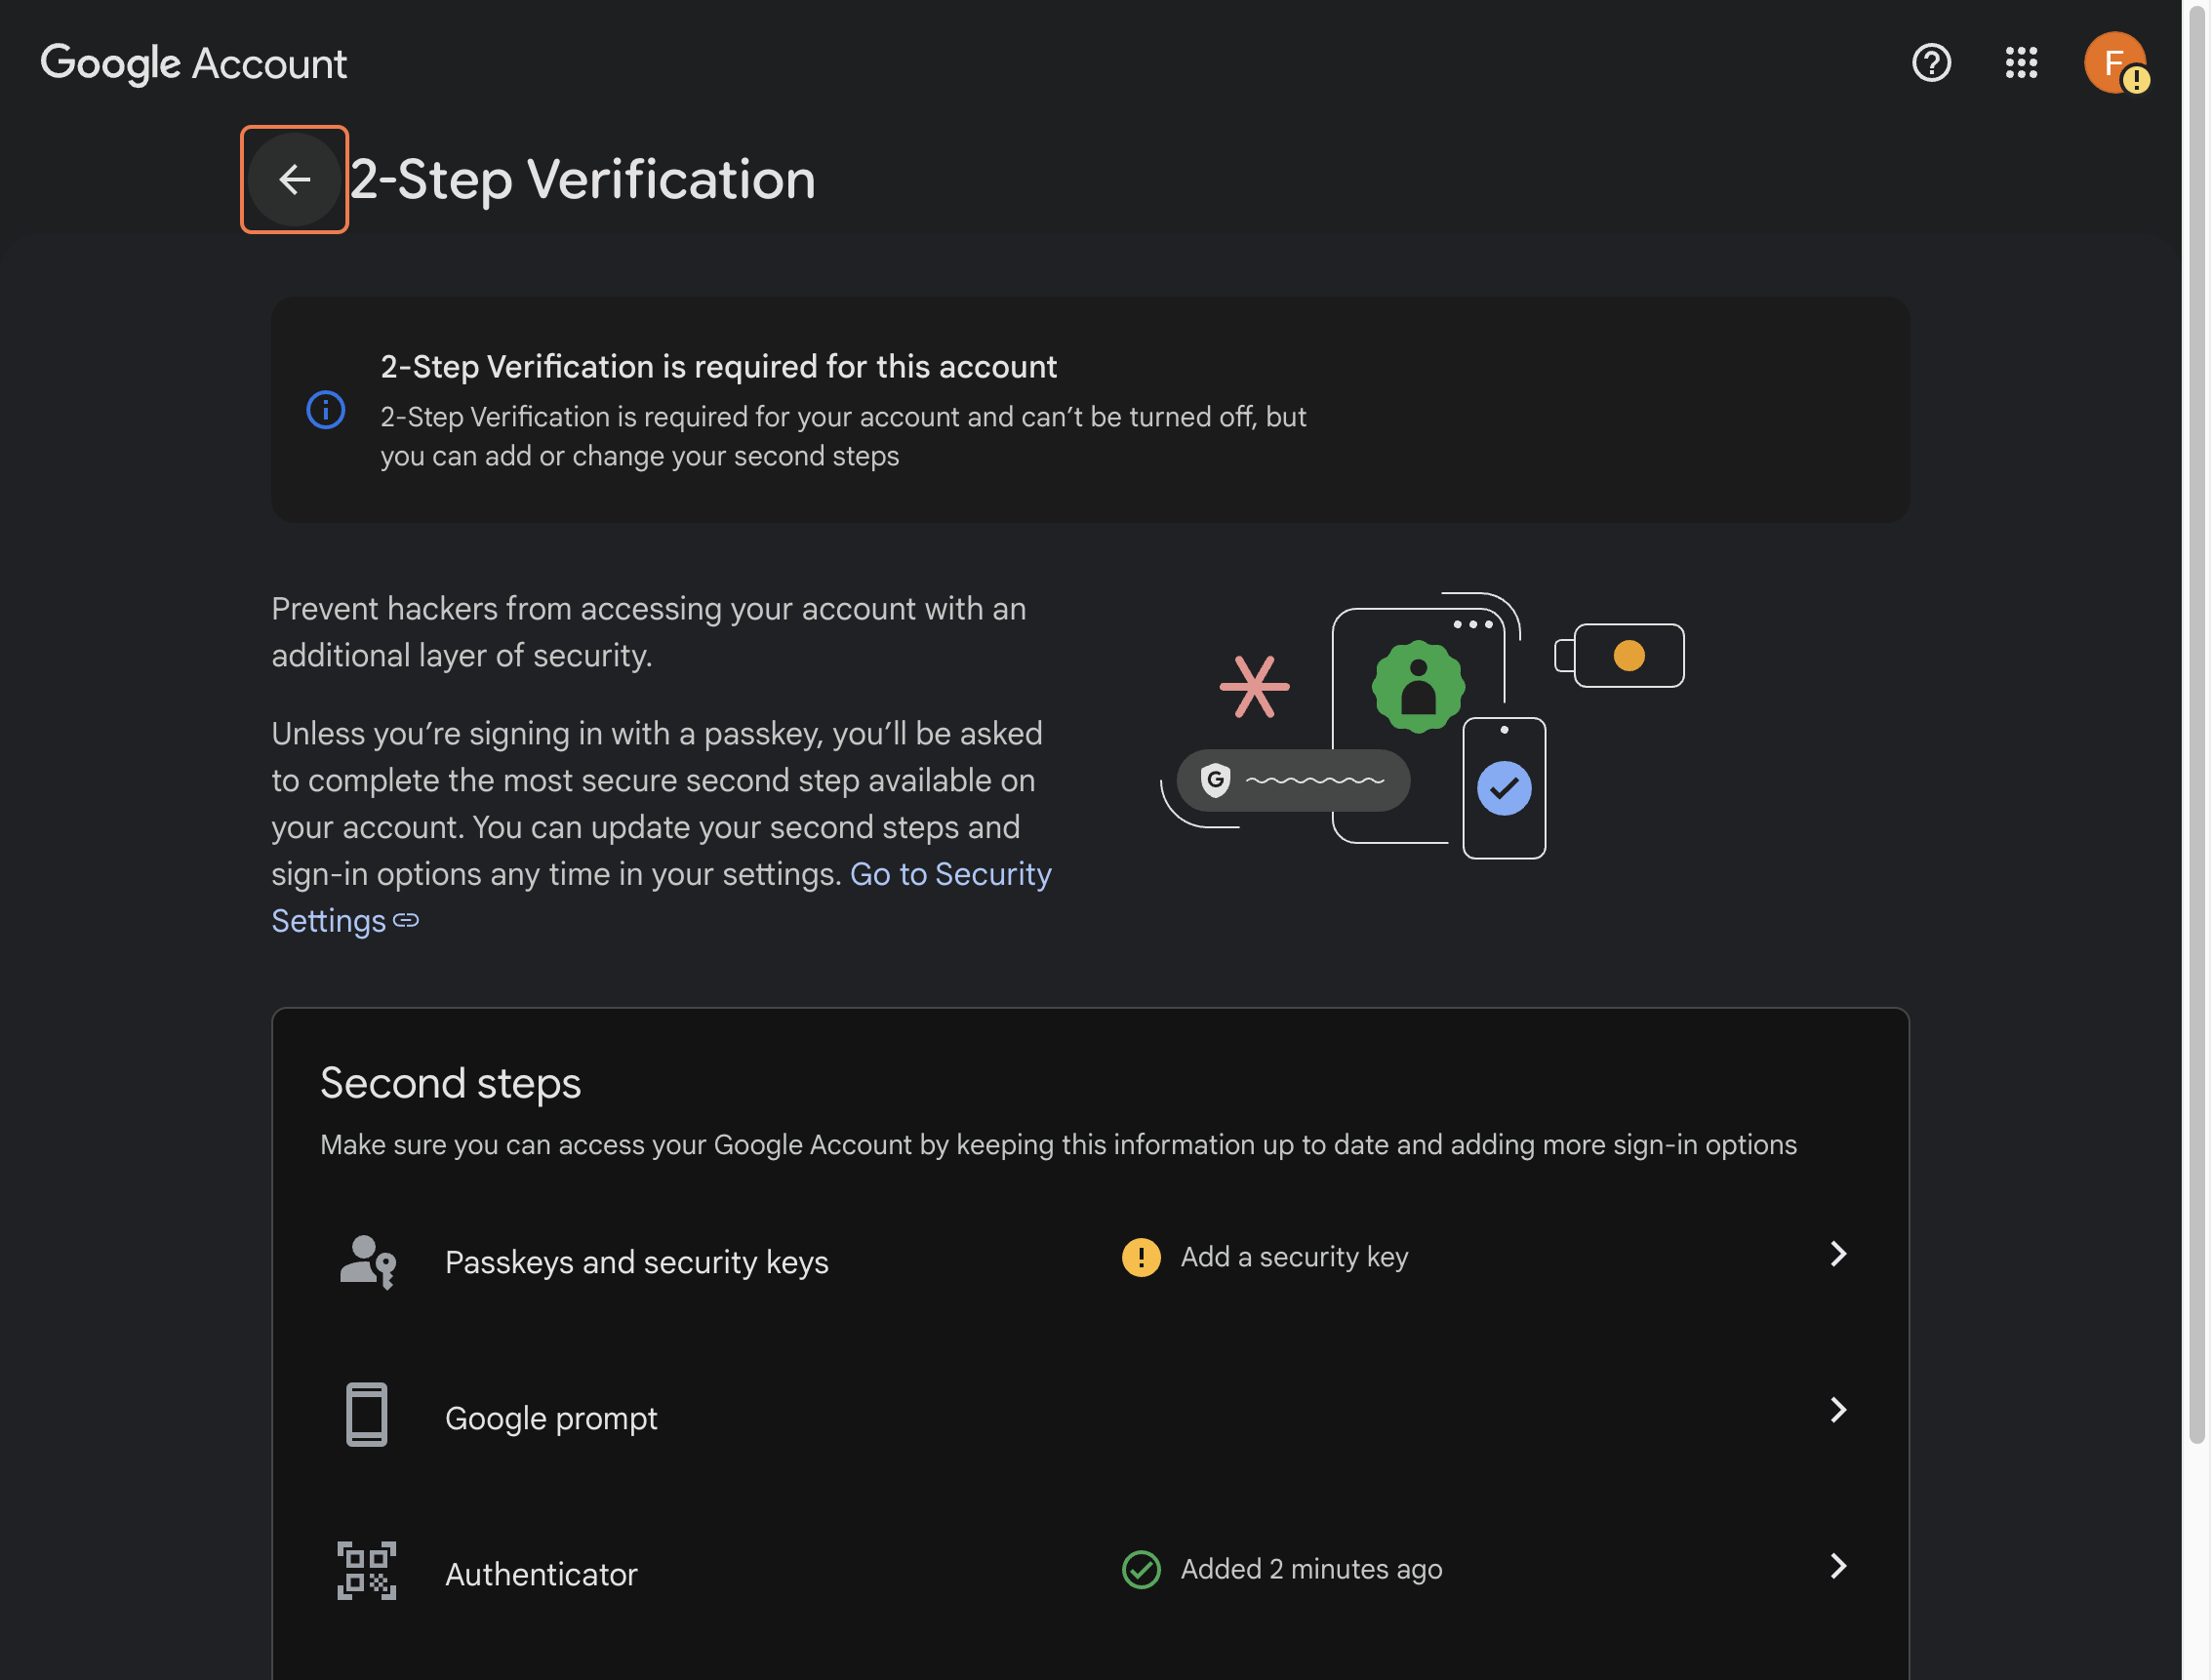
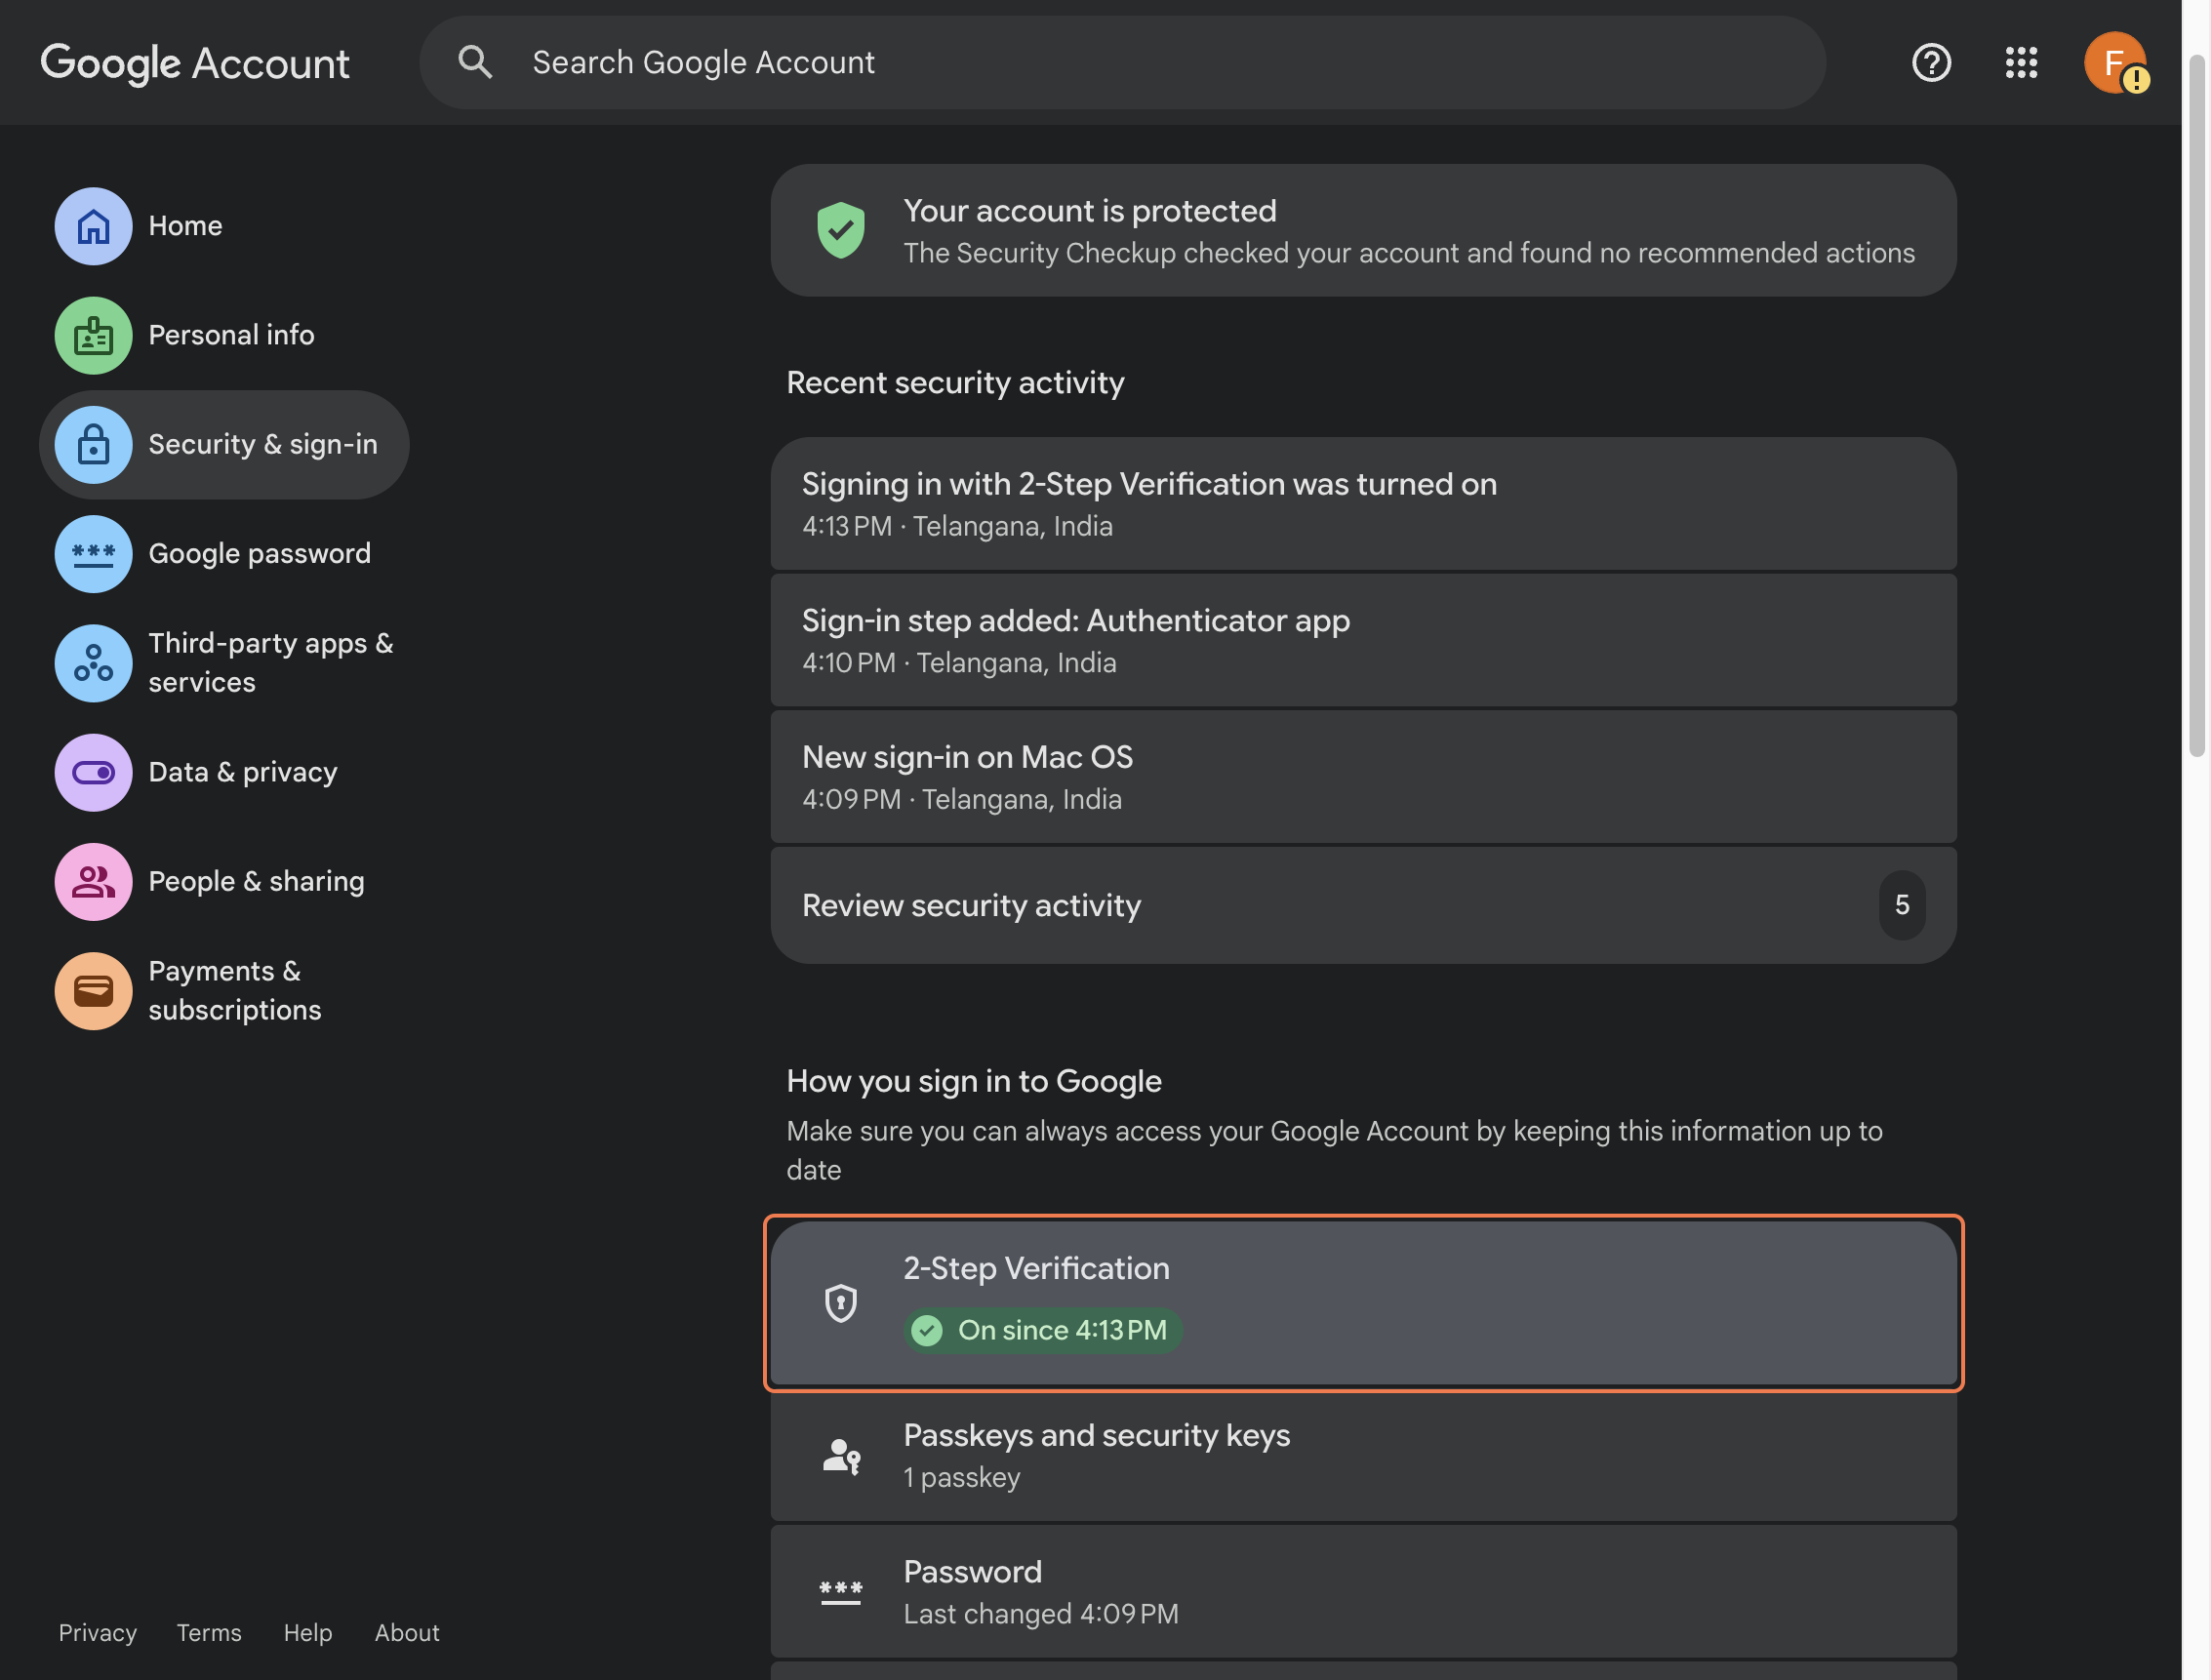
Step 29
Open 2-Step Verification and confirm everything looks correct.
Use this last check to make sure your security methods are visible and active.